The following section lists a typical use case of JH7110 SPI.
Locating the Original Kernel Driver
The driver file is stored in the following path.
freelight-u-sdk/linux/drivers/spi/spidev.c
The driver is a Linux embedded SPI device driver.
Registering an SPI Driver
You can use the spi_register_driver interface to register an SPI
driver, as a basis for SPI message reading and writing.
The following code block provides an example.
staticint __init spidev_init(void)
{
int status;
/* Claim our 256 reserved device numbers. Then register a class
* that will key udev/mdev to add/remove /dev nodes. Last, register
* the driver which manages those device numbers.
*/
BUILD_BUG_ON(N_SPI_MINORS > 256);
status = register_chrdev(SPIDEV_MAJOR, "spi", &spidev_fops);
if (status < 0)
return status;
spidev_class = class_create(THIS_MODULE, "spidev");
if (IS_ERR(spidev_class)) {
unregister_chrdev(SPIDEV_MAJOR, spidev_spi_driver.driver.name);
return PTR_ERR(spidev_class);
}
status = spi_register_driver(&spidev_spi_driver);
if (status < 0) {
class_destroy(spidev_class);
unregister_chrdev(SPIDEV_MAJOR, spidev_spi_driver.driver.name);
}
return status;
}
module_init(spidev_init);
Configuring the SPI Driver
In the meantime, make sure you have added device information descriptions of the
sub-devices for the SPI controller in the dts file.
The following code block shows an example of spi0.
The configuration file contains the following parameters for
spi_dev0.
compatible: The compatibility information of the
driver.
pl022,com-mode: The communication mode of the driver.
The following values are available.
0: Polling.
1: Interrupt
2: DMA
spi-max-frequency: The maximum frequency of the slave
device.
Note: Make sure you set the a proper value for
maximum frequency based on your real conditions, data loss in
transmission maybe caused if an improper value is configured.
reg: The register address offset of the slave device.
status: Status of the slave device. The following
values are available.
okay: The slave device is working properly.
disabled: The slave device has been disabled.
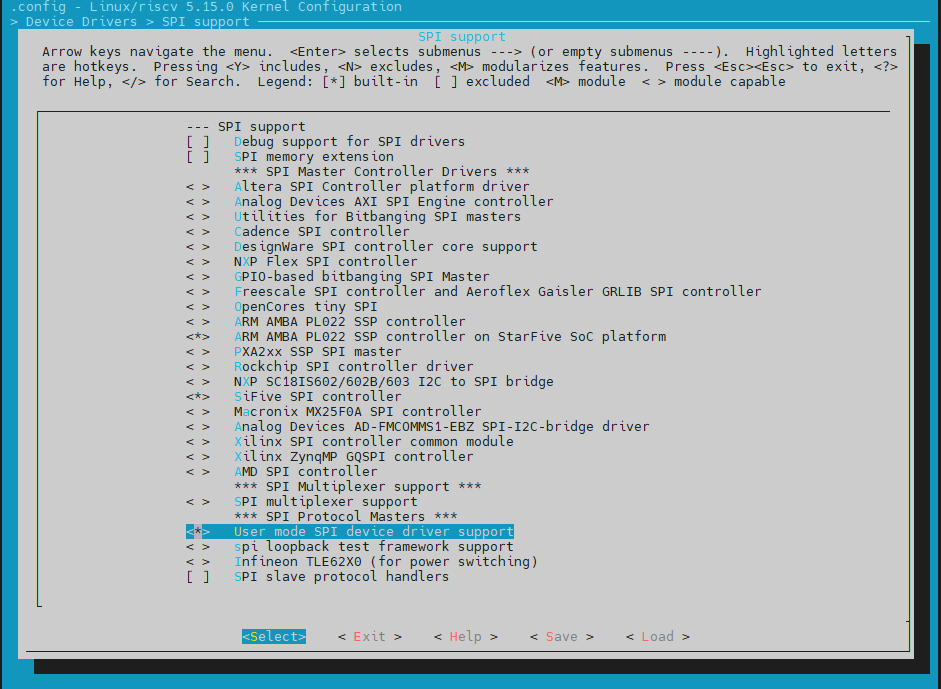
Configuring Kernel Menu
In the kernel menu configuration, make sure you have selected the User
mode SPI device driver support option. Figure 1. User Mode SPI Support
Building the SPI File
After you have completed the firmware installation, follow the steps below to build
the SPI file.
Find the spidevX.0 (X = 1-7) device under the
/dev folder.
Perform reading and writing operations on the file. Or you can use the Linux
SPI tool, and run the following command under path:
freelight-u-sdk/linux/tools
Use the following command to build SPI file for test.
# make spi
Result:
An executable file named spidev_test is generated
under the freelight-u-sdk/linux/tools/spi path.
Testing the SPI File
Follow the steps below to test your generated SPI file.
Copy the generated file to the SoC and connect the TX and RX of the I/O port
on the SPI.
Then run the following command to
test:
# /spidev_test -D /dev/spidevX.0 -v -p data
Result:
The displayed data is the content to be transferred. The test example is
as follows.Figure 2. SPI Test Example