Debugging UART Send and Receive Functions
-
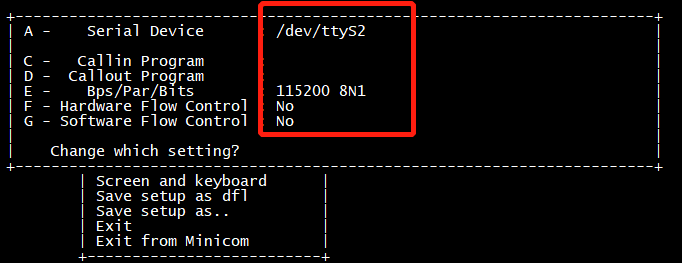
Configure Visionfive minicom:
sudo minicom -s -
Select Serial port setup, and configure minicom as follows:
Figure 1. Example Configuration 
-
Start VisionFive minicom by
typing the following command on the PC:
minicom -o -D /dev/ttyS2Figure 2. Example Output 
-
Configure Ubuntu minicom by typing the following:
sudo minicom -s -
Select Serial port setup, and configure minicom as follows:
Figure 3. Example Configuration 
 Note:
Note:Serial Device can be detected by command
dmesg | grep ttyon UbuntuFigure 4. Example Command and Output 
-
Start Ubuntu minicom, you can see as follows:
Figure 5. Example Output 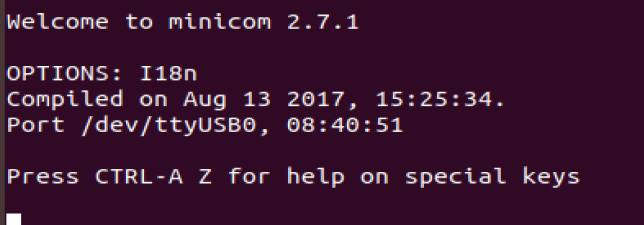
Test UART Send:
-
To test UART send function, you can input characters, such as
hello
            ubuntu
, on the VisionFive minicom. Then you will see the character are outputted on the Ubuntu minicom as the following:Figure 6. Test UART Send 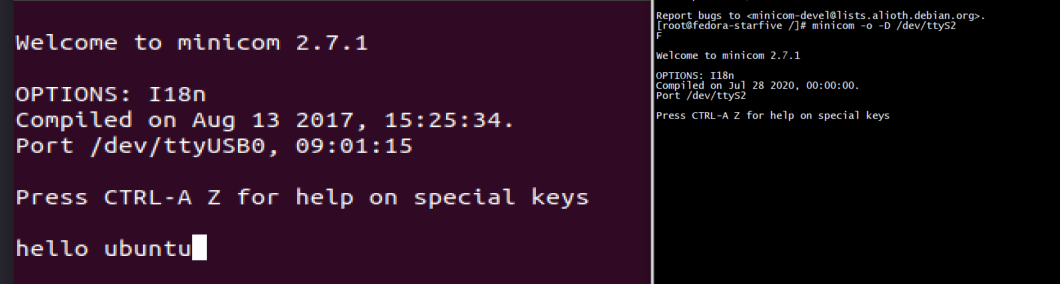
-
Figure on the Left: Ubuntu minicom interface
-
Figure on the Right: VisionFive minicom interface
-
Test UART Receive:
-
To test UART receive, you can input characters, such as
hello
            visionfive
on the Ubuntu minicom. Then you will see the characters are outputted on the VisionFive minicom:Figure 7. Test UART Receive: 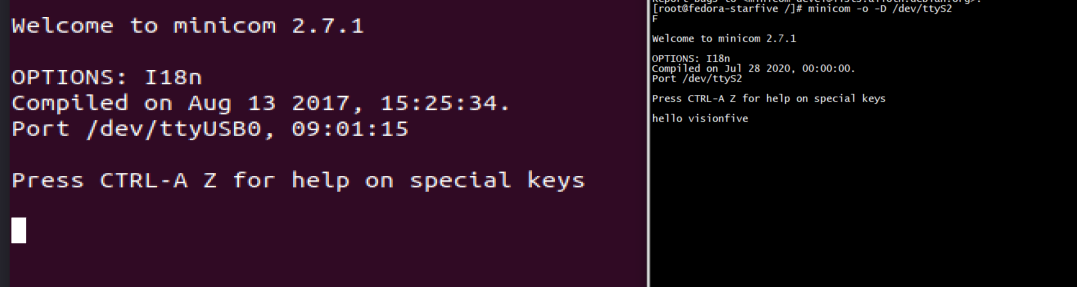
-
Figure on the Left: Ubuntu minicom interface
-
Figure on the Right: VisionFive minicom interface
-