Preparation
Make sure you perform the following before using the flash tool:
- Prepare the items listed in the Prerequisite.
- Install driver as described in Installing Driver.
Prerequisite
Environment: Windows 10 and above.
Required Hardware:
- JH-7110 DevKit
- USB to Serial Converter
- Type-C cable (USB to Type-C)
- 12 V/5 A power adapter
Installing Driver
To install driver, perform the following steps:
- Download and unzip the file, UsbFlashTool_<Version>-Windows.Note: <Version> is the version number of the flash tool. For example, V2.6.
- Set the boot mode to UART ( RGPIO_1, RGPIO_0: 1, 1 ), then connect the cables as
described in the following figure:
Figure 1. Wiring  Tip: Refer to this link to set the boot mode as UART.
 - Open the file,
UsbFlashTool_<Version>-Windows.Note: <Version> is the version number of the flash tool. For example, V2.6.
- Check if serial port settings (SerialPort,
Baudrate, DataBit,
StopBit) are correct .
Figure 2. Serial Port Settings 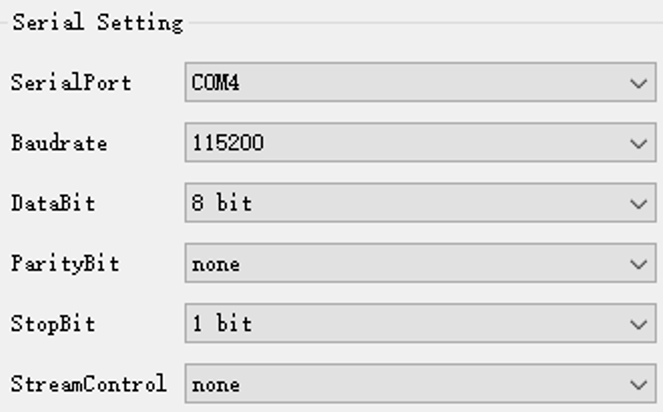
- Select Firmware under file type and
select Flash under memory type, and then choose the file of
usbprog-devkit-<Date>.out and
click Load.Note: <Date> indicates the update time. For example, 230801.
Figure 3. Select Frimware File 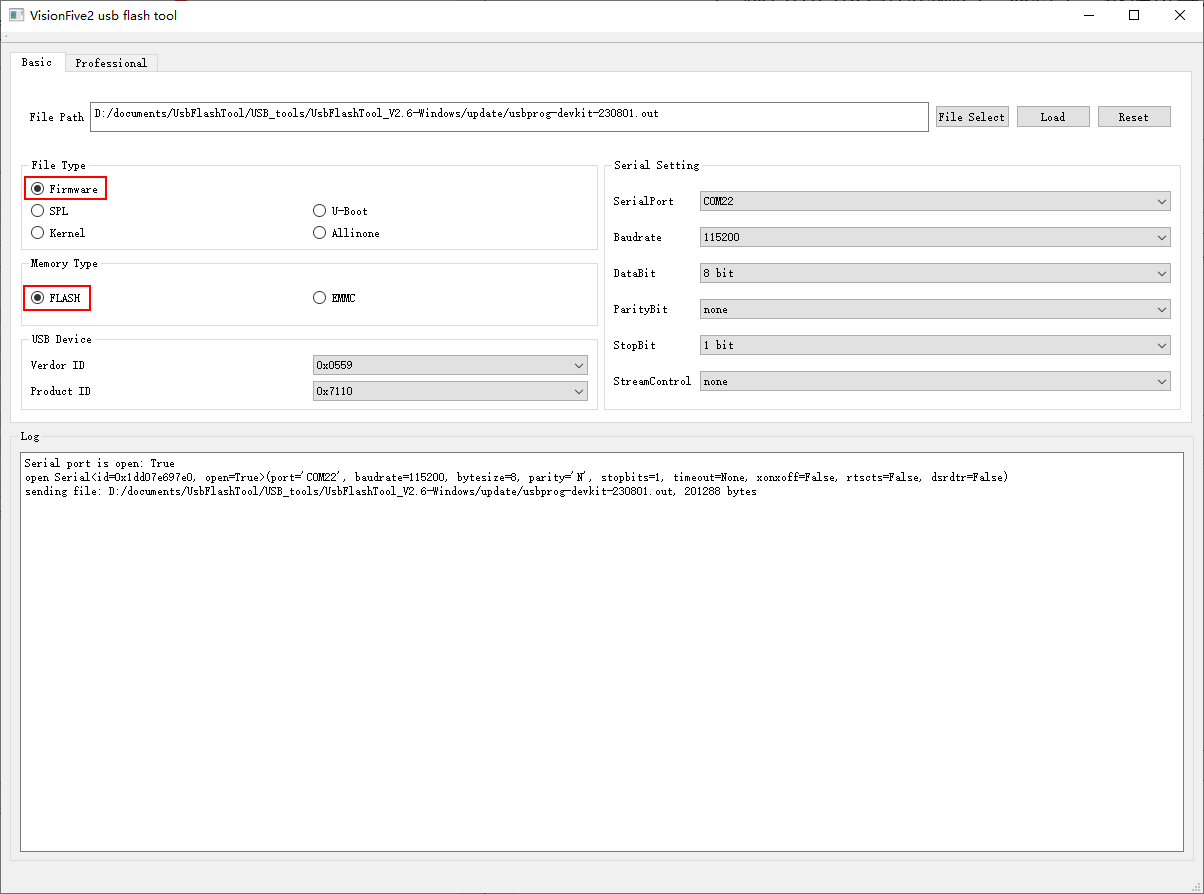
- Open Device Manager and you will see StarFive JH7110
Device. If the device does not appear in the Device Manager,
make sure your USB cable connection is correct (only when the device appears
that you can install the driver).
Figure 4. Device Manager 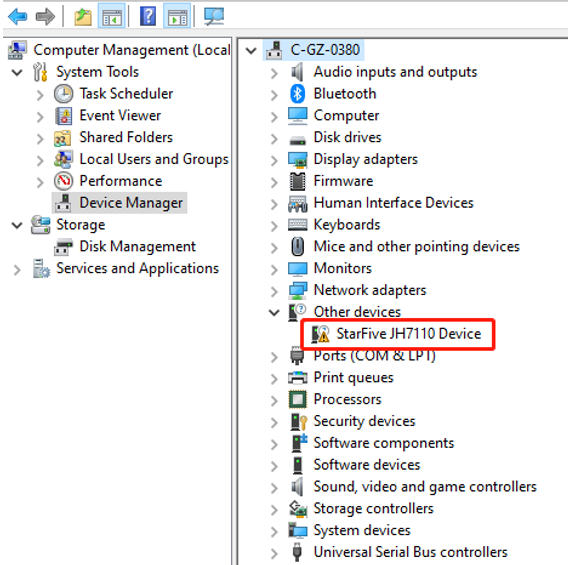
- Open zadig-2.5.exe in the folder
UsbFlashTool_<Version>-Windows,
click , choose StarFive JH7110 Device and click
Install Driver.Result:
Figure 5. Install Driver 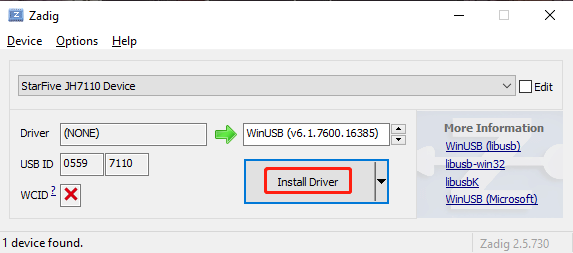
The installation is successful.
- Reboot JH-7110 DevKit and
UsbFlashTool_<Version>-Windows.Note: <Version> is the version number of the flash tool. For example, V2.6.
Note: Driver installation is only required for the first
use.