Adding New File
To add new file, perform the following steps:
Note: If there is no update, no need to add the new file.
-
Compile the file under the linux directory with the following
command:
make CROSS_COMPILE=riscv64-linux-gnu- ARCH=riscv INSTALL_PATH=<ROOTFS_PATH> zinstall -<jx>Tip:- <ROOTFS_PATH>: This is a user-defined directory where the vmliunz files will be generated.
- <jx>: It refers to the number of cores in your CPU. If your CPU has 8 cores, change this to -j8.
Figure -
Figure 1. Example Command and Output  Result:
vmliunz files will be generated under the ROOTFS_PATH.
-
(Optional) Compile the file under the linux path with the
following command:
make CROSS_COMPILE=riscv64-linux-gnu- ARCH=riscv INSTALL_MOD_PATH=<ROOTFS_PATH> modules_install -jxTip:- If you need to add new modules, this step is required.
- <ROOTFS_PATH>: This is a user-defined directory where the modules will be generated.
- -jx: It refers to the number of cores in your CPU. If your CPU has 8 cores, change this to -j8.
Example Command and Output: Figure -
Figure 2. Example Command and Output  The module files will be generated under the ROOTFS_PATH.
 -
View the files generated under
${ROOTFS_PATH}. The following is an example:Figure 3. Example 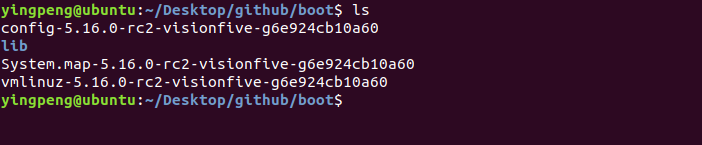
-
Add the new file:
-
View the SD-card information.
df -hFigure 4. Example SD Card Information 
-
View the SD-card information.
-
Perform the following step to update the grub.cfg file:
cd /media/<UserName>/__boot/ sudo gedit grub.cfgNote:<User_Name> is your username, for example, yingpeng.
-
Add the following command lines, save and exit:
menuentry '<Configuration_Item_Name_on_Menu>' { linux /<Newly_Compiled_vmlinuz_file> ro root=UUID=59fcd098-2f22-441a-ba45-4f7185baf23f rhgb console=tty0 console=ttyS0,115200 earlycon rootwait stmmaceth=chain_mode:1 selinux=0 LANG=en_US.UTF-8 devicetree /dtbs/5.16.0-rc2+/starfive/<dtb_File_Name> initrd /initramfs-5.16.0-rc2+.img }Tip:In these commands:
-
<Configuration_Item_Name_on_Menu>: The configuration name
displayed on the menu. For example,
My Fedora vmlinux-5.16.0-rc2
                  visionfive
. -
<Newly_Compiled_vmlinuz_file>: The vmlinuz file name that
is newly compiled in the previous steps. For example,
vmlinuz-5.16.0-rc2-visionfive-g6e924cb10a60. - <dtb_File_Name>: Different boards use different dtb files, and for the detailed information, refer to the dtb Files table in StarFive 40-Pin GPIO Header User Guide.
Example: The following are the example commands:
menuentry 'My Fedora vmlinux-5.16.0-rc2 visionfive' { linux /vmlinuz-5.16.0-rc2-visionfive-g6e924cb10a60 ro root=UUID=59fcd098-2f22-441a-ba45-4f7185baf23f rhgb console=tty0 console=ttyS0,115200 earlycon rootwait stmmaceth=chain_mode:1 selinux=0 LANG=en_US.UTF-8 devicetree /dtbs/5.16.0-rc2+/starfive/jh7100-starfive-visionfive-v1.dtb initrd /initramfs-5.16.0-rc2+.img } -
<Configuration_Item_Name_on_Menu>: The configuration name
displayed on the menu. For example,
The following steps are provided to verify if the configuration is successful:
- Pull out the card from the PC and insert it into the VisionFive board. The system will start normally after power-on.
-
You can find the defined configuration item, for example,
My Fedora
              vmlinux-5.16.0-rc2 visionfive
, on the menu, as shown below:Figure 5. Example Interface 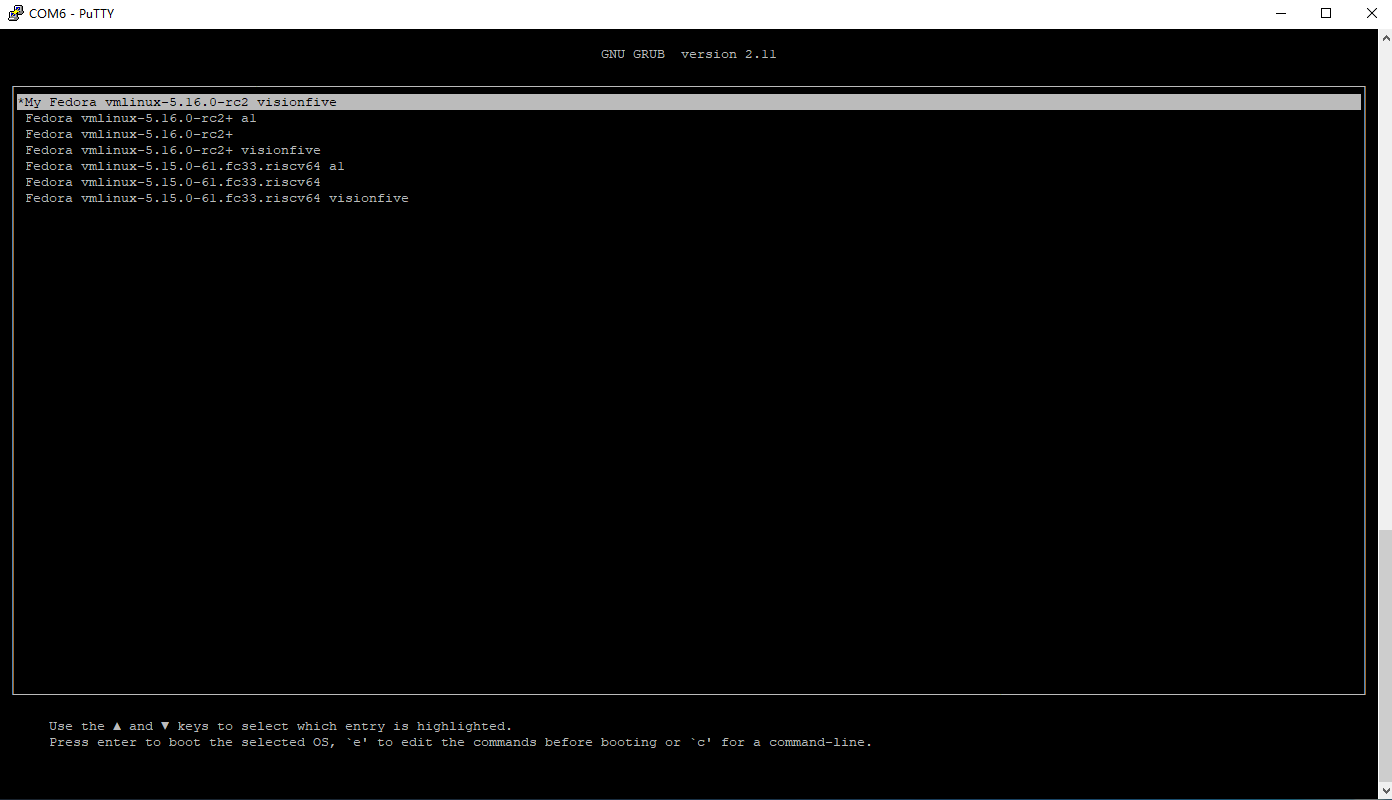
-
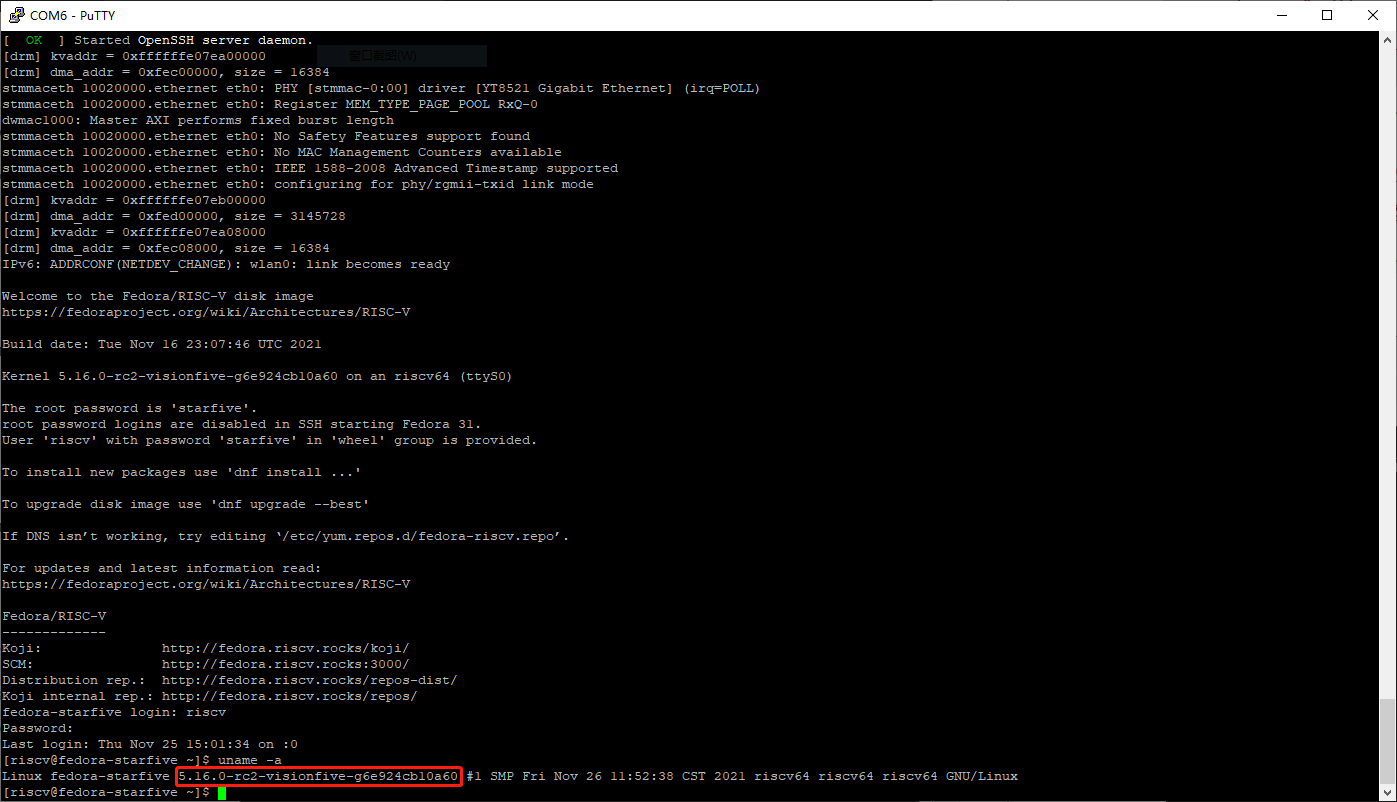
After the system starts successfully, you can see the version of the new vmlinuz file:
Figure 6. Example Output