Basic Mode
To use the VisionFive 2 flash tool
in basic mode, follow the steps below:
Important:
- Firmware should be burned at first; If there is a problem when burning, you can power off and restart, and reset again.
- Make sure you select the correct memory type.
- Kernel and Allinone can only burn into EMMC.
- The file path can be customized in basic mode while in professional mode, files should be under update directory.
- Burn Firmware:
- Select Firmware under file type.
- Select Flash under memory type.
- Select the file of
usbprog-devkit-<Date>.out
by clicking File Select.Note: <Date> indicates the update time. For example, 230801.
- Click Load.
Figure 1. Select Firmware File 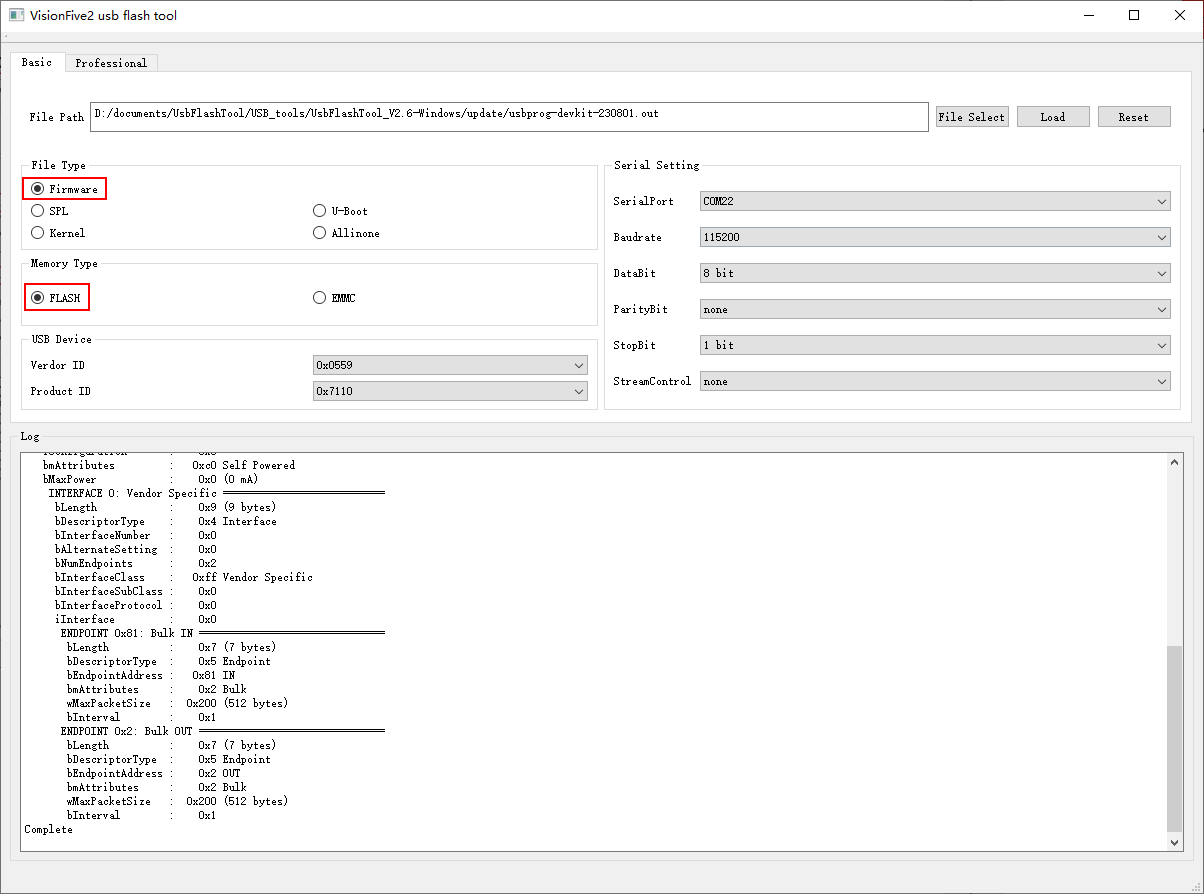
- Burn SPL:
- Select SPL under file type.
- Select Flash under memory mode.
- Select u-boot-spl.bin.normal.out by clicking File Select.
- Click Load.
Figure 2. Burn u-boot-spl.bin.normal.out 
- Burn U-Boot:
- Select U-Boot under file type.
- Select Flash under memory type.
- Select devkits_fw_payload.img by clicking File Select.
- Click Load.
Figure 3. Burn devkits_fw_payload.img 
- Burn Kernel:
- Select Kernel under file type.
- Select EMMC under memory type.
- Select starfive-devkits-vfat.part by clicking File Select.
- Click Load.
Figure 4. Burn starfive-devkits-vfat.part 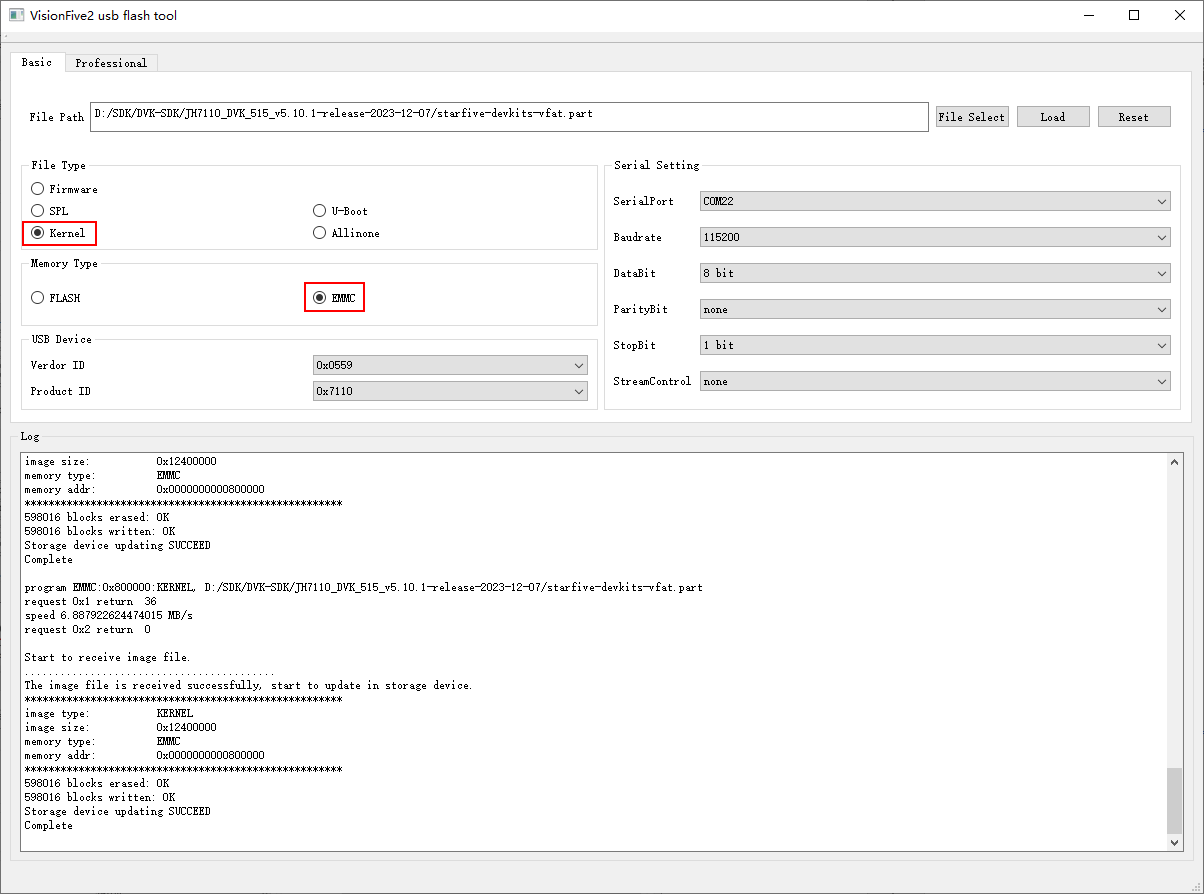
- Burn sdcard.img:
- Select Allinone under file type.
- Select EMMC under memory type.
- Select sdcard.img by clicking Select File.
- Click Load.
Figure 5. Burn sdcard.img 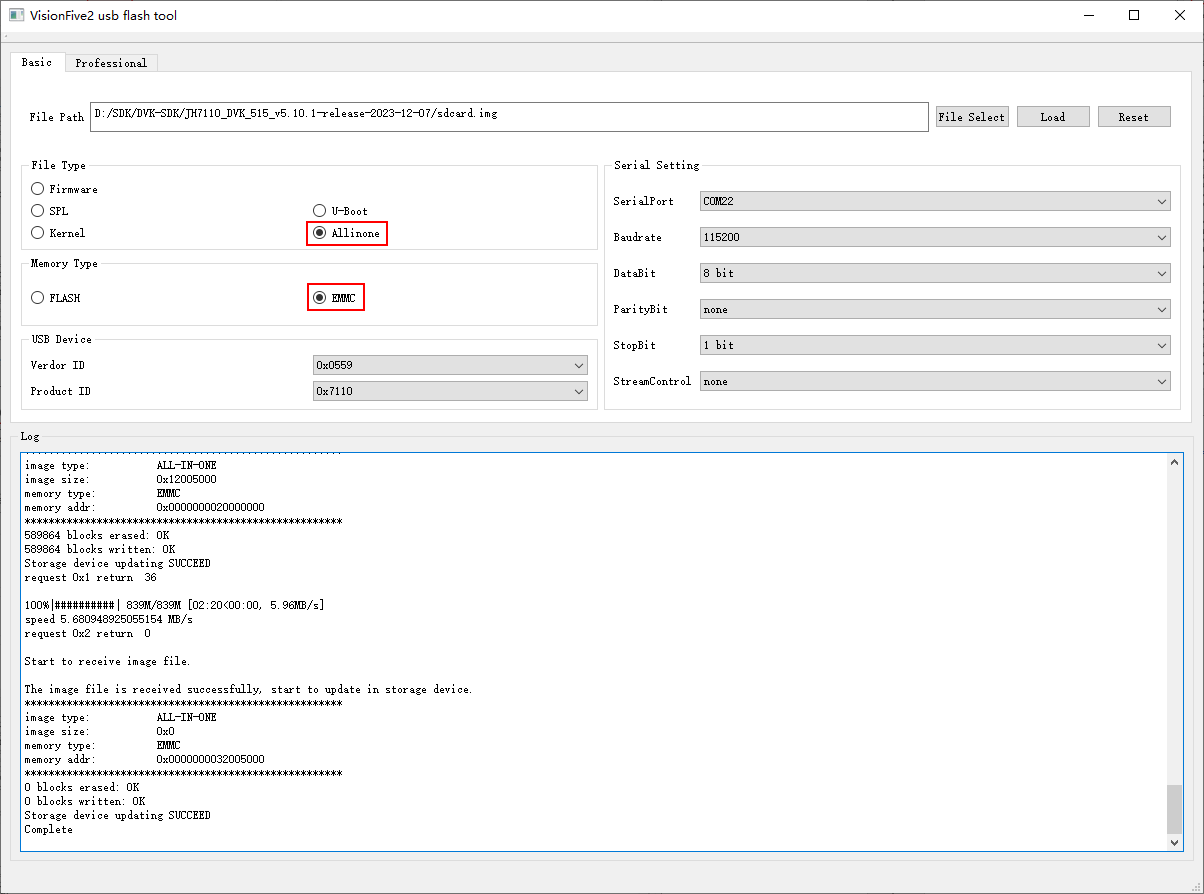
You will see the output
Complete, which indicates that the image is burnt successfully.