For Mac/Linux
- Insert the micro-SD card with the Fedora image burnt into VisionFive.
- Connect one end of the USB Type-C cable to the USB Type-C port on the VisionFive, and connect the other end of the cable to the power adapter.
-
Connect the jumper wires between the USB-to-Serial converter and the 40-Pin GPIO header
of the VisionFive as follows.
Figure 1. Connecting Jumper Wires 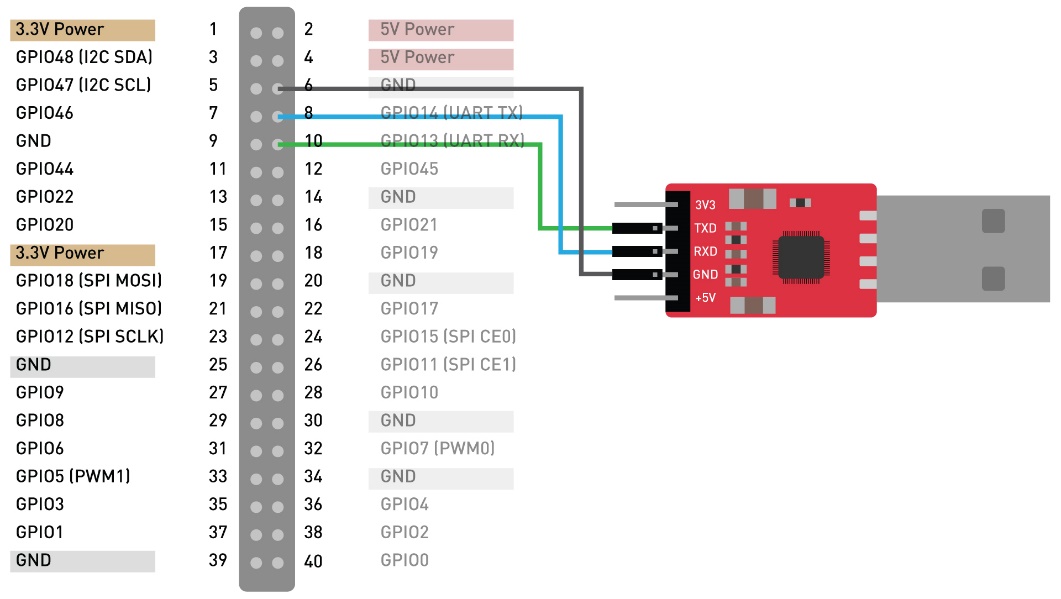
- Connect the USB-to-Serial converter to the PC.
- Open a terminal window on Mac/Linux.
-
Update the packages list by typing the following command.
sudo apt-get update -
Install minicom by typing the following command.
sudo apt-get install minicom -
View the connected serial devices.
dmesg | grep ttyFigure 2. Example Output 
-
Connect to the serial device by typing the following command.
sudo minicom -D /dev/ttyUSB0 -b 115200Note: The baud rate is set to 115200.Figure 3. Example Output 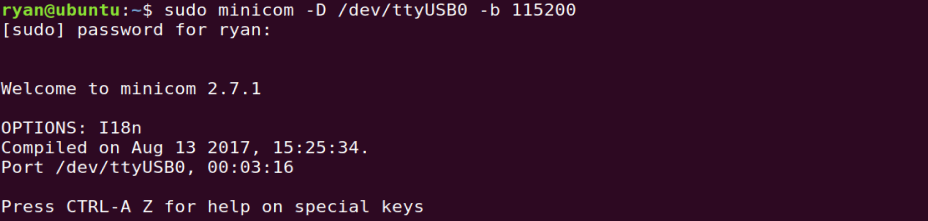
- Power on the VisionFive.
-
Type username and password in the prompt as follows:
-
Username: riscv
-
Password: starfive
Result:Now you have connected with the VisionFive via serial communication using Mac/Linux!
Figure 4. Example Output 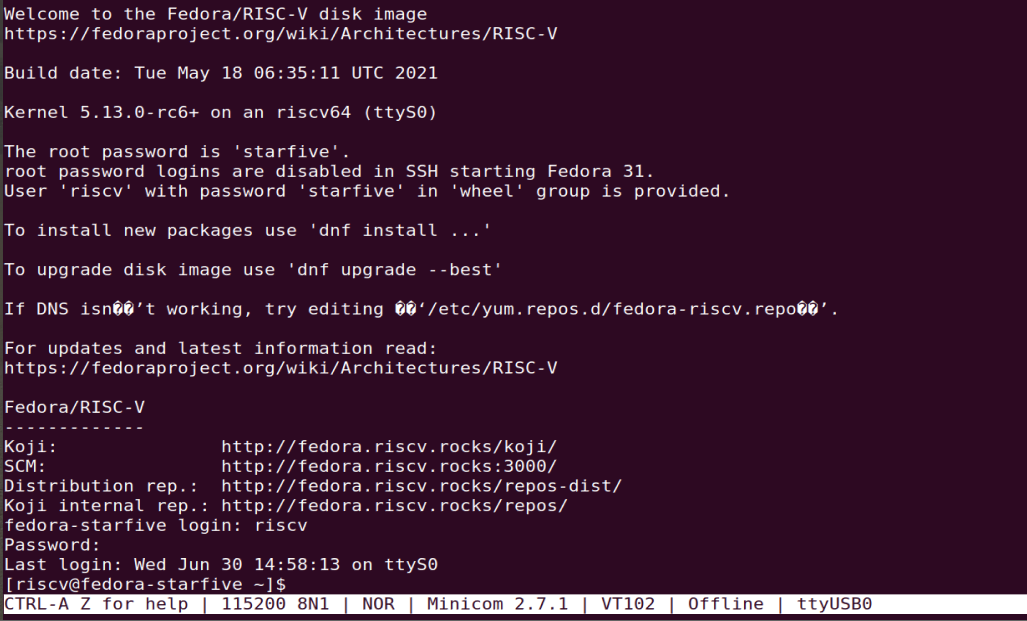
-