Hardware Setup
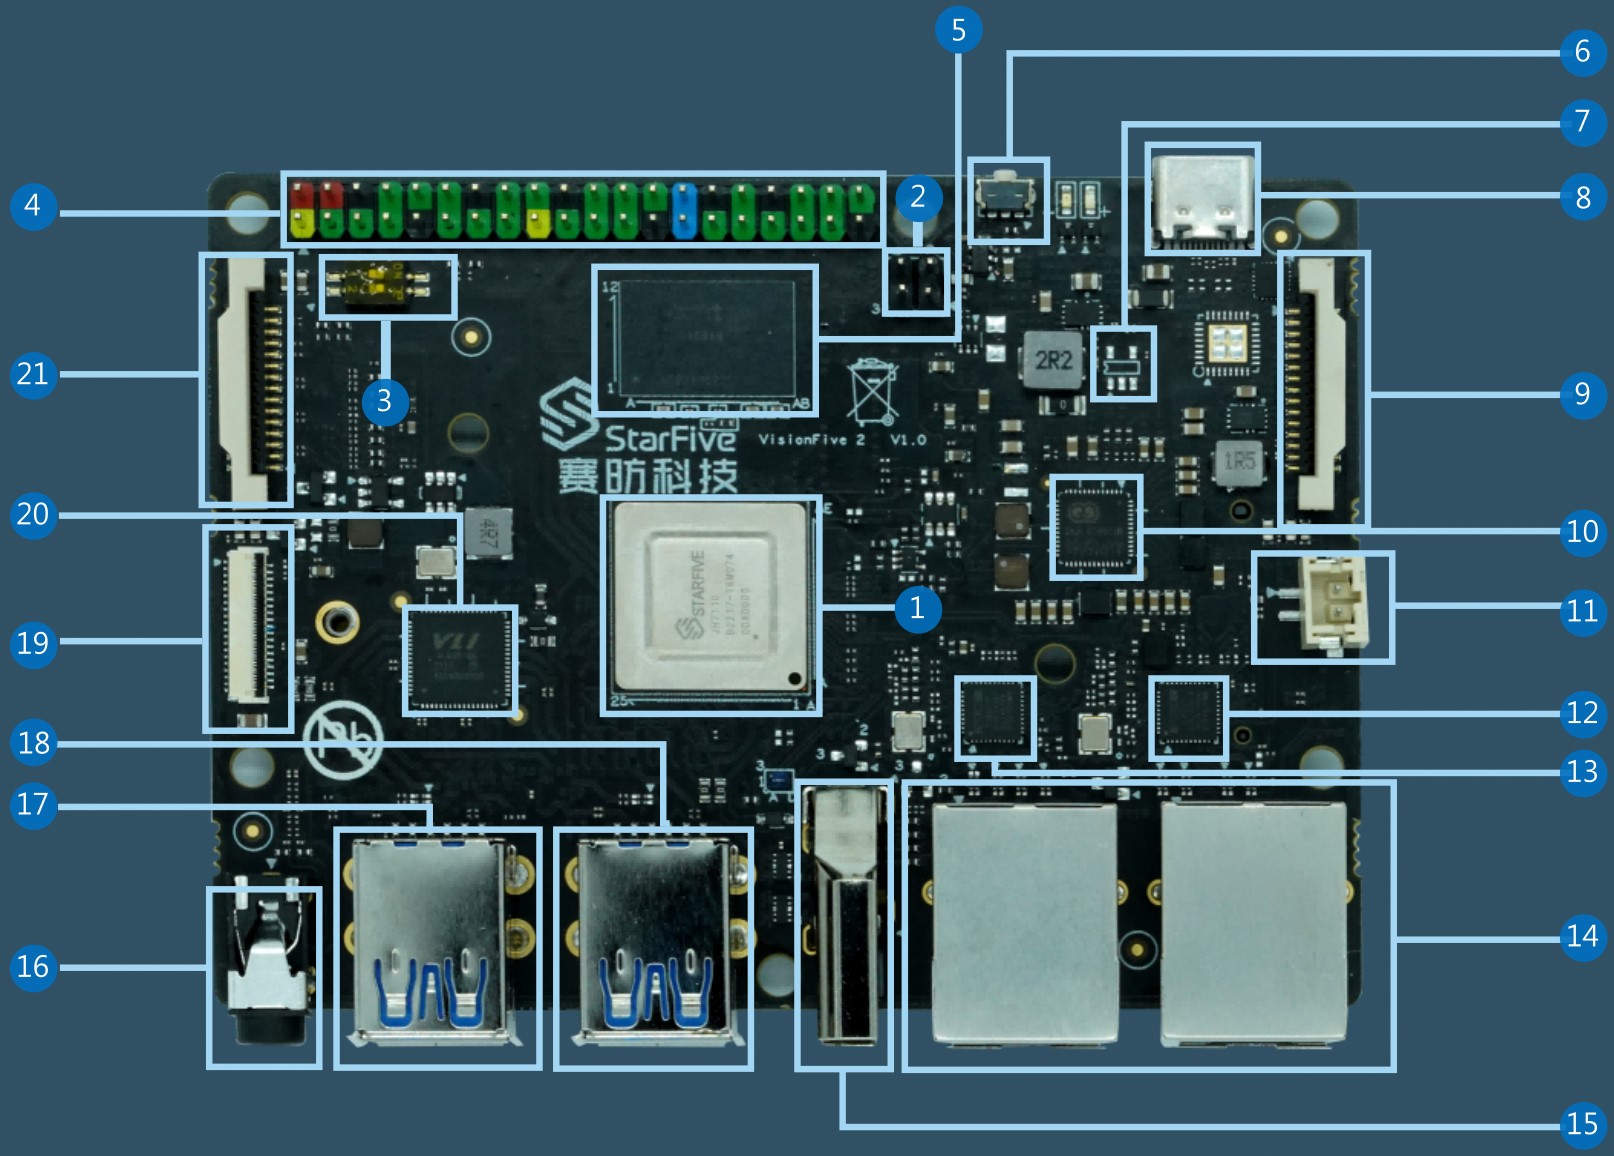
Connect the external devices and accessories and power adapter to VisionFive 2/VisionFive 2 Lite according to the following top-view diagram:
- Plug the Micro-SD card with the latest Debian image into the card slot on the back
of VisionFive
2/VisionFive 2
Lite.Note: Flash Debian OS into a Micro-SD card as described in the Flashing Debian OS to a Micro-SD Card section in the VisionFive 2 Single Board Computer Quick Start Guide or VisionFive 2 Lite Single Board Computer Quick Start Guide. Make sure that the Debian image you download is the latest version. creation time of the folder where the image is located. Select the image with the latest creation time in the folder.
- Connect the Ethernet cable to one of the RJ45 Ethernet ports (No. 14).
- Connect the HDMI monitor with the HDMI cable to the HDMI 2.0 port (No. 15).
- Connect the IMX219 MIPI camera to HDMI 2.0 port (No. 9). If the camera has a pin header for fixing purposes (without connecting to any actual circuit), it can be connected to the available pins of the 40-pin GPIO header (No. 4). (Optional)
- Connect the USB camera, keyboard, and mouse to the USB ports (No. 17 and 18).
- Connect the power adapter with a USB cable to the USB-C port (No. 8). (This step must be performed after Steps 1 to 4).