Installing Minicom on Linux to View FPGA Output
To connect to the FPGA via minicom to view the FPGA's output, perform the following steps:
- To install minicom on Linux, run this command:
$ sudo apt-get install minicom - You can check which serial port the FTDI USB UART (not the Olimex JTAG) is
connected to using the command
$ ls -lR /dev/serial. Ensure that the FTDI USB UART has the correct serial number for Dubhe (in case you are connecting to more than 1 FTDI UARTs).Figure 1. Example Output 
- Execute the following command to set up minicom:
$ sudo minicom -sResult:
You will be brought to an interface shown below:
Figure 2. Example Output 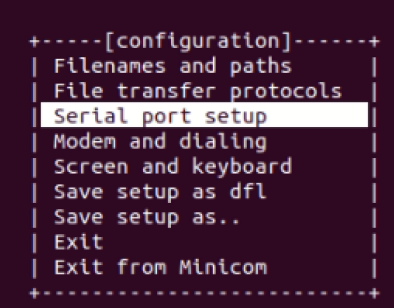
- Go to Serial port setup and press
A. Change the serial device to the port that the
FTDI is connected to (for example: /dev/ttyUSB1). Press Enter after typing
the serial port name, and type F to set the
Hardware Flow Control to
No. Ensure that the baud rate in
E is 115200.
Figure 3. Example Interface 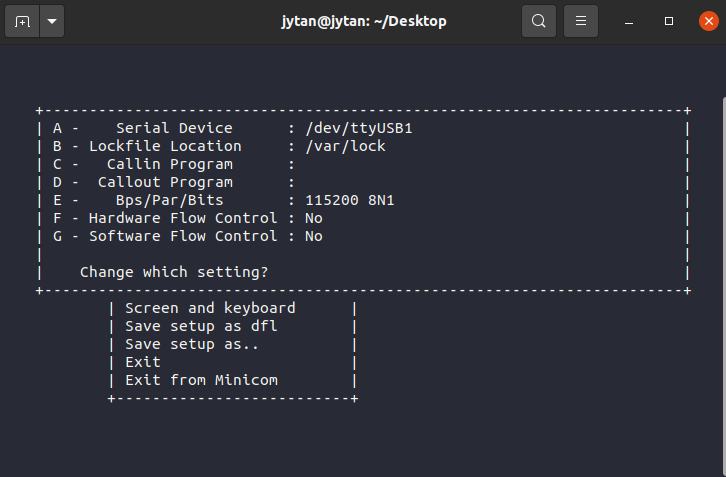
- Go to Save setup as dfl and press
Enter to save the configuration. Then, go down to
Exit from Minicom to exit.
Figure 4. Example Baud Rate 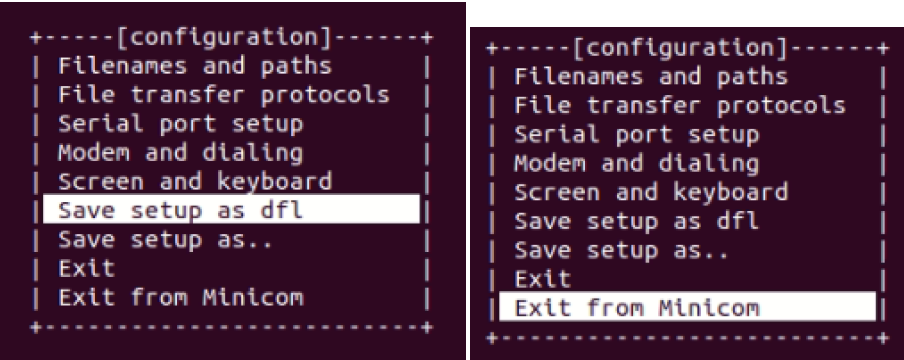
- After successfully saving the configuration, you can now use this command
in the terminal to get access to the FTDI USB port:
$ sudo minicomFigure 5. Example Output 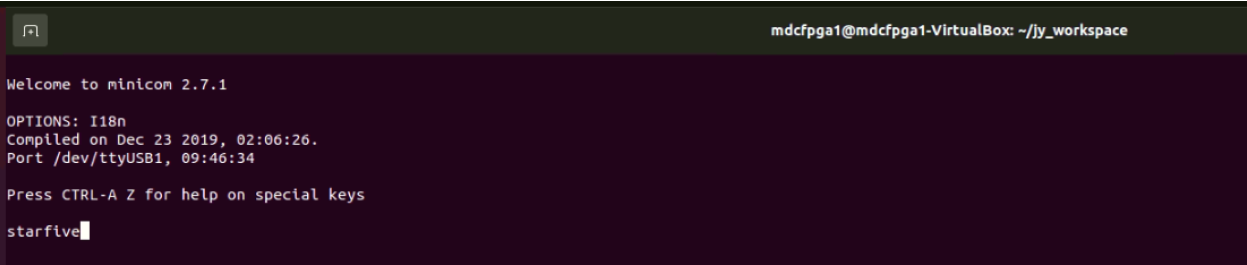
After successfully saving the configuration, you can now use this command in the terminal to get access to the FTDI USB port:
$ sudo minicom