Loopback Test
The following steps are provided for the loopback test:
-
Wiring: Connect Pin19 with Pin 21 as the following:
Figure 1. Connect Pin 19 with 21 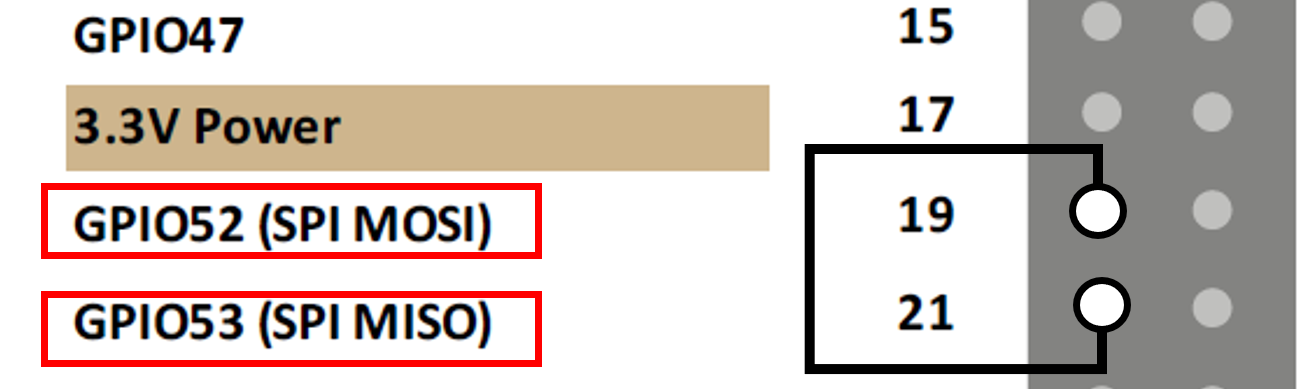
-
Locate to the following path for the test tool, spidev_test.c:
cd /linux/tools/spi -
Execute the following command under the test tool directory:
make CROSS_COMPILE=riscv64-linux-gnu- ARCH=riscvResult:The output file is spidev_test in the same directory.
-
Upload spidev_test to VisionFive
2, and change the execution
permission by executing the following:
chmod +x spidev_test -
Confirm the SPI device.
ls /dev/spidev*Result:Figure 2. Example Output 
In this output, spidev1.0 is the device name.
-
Execute the following command to perform the test:
./spidev_test -D /dev/spidev1.0 -v -p string_to_sendTip:spidev1.0is the device name got from the previous step.Result:
Figure 3. Example Output 
In this figure, the TX and RX output are the same, which indicates the test is successful.