Prerequisites
This topic lists the hardware and software requirements for flashing OS images.
Hardware Requirements
Prepare the following hardware items.
| Item | Notes |
|---|---|
| VisionFive 2 Lite board | — |
| Power adapter | USB Type-C, 5V / 3A |
| USB Type-C cable | For power supply |
| Host PC | Linux, Windows, or macOS |
| TF Version only: | |
| Micro-SD card | 16 GB or larger |
| USB card reader | If your PC has no built-in slot |
| eMMC Version only: | |
| USB-C to USB-A/C cable | For data transfer (Fastboot) |
| For desktop usage: | |
| Keyboard and mouse | USB |
| Monitor or TV | With HDMI input |
| HDMI cable | — |
| Recommended optional items: | |
| Ethernet LAN cable | For network access |
| USB-to-UART serial converter | For serial console access and system recovery |
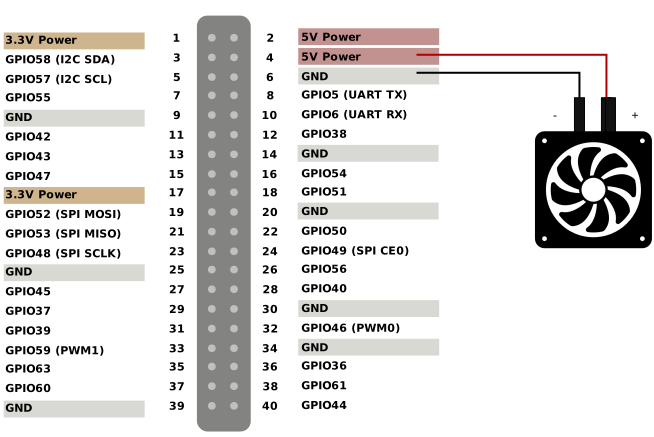
Connect a Fan
Connect a 2-pin 5 V fan to VisionFive 2 Lite's 40-pin GPIO header for further cooling as follows:
Install Drivers for Fastboot
Install the drivers for the StarFive Fastboot tool. This is required only if you want to flash the OS image to onboard eMMC using Fastboot.
-
Download the extract the Fastboot toll package SFFB_Tool_V1.0.7z.
-
Enter fastboot mode using ether of the following methods.
Table 2. Enter Fastboot Mode Method Details Enter Fastboot Mode via Serial Console - Power on VisionFive 2 Lite and press any key during the U-Boot countdown to interrupt boot.
- Enter the following command and wait.
fastboot usb 0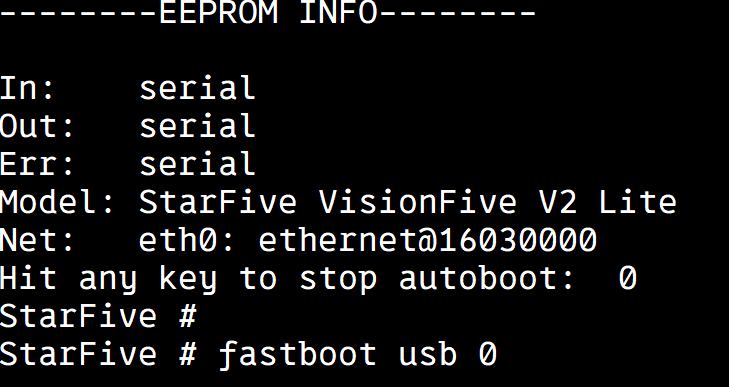
Enter Fastboot Mode via Fastboot Pin - Before powering on, short the fastboot pins
(J20), as indicated in the diagram below.
Figure 2. Shorting Fastboot Pins 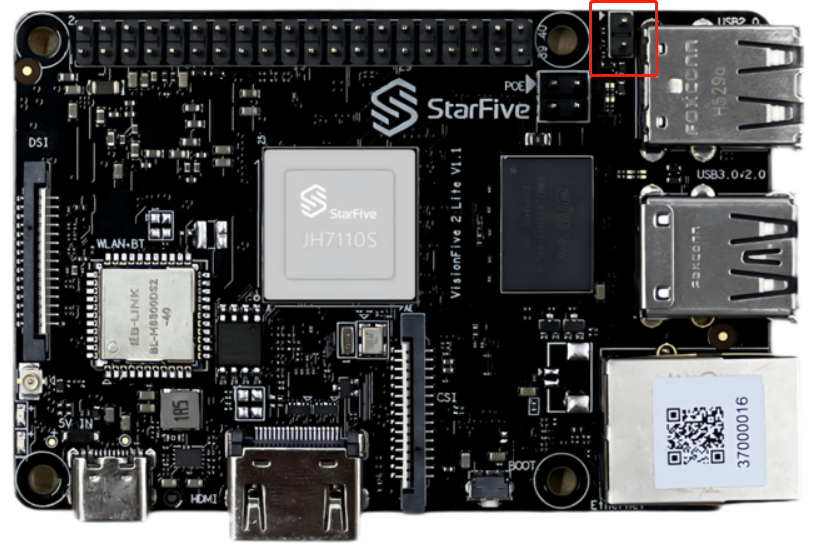
- Power on the board and it enters the Fastboot mode automatically.
-
Open Device Manager on Windows. A device named USB Download Gadget appears under Other Devices.
Figure 3. USB Download Gadget 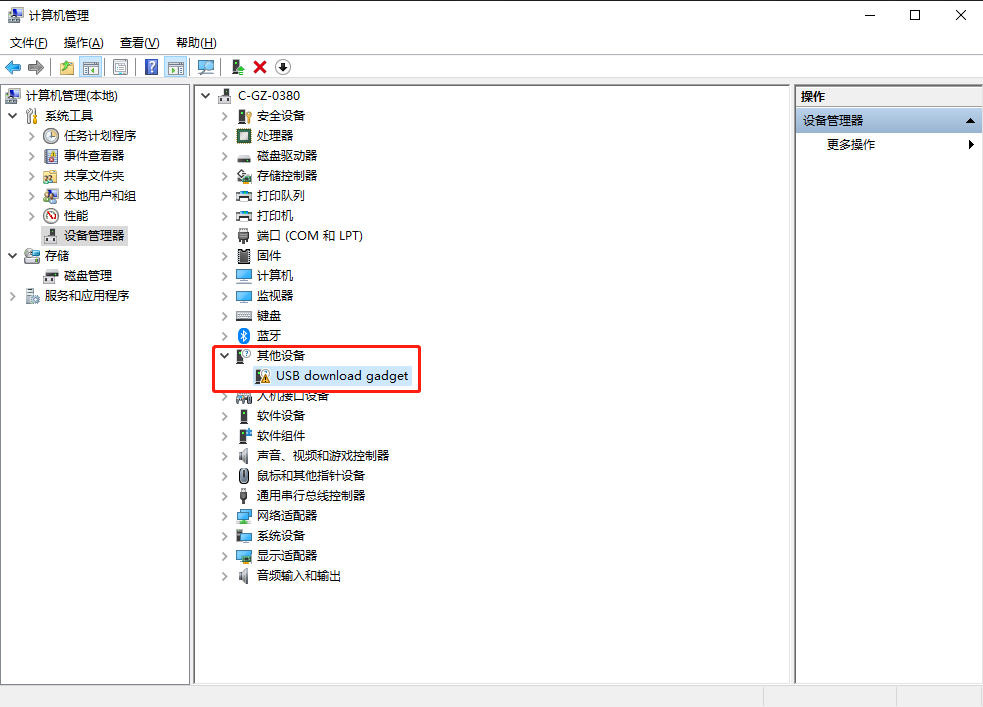
-
Right-click USB Download Gadget to open the Properties window, and click Update driver.
-
Select Browse my computer for drivers.
-
Add the folder path $\SFFB_Tool_V1.0\usb_driver and click Next.
On successful installation, the device name is displayed under the Device Manager.