Flashing OS to Onboard eMMC (eMMC Version)
This section describes how to flash Ubuntu or Debian (both Linux distributions) to the VisionFive 2 Lite’s onboard eMMC using the Fastboot tool or Fastboot commands. Step-by-step examples are provided for Linux and Windows host systems as reference for implementation.
Hardware Preparation
- In addition to the hardware items described in Before You Start, one USB C to USB A/C cable is required to flash OS to onboard eMMC.
- Before using the fastboot tool to flash the image, connect the serial port
and USB data cable properly as the following:
Figure 1. Set up Hardware 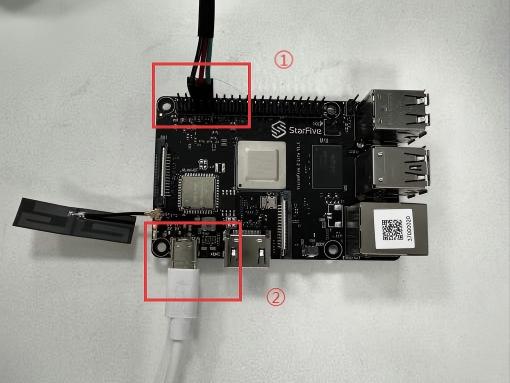
①: Connect the serial port to VisionFive 2 Lite (for entering to fastboot mode by running commands during starup).
②: Connect the USB-C port of the USB-C to USB-A/C cable to the VisionFive 2 Lite, and connect the other end to the PC.
Software Preparation
Perform the following steps to install drivers for using StarFive Fastboot Tool on Windows for the first time or fastboot on Ubuntu:
- Download and decompress the SFFB_Tool_V1.0.7z package.
- Enter fastboot mode by perform one of the following
methods:
- By entering commands during startup:
- Power on the VisionFive 2
Lite, and press any key to stop at U-Boot.
Figure 2. Press Any Key to Stop at U-Boot 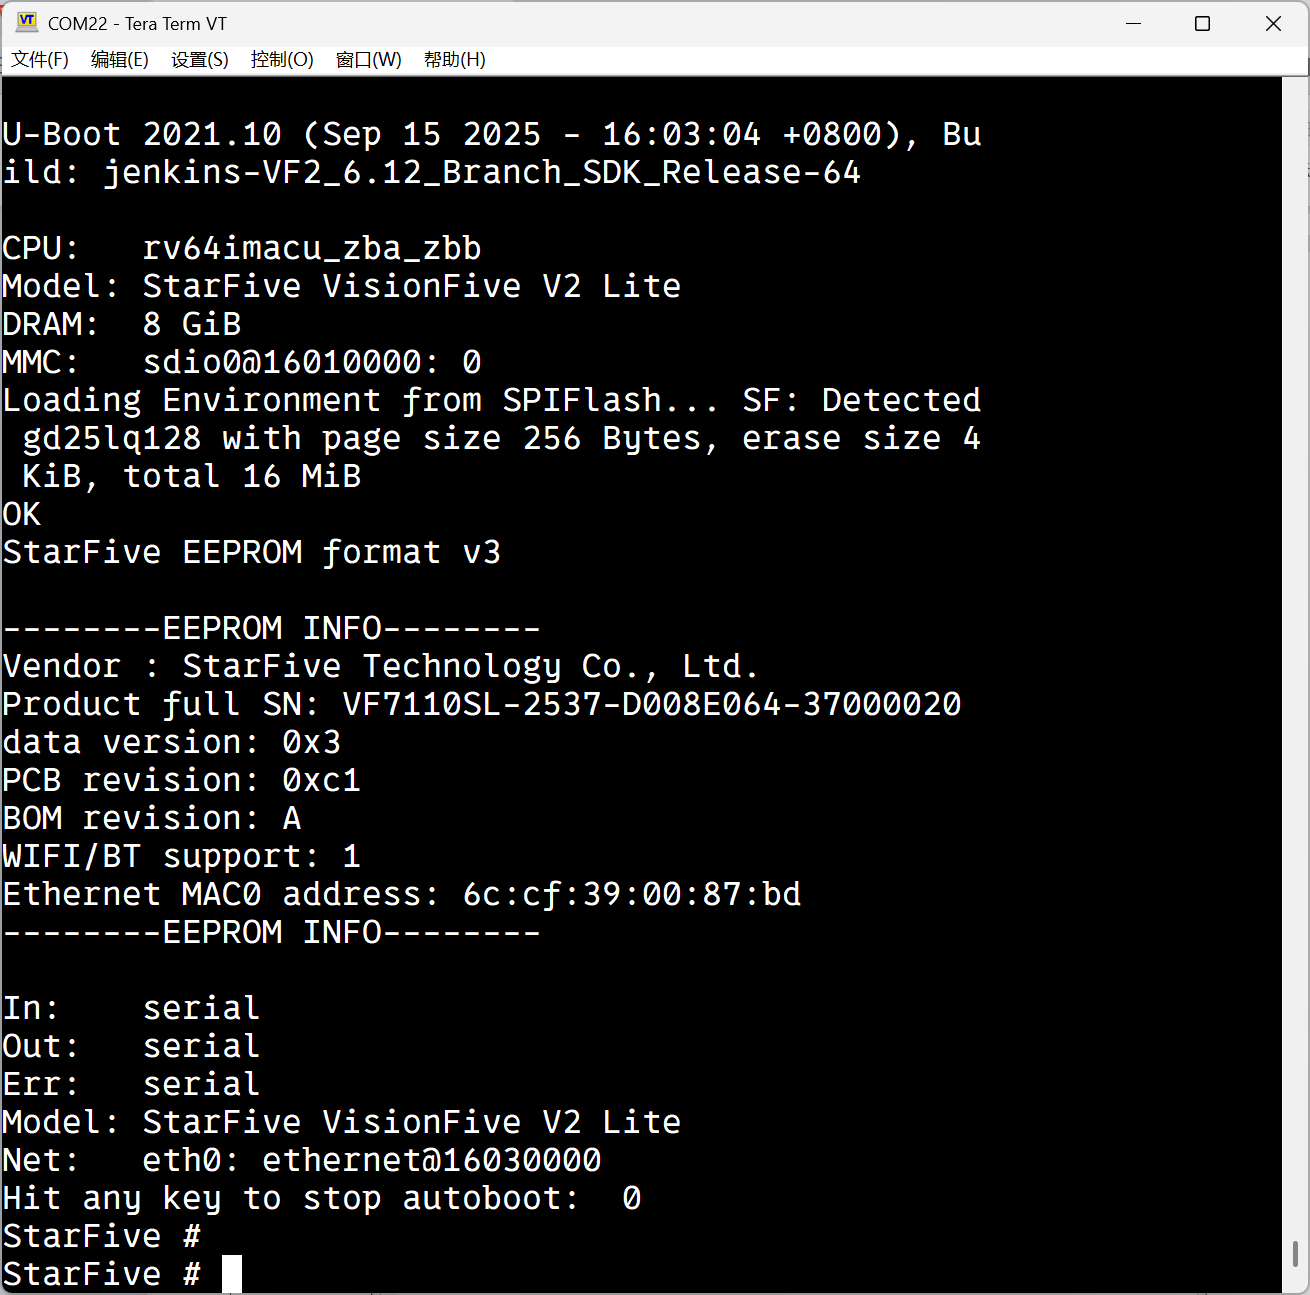
- Enter
fastboot usb 0and wait.Figure 3. Enter fastboot usb 0 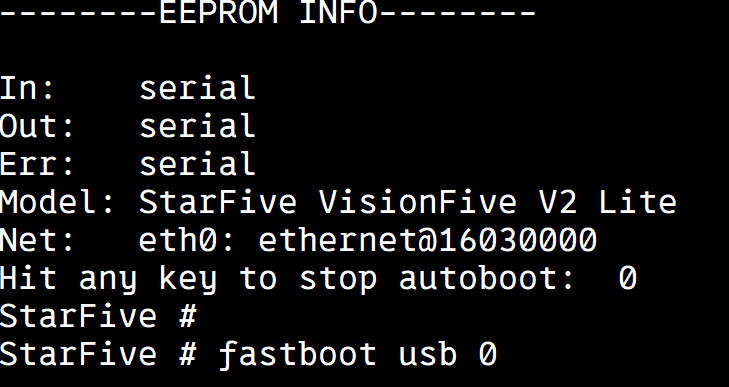
- Power on the VisionFive 2
Lite, and press any key to stop at U-Boot.
- By shorting fastboot pins before powering on:
- Shorting the fastboot pins before powering on can also make the
board enter fastboot mode automatically.
Figure 4. Shorting Fastboot Pins 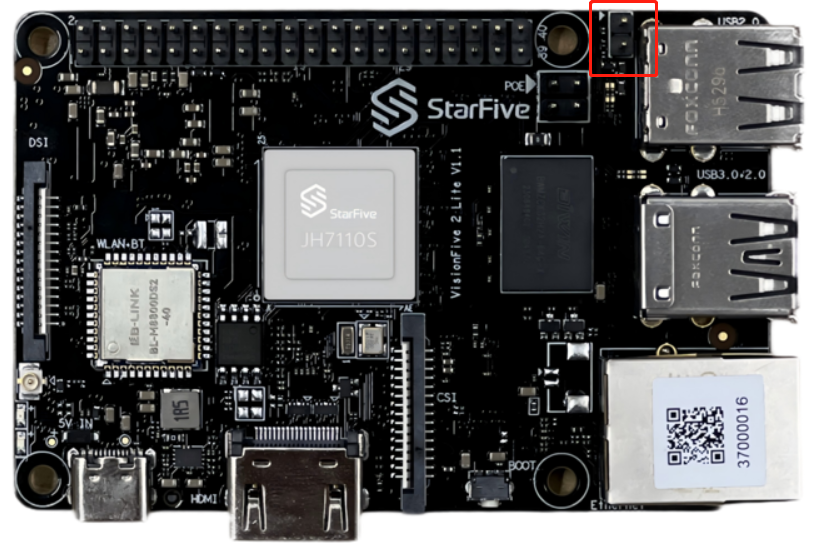 Note: The highlighted area is the fastboot pins.
Figure 5. Fastboot Mode 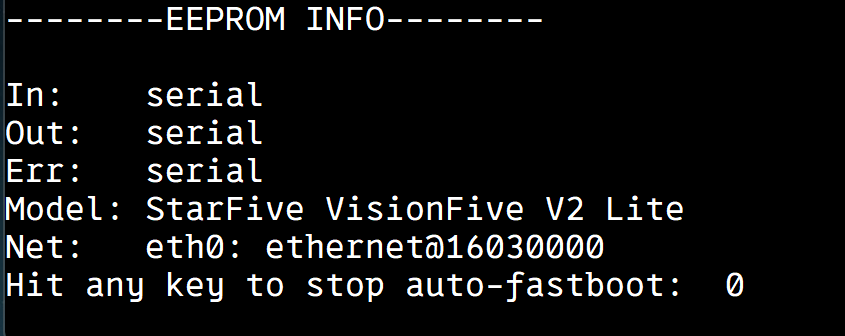
- Shorting the fastboot pins before powering on can also make the
board enter fastboot mode automatically.
- By entering commands during startup:
- Open Device Manager on Windows, a device named
USB Download Gadget will appear under
Other Devices.
Figure 6. USB Download Gadget 
- Double click USB Download Gadget to open
Properties menu, and then click Update
driver .
Figure 7. Update Driver 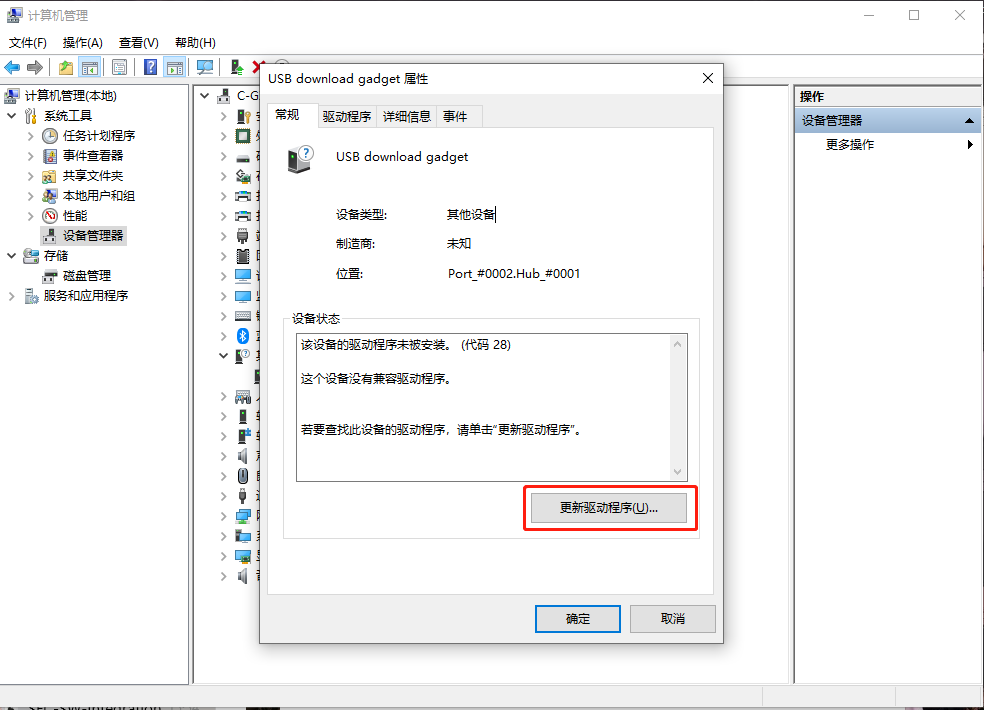
- Select Browse my computer for drivers.
Figure 8. Browse My Computer for Drivers 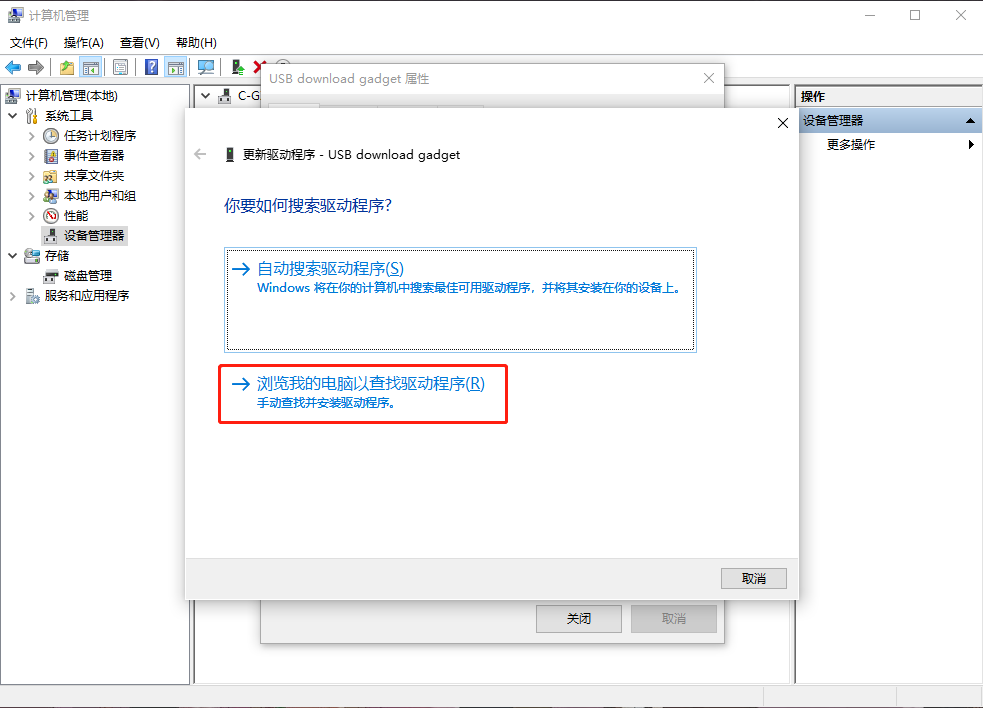
- Add the folder path $\SFFB_Tool_V1.0\usb_driver, and then
click Next to continue the installation.
Figure 9. Add Folder Path 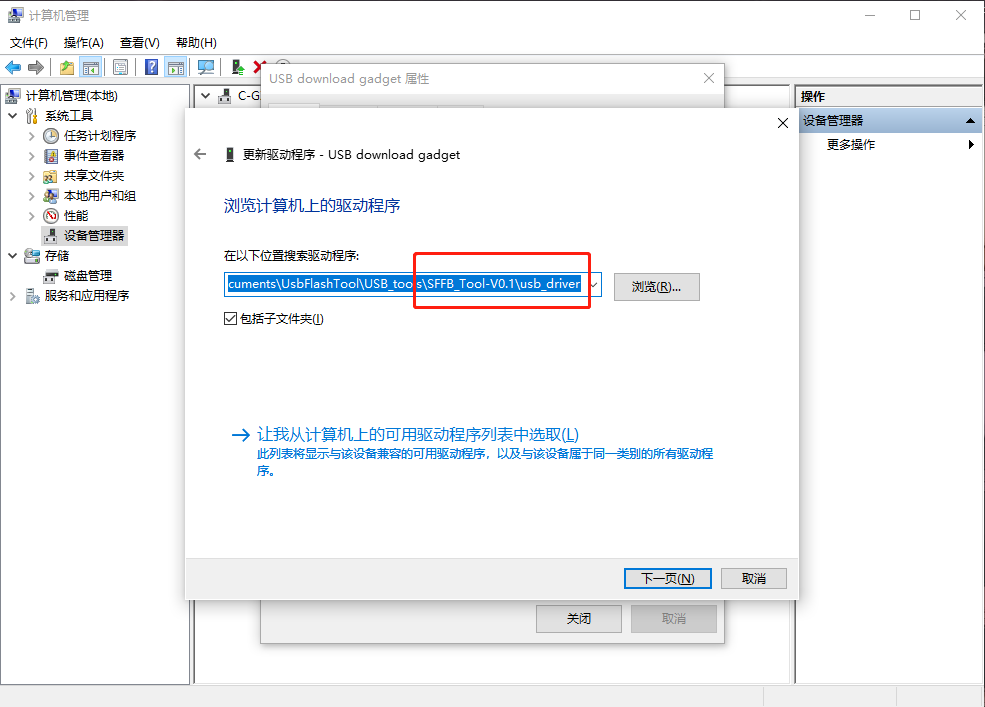
The following output indicates a successful installation:
Figure 10. Successful Installation 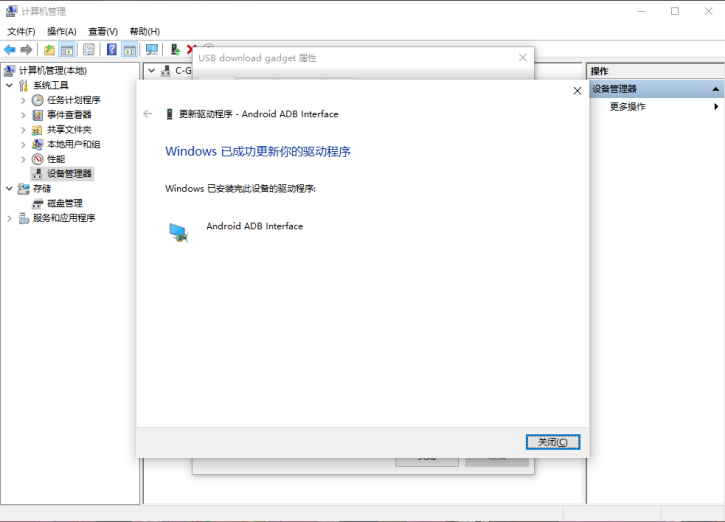
- Verify the installation in Device Manager.
The device name should display under the Device Manager after success installation.
Figure 11. Verification 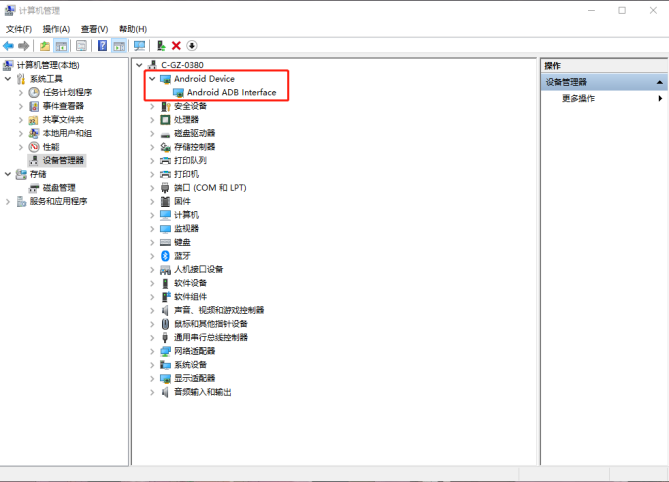
Flashing OS into eMMC using Fastboot on Windows
- Always open the software (Fastboot Tool) before powering on the board.
- Automatic FastBoot mode is only triggered during the very first boot of the board. A successfully programmed board will skip this mode on subsequent startups.
- To prevent accidental automatic programming of a new device, click the Reset button to clear the set file path once the current burning session is complete.
- Start up and connection:
Open the software, power on the VisionFive 2 Lite, and press any key at the U-Boot prompt to interrupt the boot process and enter the command (
fastboot usb 0). - Select burning mode and file:
- Choose the appropriate burning mode based on your requirements:
- Image: For burning system image files (*.img).
- Kernel: For burning the Linux kernel file (starfive-visionfive2-vfat.part).
- FileSystem: For burning filesystem images (*.ext4).
- Select the corresponding image file (e.g.,
ubuntu-24.03-preinstalled-desktop-riscv64+vf2-lite.img).
Figure 12. Select Image File 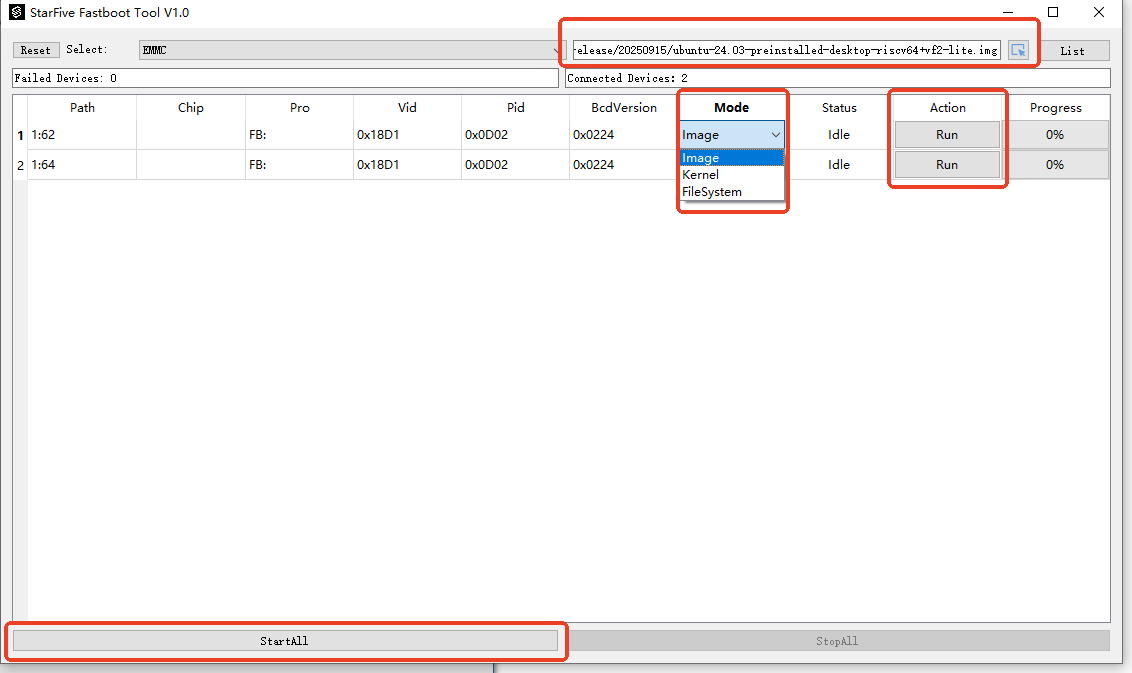
- Choose the appropriate burning mode based on your requirements:
- Start burning by clicking the Run or Start All button
to begin the download. Wait for the progress bar to reach 100%, indicating
the burning process is complete.
Figure 13. Start Burning 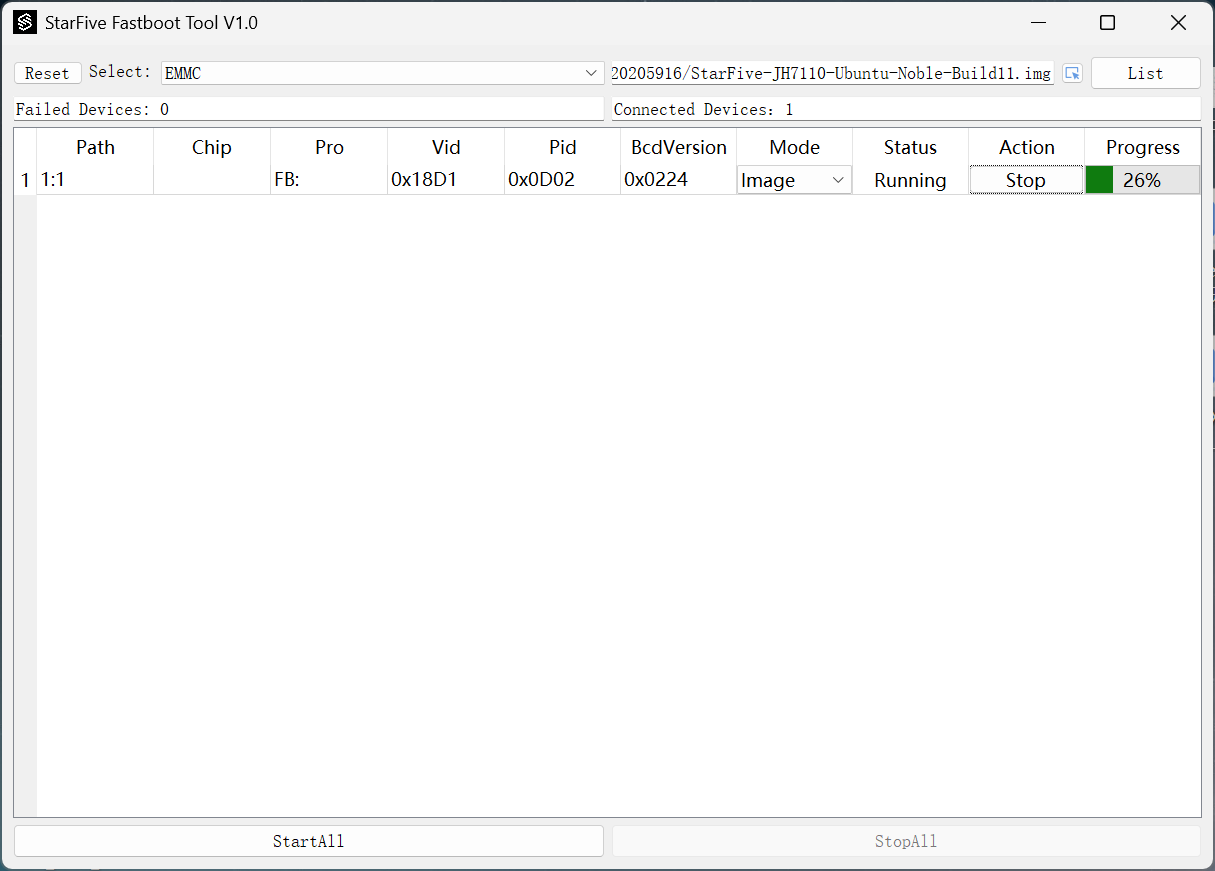
Figure 14. Example Output 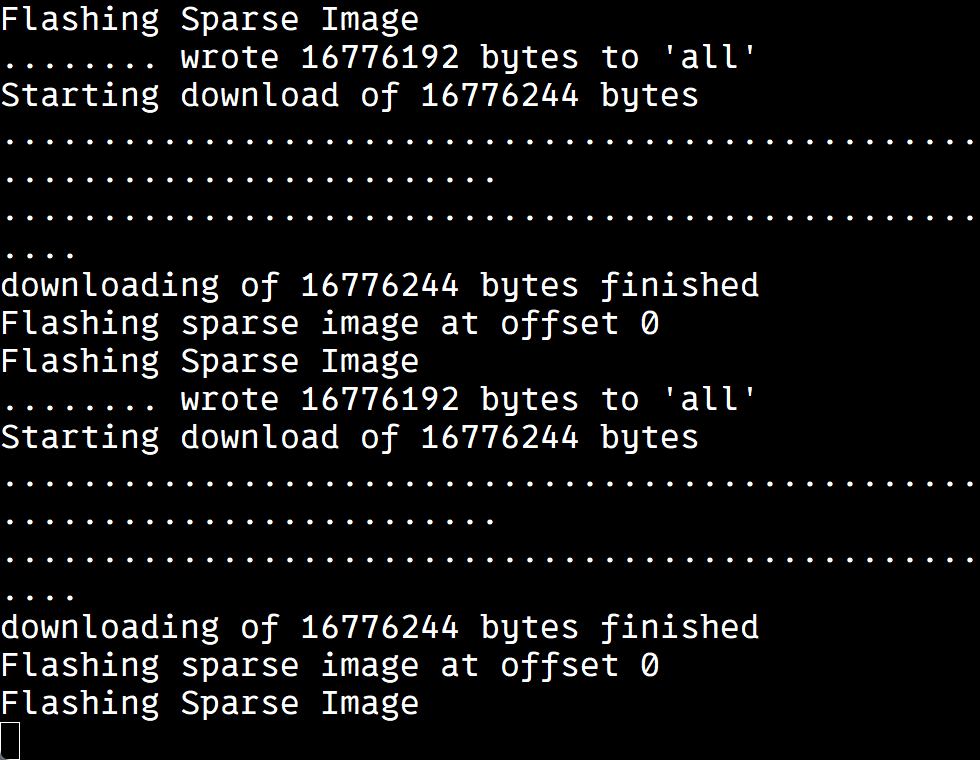

- Once the image is successfully burned, restart the board.
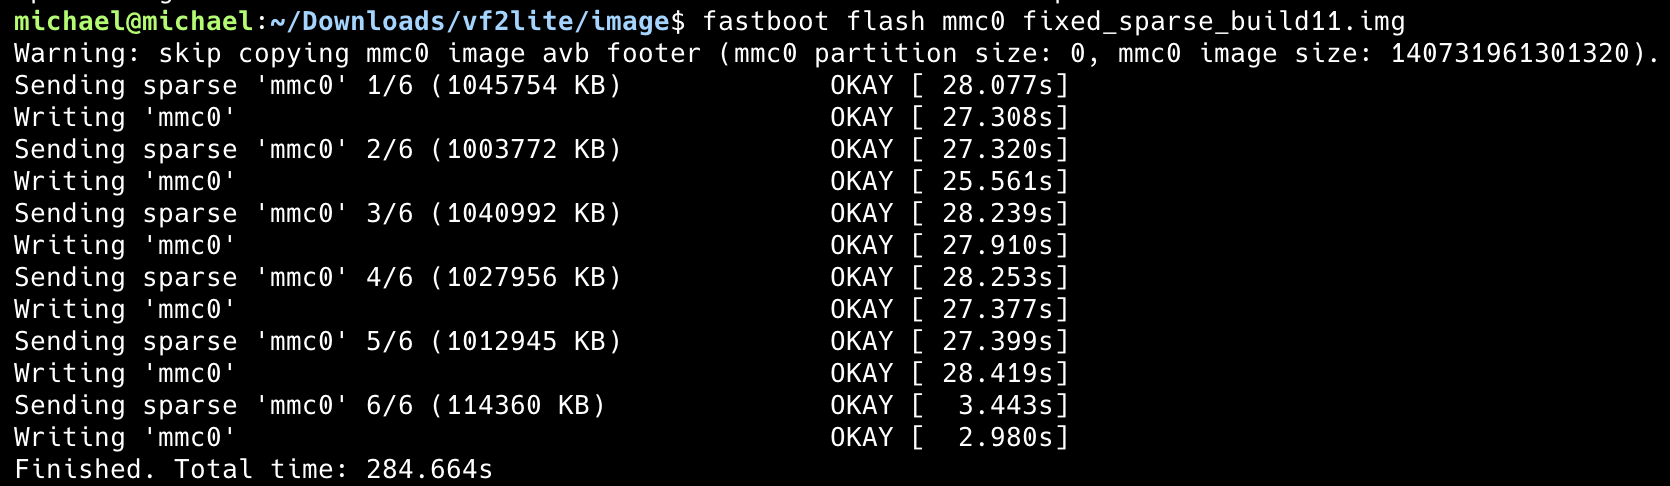
Flashing OS into eMMC using Fastboot on Ubuntu
To flash the OS image into eMMC using the Fastboot tool on Ubuntu:
- Install Fastboot Tool on
Ubuntu:
$ sudo apt install fastboot
- For enabling faster and more reliable flashing, image
should be converted into a sparse format to skip empty data
blocks.
$ sudo apt install android-sdk-libsparse-utils
$ img2simg StarFive-JH7110-Ubuntu-Noble-Build11.img xxxxx.img
- Enter the fastboot mode on Ubuntu. For details, see Software Preparation.
- Run
fastboot devices -land find the device.Figure 15. Example Output 
- Run
fastboot flash mmc0 xxxxx.imgto burn the image into eMMC, and then restart the device after flashing:Tip: xxxxx.img is the file generated in Step 2.Figure 16. Example Output