Preparation
Hardware Preparation
- Except for the hardware items described in Required Hardware, one USB C to USB A/C cable is required to flash OS to onboard eMMC.
- Before using the fastboot tool to flash the image, connect the serial port
and USB data cable properly as the following:
Figure 1. Set up Hardware 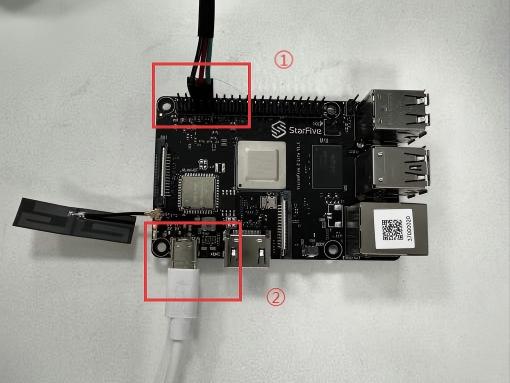
①: Connect the serial port to VisionFive 2 Lite (for entering to fastboot mode by running commands during starup).
②: Connect the USB-C port of the USB-C to USB-A/C cable to the VisionFive 2 Lite, and connect the other end to the PC.
Software Preparation
Perform the following steps to install drivers for using StarFive Fastboot Tool on Windows for the first time or fastboot on Ubuntu:
- Download and decompress the SFFB_Tool_V1.0.7z
- Enter fastboot mode by perform one of the following
methods:
By enter commands during starup
By shorting fastboot pins before powering on
- By entering commands during startup:
- Power on the VisionFive 2
Lite, and press any key to stop at U-Boot.
Figure 2. Press Any Key to Stop at U-Boot 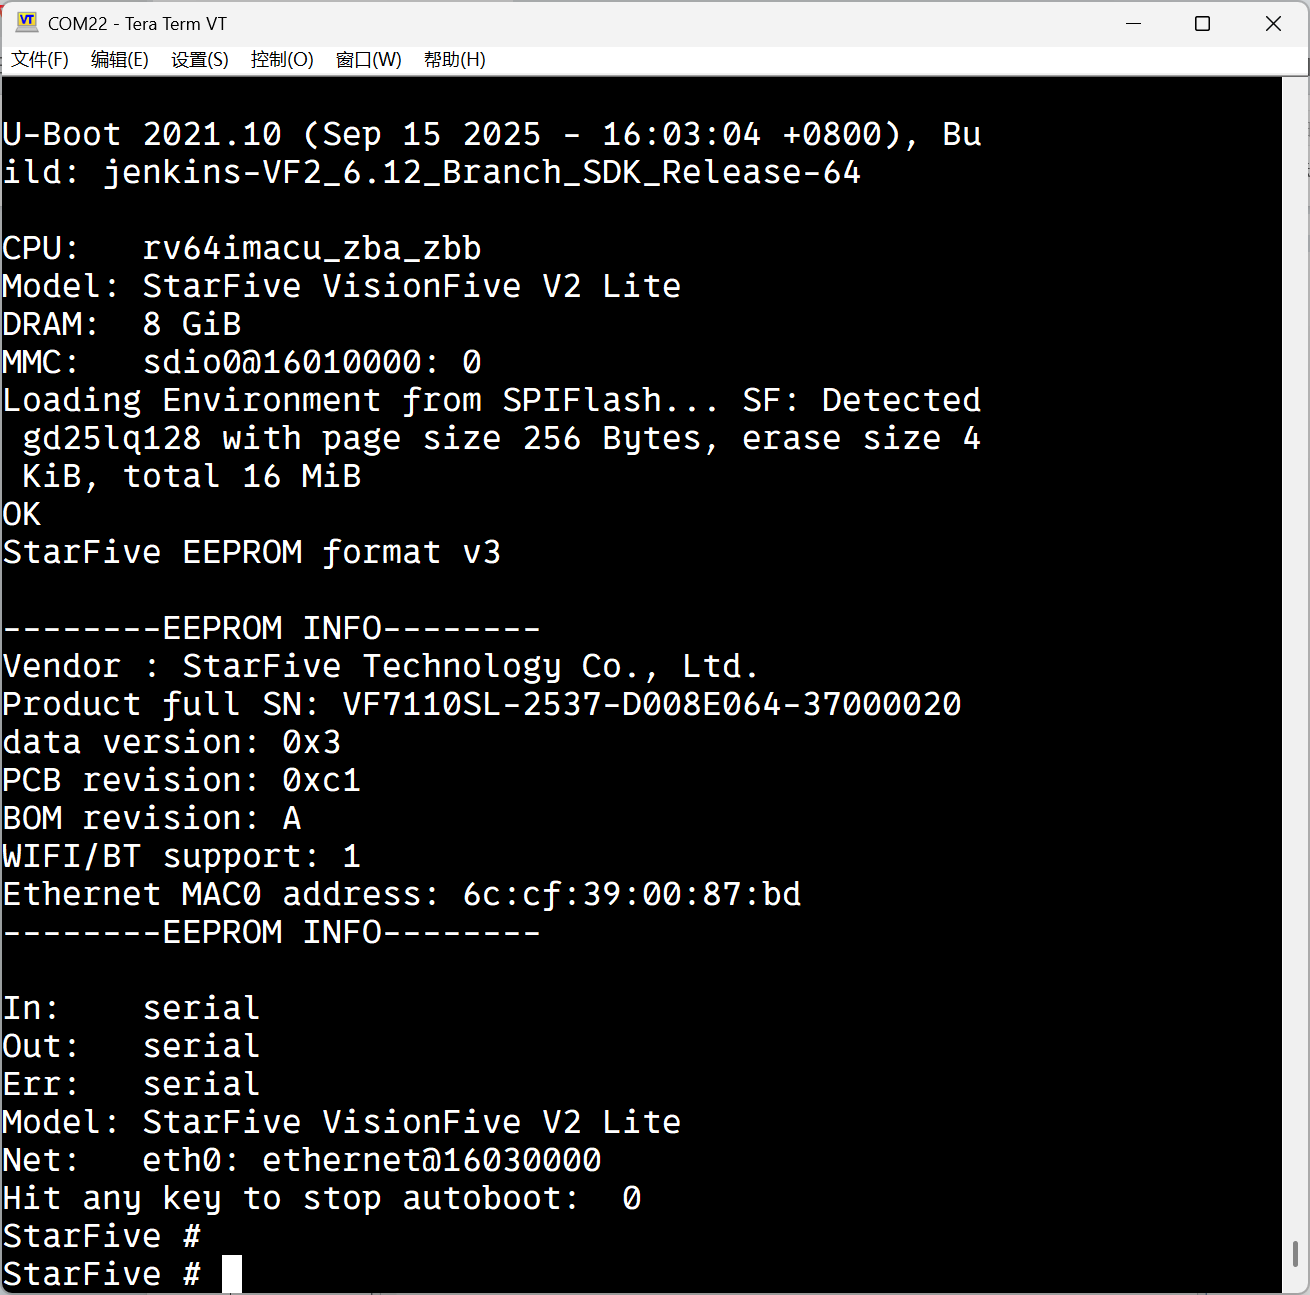
- Enter
fastboot usb 0and wait.Figure 3. Enter fastboot usb 0 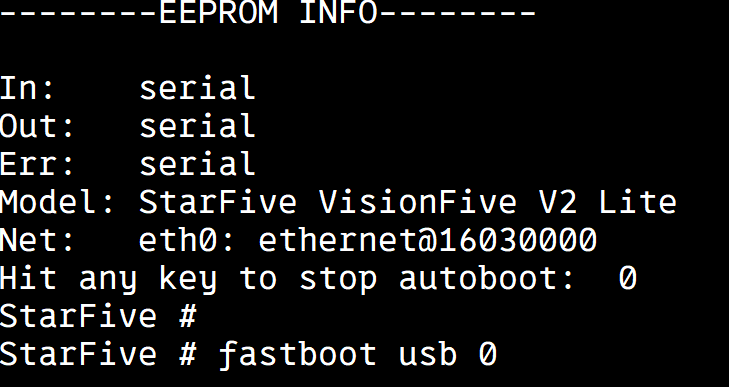
- Power on the VisionFive 2
Lite, and press any key to stop at U-Boot.
- By shorting fastboot pins before powering on:
- Shorting the fastboot pins before powering on can also make the
board enter fastboot mode automatically.
Figure 4. Shorting Fastboot Pins  Note: The highlighted area is the fastboot pins.
Figure 5. Fastboot Mode 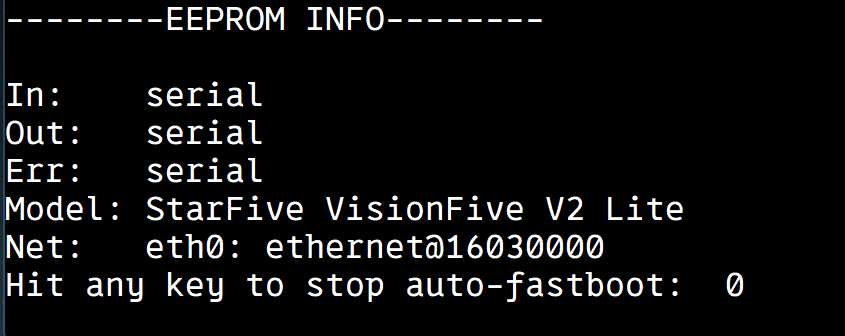
- Shorting the fastboot pins before powering on can also make the
board enter fastboot mode automatically.
- By entering commands during startup:
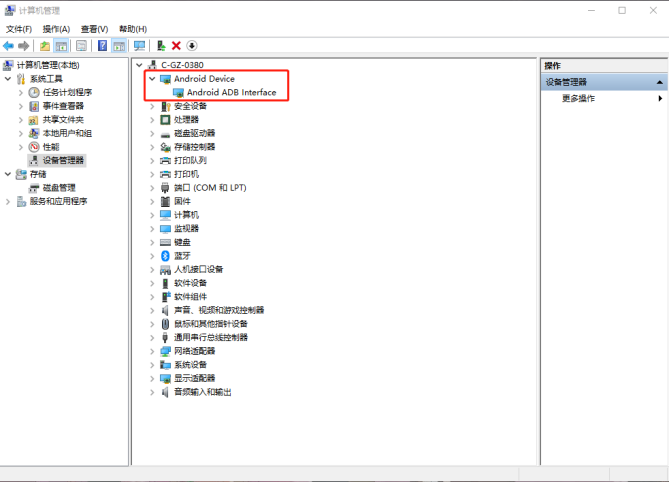
- Open Device Manager on Windows, a device named
USB Download Gadget will appear under
Other Devices.
Figure 6. USB Download Gadget 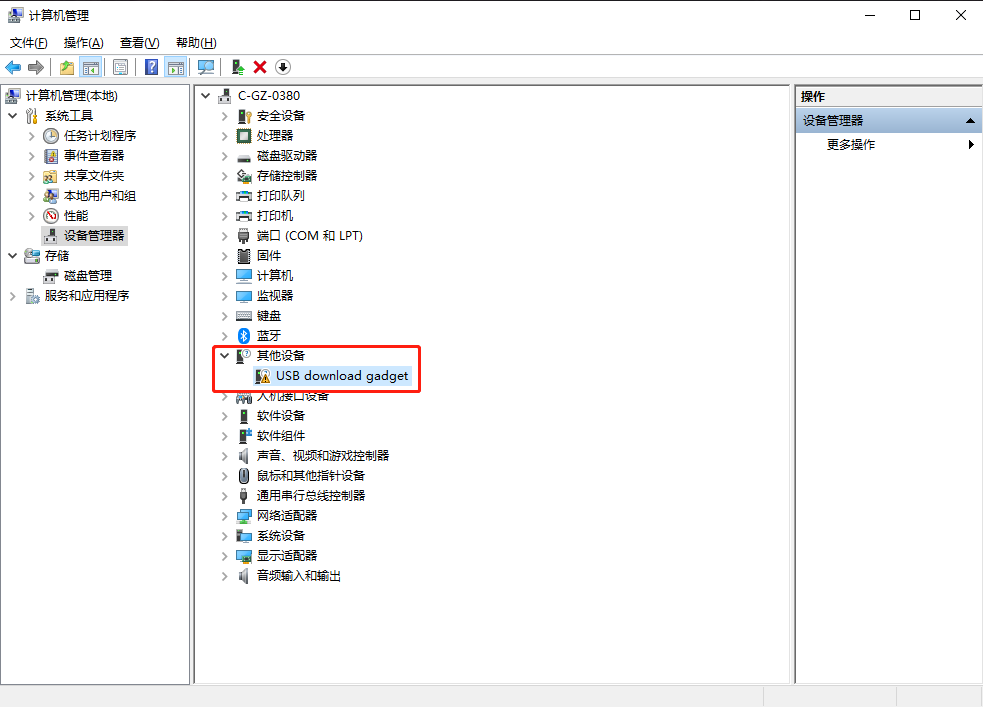
- Double click USB Download Gadget to open
Properties menu, and then click Update
driver .
Figure 7. Update Driver 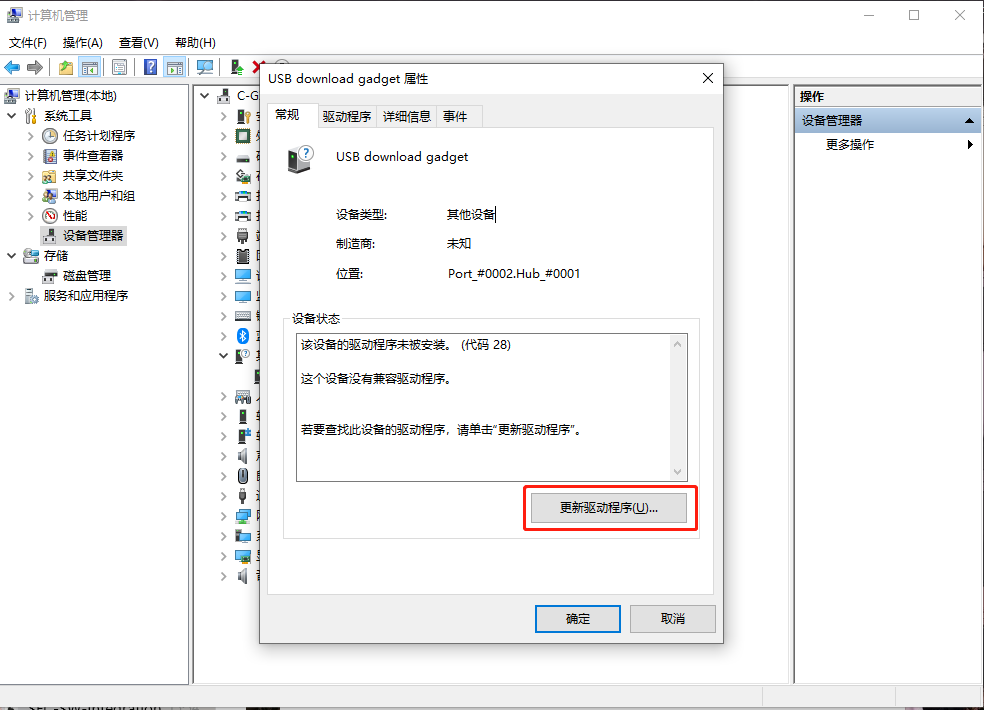
- Select Browse my computer for drivers.
Figure 8. Browse My Computer for Drivers 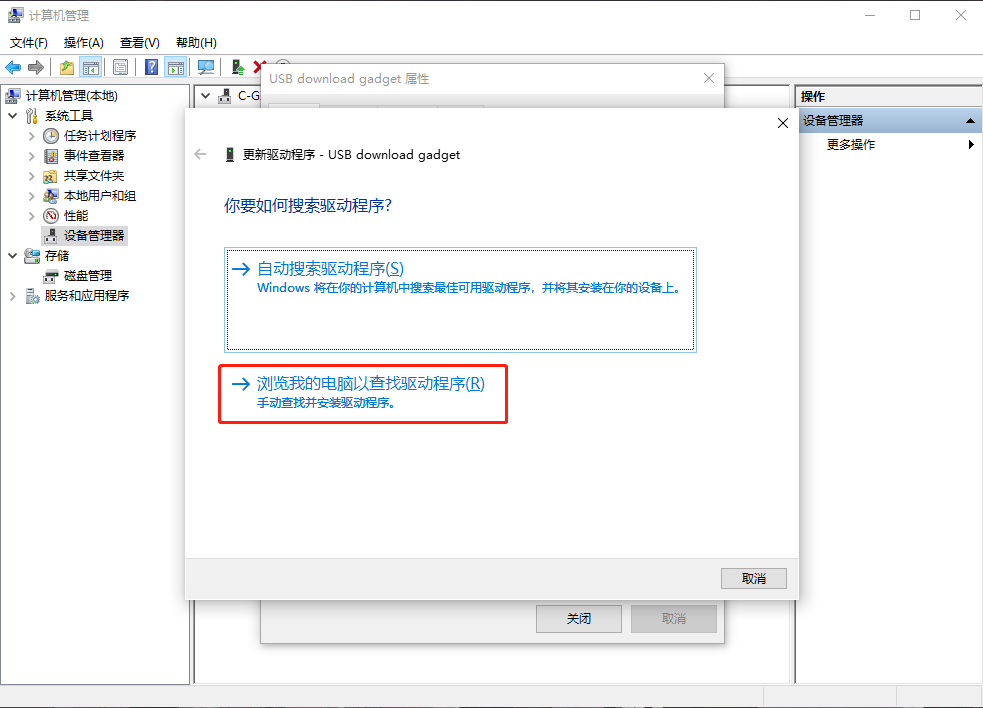
- Add the folder path $\SFFB_Tool_V1.0\usb_driver, and then
click Next to continue the installation.
Figure 9. Add Folder Path 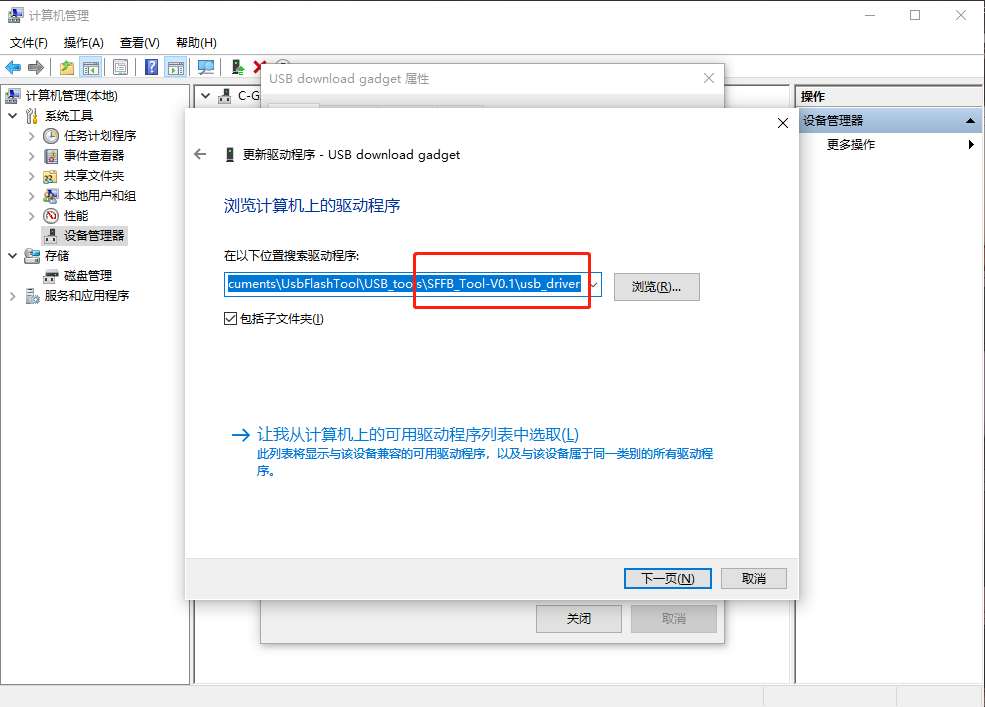
The following output indicates a successful installation:
Figure 10. Successful Installation 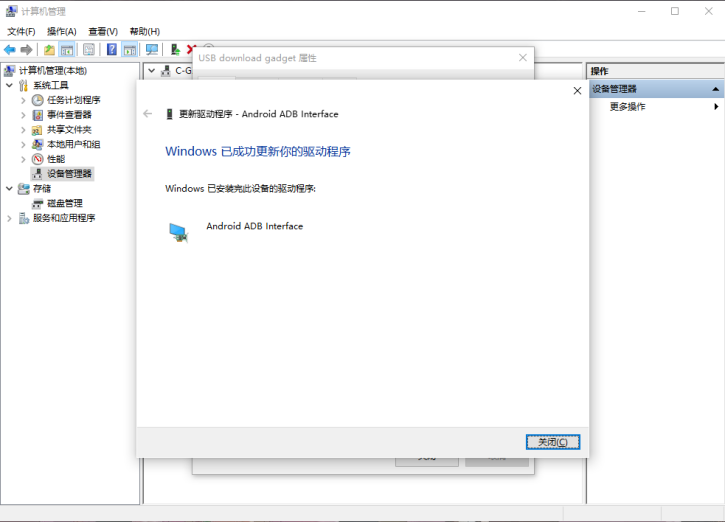
- Verify the installation in Device Manager.
The device name should display under the Device Manager after success installation.
Figure 11. Verification