For Windows
- Log in to your router (usually you need to enter 192.168.1.1 on the web browser to enter the router).
-
Go to DHCP configuration and find the IP address of the VisionFive
2.
Tip: You can easily find the IP address of the VisionFive 2 by referring to its hostname, starfive.
-
Download and install Putty by visiting this link.
Tip: Putty is an SSH and telnet client through which you can connect to the Carrier Board. You can skip this step if you already have Putty installed.
- Open Putty to log in to Debian.
- Select SSH under the Connection Type.
-
Configure the settings as follows:
-
Host Name: IP address of your VisionFive 2
-
Port: 22
-
- Click Open.
-
(Optional) Decide the user account. If you need to use the root
account for privileged operations in remote access, follow the instructions in Using SSH over Ethernet as Root Account.
Note: If you don't need to login as root, skip this step.
-
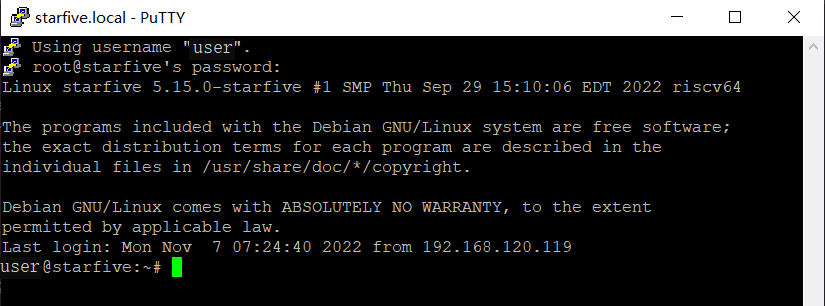
Enter the credentials as follows:
Note: If you want to login as root account, perform the previous step and change the Username as root in the following credentials.
- Username: user
- Password: starfive
Result:Now you have connected with the VisionFive 2 via SSH using windows!
Figure 1. Example Output