Preparations
Hardware Preparation
Make sure you have prepared the following hardware items:
- VisionFive 2
- Micro SD card (32 GB or more)
- USB card reader for your host PC
- PC with Linux/Windows/Mac OS
- Power adapter
- USB Type-C Cable
- For desktop environment usage:
- Keyboard and mouse
- Monitor or TV
- HDMI cable
-
Additionally, here are some optional components which you may also need:
- Ethernet LAN cable or a compatible WiFi dongle (ESWIN6600U or AIC8800 module is enabled by default)
- USB to UART Serial converter moduleTip: This is used for system recovery via UART boot mode.
Connect a Fan to VisionFive 2
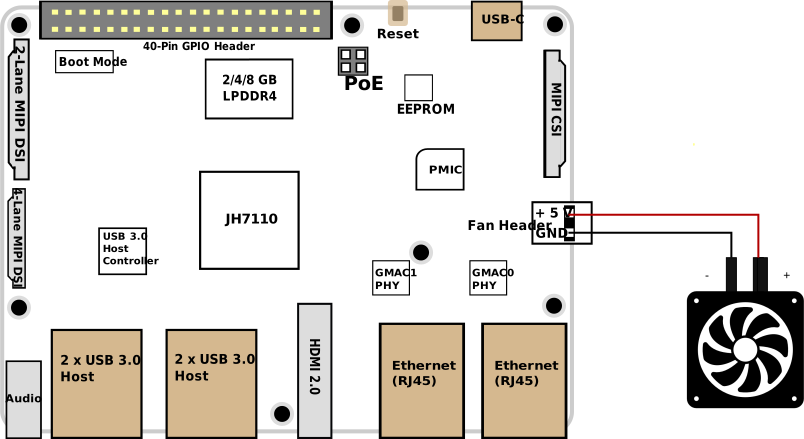
For further cooling, you can connect a 2-pin 5 V fan to VisionFive 2 as follows:
Determine Boot Mode
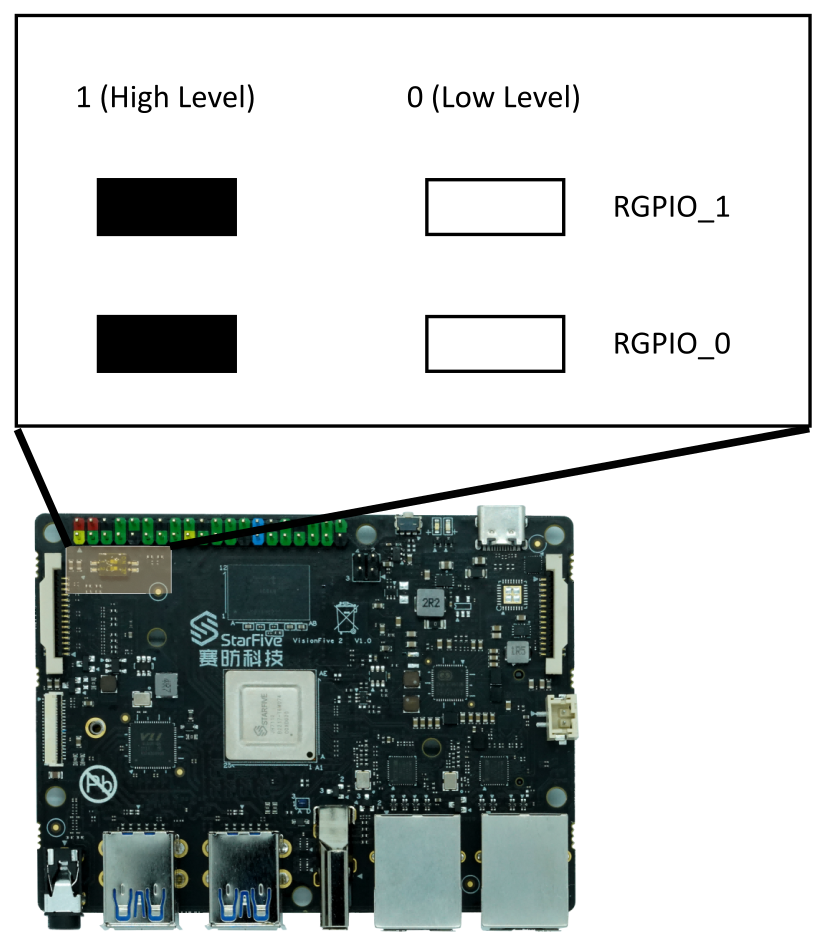
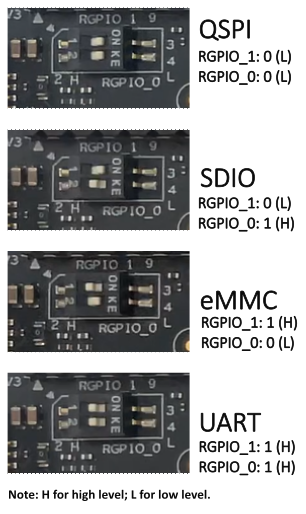
VisionFive 2 provides pins to determine the boot mode before it is powered up. The following table lists the available boot modes.
| Index | Boot Mode | RGPIO_1 | RGPIO_0 |
|---|---|---|---|
| 1 | 1-bit QSPI Nor Flash | 0 (L) | 0 (L) |
| 2 | SDIO3.0 | 0 (L) | 1(H) |
| 3 | eMMC | 1 (H) | 0 (L) |
| 4 | UART | 1 (H) | 1 (H) |
StarFive recommends that you use 1-bit QSPI Nor Flash mode as there is a low possibility that the VisionFive 2 may fail to boot in eMMC or SDIO3.0 boot mode. Try restarting the VisionFive 2 if it fails to boot in eMMC or SDIO3.0 boot mode.
The following figures display the location and the pin definitions of the boot mode settings.