Compile U-Boot to Create Boot Files
This section provides instructions to compile U-Boot to create two boot files: the SPL
firmware image (u-boot-spl.bin.normal.out) and the main firmware payload
image (visionfive2_fw_payload.img).
Install Compiler
- Execute the following commands to install the
riscv64-linux-gnu-gcccompiler from Ubuntu packages.sudo apt update sudo apt upgrade sudo apt install gcc-riscv64-linux-gnu - Execute the following command to check the version of the riscv64-linux-gnu-gcc.
The output is as follows:riscv64-linux-gnu-gcc -vFigure 1. gcc Version 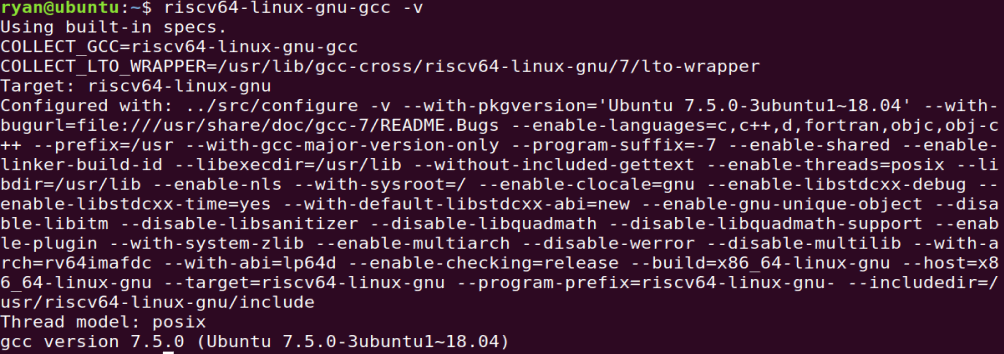
Compile U-Boot
- Locate your desired directory to store the U-Boot files. For example, the home
directory.
cd ~ # <U-Boot directory> - Download the source code for U-Boot
compilation.
git clone https://github.com/starfive-tech/u-boot.git - Switch to the code branch by executing the following
command:
cd u-boot git checkout -b JH7110_VisionFive2_devel origin/JH7110_VisionFive2_devel git pull - Type the following to compile U-Boot under the U-Boot
directory.
make <Configuration_File> ARCH=riscv CROSS_COMPILE=riscv64-linux-gnu-
make ARCH=riscv CROSS_COMPILE=riscv64-linux-gnu-
where,
The following 3 files are generated in the U-Boot directory after the U-Boot compilation:Configuration_Fileisstarfive_visionfive2_defconfig.u-boot.bin: To be used for OpenSBI compilationarch/riscv/dts/starfive_visionfive2.dtb: VisionFive 2 device tree file, to be used for OpenSBI compilationspl/u-boot-spl.bin: U-Boot Secondary Program Loader file, to be used for SPL file creation
Compile OpenSBI

- Locate your desired directory to store the OpenSBI files. For example, the home
directory.
cd ~ # <OpenSBI directory> - Download the source code for OpenSBI
compilation.
git clone https://github.com/starfive-tech/u-boot.git - Change to the OpenSBI directory. Type the following to compile
OpenSBI.
cd <OpenSBI directory>
make ARCH=riscv CROSS_COMPILE=riscv64-linux-gnu- PLATFORM=generic FW_PAYLOAD_PATH=${U_BOOT_PATH}/u-boot.bin FW_FDT_PATH=${U_BOOT_PATH}/arch/riscv/dts/starfive_visionfive2.dtb FW_TEXT_START=0x40000000
After the OpenSBI compilation, the
fw_payload.binfile is generated in the<OpenSBI directory>/build/platform/generic/firmwaredirectory, and the size is larger than 2 M.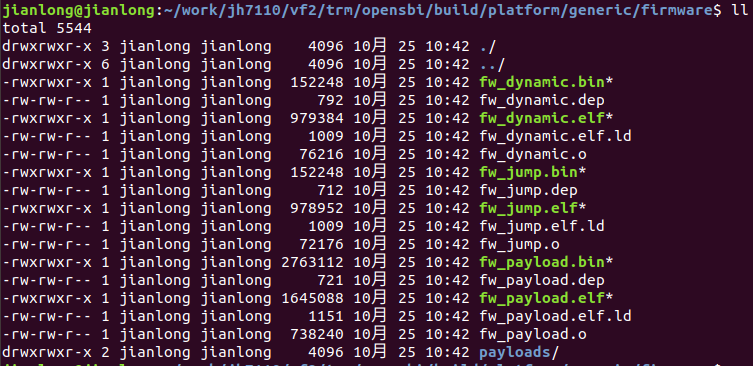
Create SPL Firmware Image
u-boot-spl.bin.normal.out).- Locate your desired directory to store the tools files. For example, the home
directory.
cd ~ # <Tools directory> - Download the tools source
code.
git clone https://github.com/starfive-tech/Tools - Switch to the code branch by executing the following
command:
cd Tools git checkout master git pull - Run the following to generate SPL tool files under the spl_tool
directory:
cd spl_tool/ make - Run the following to generate the SPL
file:
./spl_tool -c -f ${U_BOOT_PATH}/spl/u-boot-spl.binA new file named
u-boot-spl.bin.normal.outis generated under{U_BOOT_PATH}/splTo flash this file, see Update SPL and U-Boot of Flash.Figure 3. Example Output 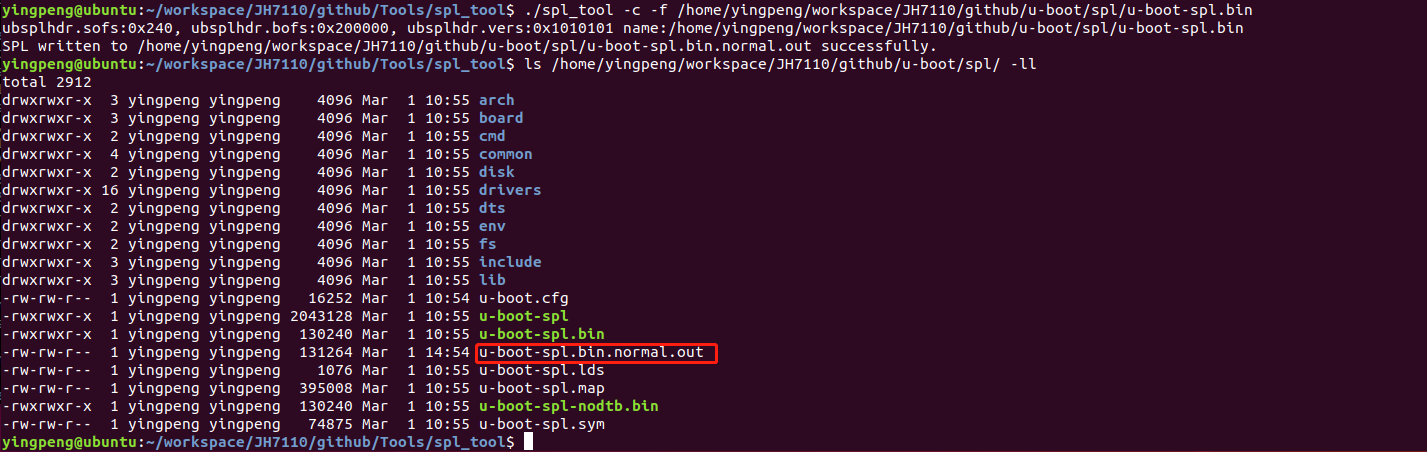
Create Main Firmware Payload Image
- Change to the
<Tools directory>/uboot_itsdirectory.cd<Tools directory>/uboot_its - Copy the
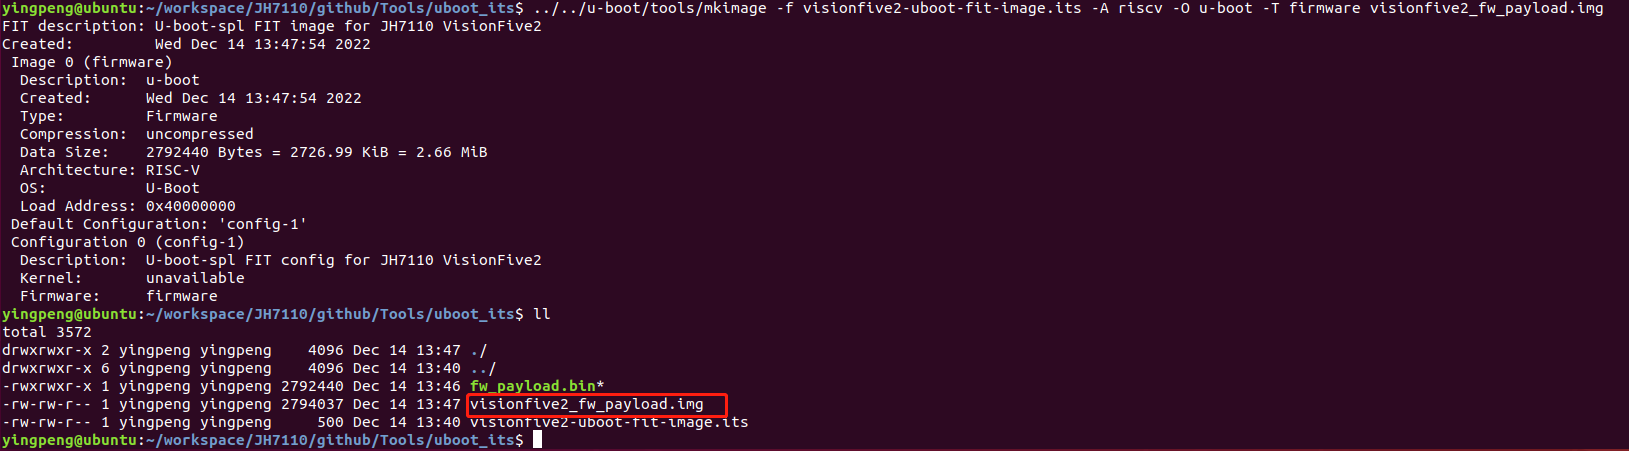
fw_payload.binfile from the<opensbi directoy>/build/platform/generic/firmwaredirectory to the<Tools directory>/uboot_itspath.cp ${OPENSBI_PATH}/build/platform/generic/firmware/fw_payload.bin ./ - Run the following to create the
fw_payloadfile under theuboot_itsdirectory.${U_BOOT_PATH}/tools/mkimage -f visionfive2-uboot-fit-image.its -A riscv -O u-boot -T firmware visionfive2_fw_payload.imgA new file named
visionfive2_fw_payload.imgis generated. To flash this file, see Update SPL and U-Boot of Flash.