Port rootfs, Kernel, and dtb into VisionFive 2
Port the rootfs, kernel, and dtb images into VisionFive 2 using either a micro-SD card or an Ethernet cable.
Preparation
Move the compiled rootfs, kernel, and dtb images into the same directory.
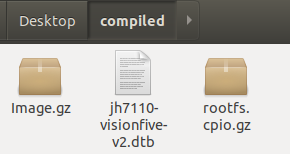
Port using Micro-SD Card
To port the rootfs, kernel, and dtb images into VisionFive 2 with a micro-SD card:
- Insert a micro-SD card to the host PC.
- Run the following ro obtain the location of the connected micro-SD
card.
lsblk - Run the following to enter the partition
configuration.
sudo gdisk /dev/sdb - Delete the original partition and create a new partition by entering the following
subsequently.
d--->o--->n--->w--->y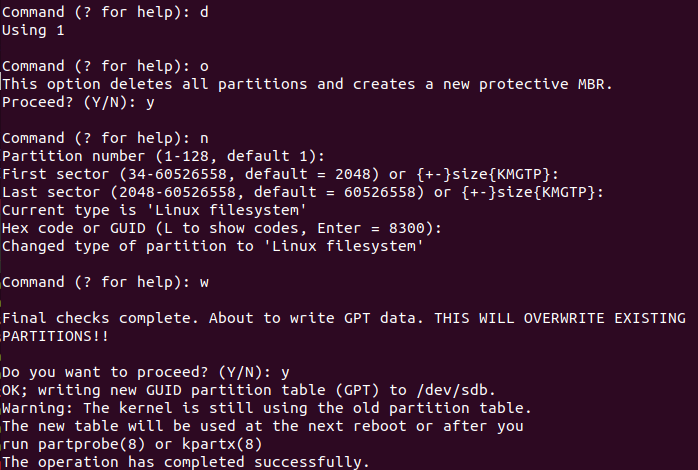
- Format the micro-SD card and create the file
system.
sudo mkfs.vfat /dev/sdb1 - Remove the micro-SD card from PC and plug again to mount it.
- Run the following to check whether it gets
mounted.
You can see an output like the following. Take a note of the mount location.df -h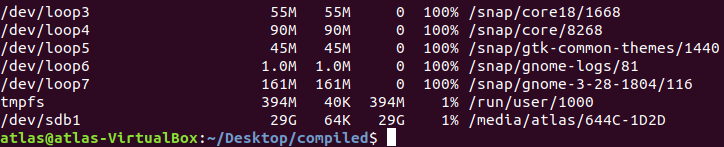
- Navigate to the directory that contains the rootfs file system package, kernel, and dtb.
- Copy the files to the micro-SD
card.
sudo cp Image.gz <Mount_Location> sudo cp rootfs.cpio.gz <Mount_Location> sudo cp <dtb_File_Name> <Mount_Location> syncwhere,- <Mount_Location> is the location you noted down in 7.
- <dtb_File_Name> is the device tree file name. For details about VisionFive 2 device tree files, see Load Specific Device Tree at Startup.
- Remove the micro-SD card from PC, insert into VisionFive 2, and turn it on.
- Open minicom while USB to Serial Adapter is connected between VisionFive 2 and PC, and
wait until the board enters U-Boot mode. You can see the following output when it
is in U-Boot mode.

- Run the
following:
setenv kernel_comp_addr_r 0xb0000000;setenv kernel_comp_size 0x10000000; fatls mmc 1:1 fatload mmc 1:1 ${kernel_addr_r} Image.gz fatload mmc 1:1 ${fdt_addr_r} jh7110-visionfive-v2.dtb fatload mmc 1:1 ${ramdisk_addr_r} rootfs.cpio.gz run chipa_set_linux; booti ${kernel_addr_r} ${ramdisk_addr_r}:${filesize} ${fdt_addr_r} - Log in using the credentials:
root/starfive.
Port using Ethernet Cable
To port the rootfs, kernel, and dtb images into VisionFive 2 with an Ethernet cable:
- Connect an Ethernet cable from the RJ45 port of VisionFive 2 to a router, connect serial adapter cable, and power on the board.
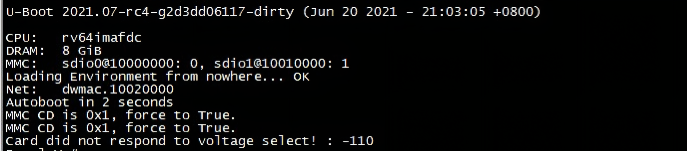
- Open minicom and wait until the board enters U-Boot mode. You can see the following
output when it is in U-Boot mode.
- Run the following to set U-Boot environment
variables.
setenv serverip 192.168.125.142;setenv ipaddr 192.168.125.200;
setenv hostname starfive;setenv netdev eth0;
setenv kernel_comp_addr_r 0xb0000000;setenv kernel_comp_size 0x10000000;
setenv bootargs console=ttyS0,115200 earlycon=sbi root=/dev/ram0 stmmaceth=chain_mode:1 loglevel=8
By default, the IP of a router is 192.168.120.1. In this case, the IP assigned by the DHCP server of the router is used as the server IP, and VisionFive 2 IP 192.168.120.xxx is used. If your router IP is different (for example, 192.168.2.1), the server and VisionFive 2 should follow the IP format of 192.168.2.xxx.
- Check the connectivity by pining the host PC from VisionFive 2. For
example,
ping 192.168.120.12If you see the output like the following, the communication between the host PC and VisionFive 2 is established on the same network.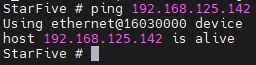
- Install a TFTP server on the host
PC.
sudo apt-get update sudo apt install tftpd-hpa - Check the status of the
server.
sudo systemctl status tftpd-hpa - Run the following to enter the TFTP server
configuration.
sudo nano /etc/default/tftpd-hpa - Configure the TFTP server.
where,TFTP_USERNAME="tftp" TFTP_DIRECTORY="/home/user/Desktop/compiled" TFTP_ADDRESS=":69" TFTP_OPTIONS="--secure"TFTP_DIRECTORYis the directory where rootfs file system package, kernel and dtb images are stored. - Restart the TFTP
server.
sudo systemctl restart tftpd-hpa - Type the following inside the U-Boot mode of VisionFive 2 to download the files from
the TFTP server of the host PC and start the
kernel.
tftpboot ${fdt_addr_r} <dtb_File_Name>;
tftpboot ${kernel_addr_r} Image.gz;tftpboot ${ramdisk_addr_r} rootfs.cpio.gz;
run chipa_set_linux;
booti ${kernel_addr_r} ${ramdisk_addr_r}:${filesize} ${fdt_addr_r}
For example,tftpboot ${fdt_addr_r} jh7110-visionfive-v2.dtb; tftpboot ${kernel_addr_r} Image.gz; tftpboot ${ramdisk_addr_r} rootfs.cpio.gz; run chipa_set_linux; booti ${kernel_addr_r} ${ramdisk_addr_r}:${filesize} ${fdt_addr_r} - Log in with the credentials:
root/starfive.