Using StarFive Fastboot Tool on Window
Note:
- Always open the software (Fastboot Tool) before powering on the board.
- Automatic FastBoot mode is only triggered during the very first boot of the board. A successfully programmed board will skip this mode on subsequent startups.
- To prevent accidental automatic programming of a new device, click the Reset button to clear the set file path once the current burning session is complete.
- Startup and connection:
Open the software, power on the VisionFive 2 Lite, press any key at the U-Boot prompt to interrupt the boot process and enter the command (
fastboot usb 0).Figure 1. Press Any Key to Stop at U-Boot 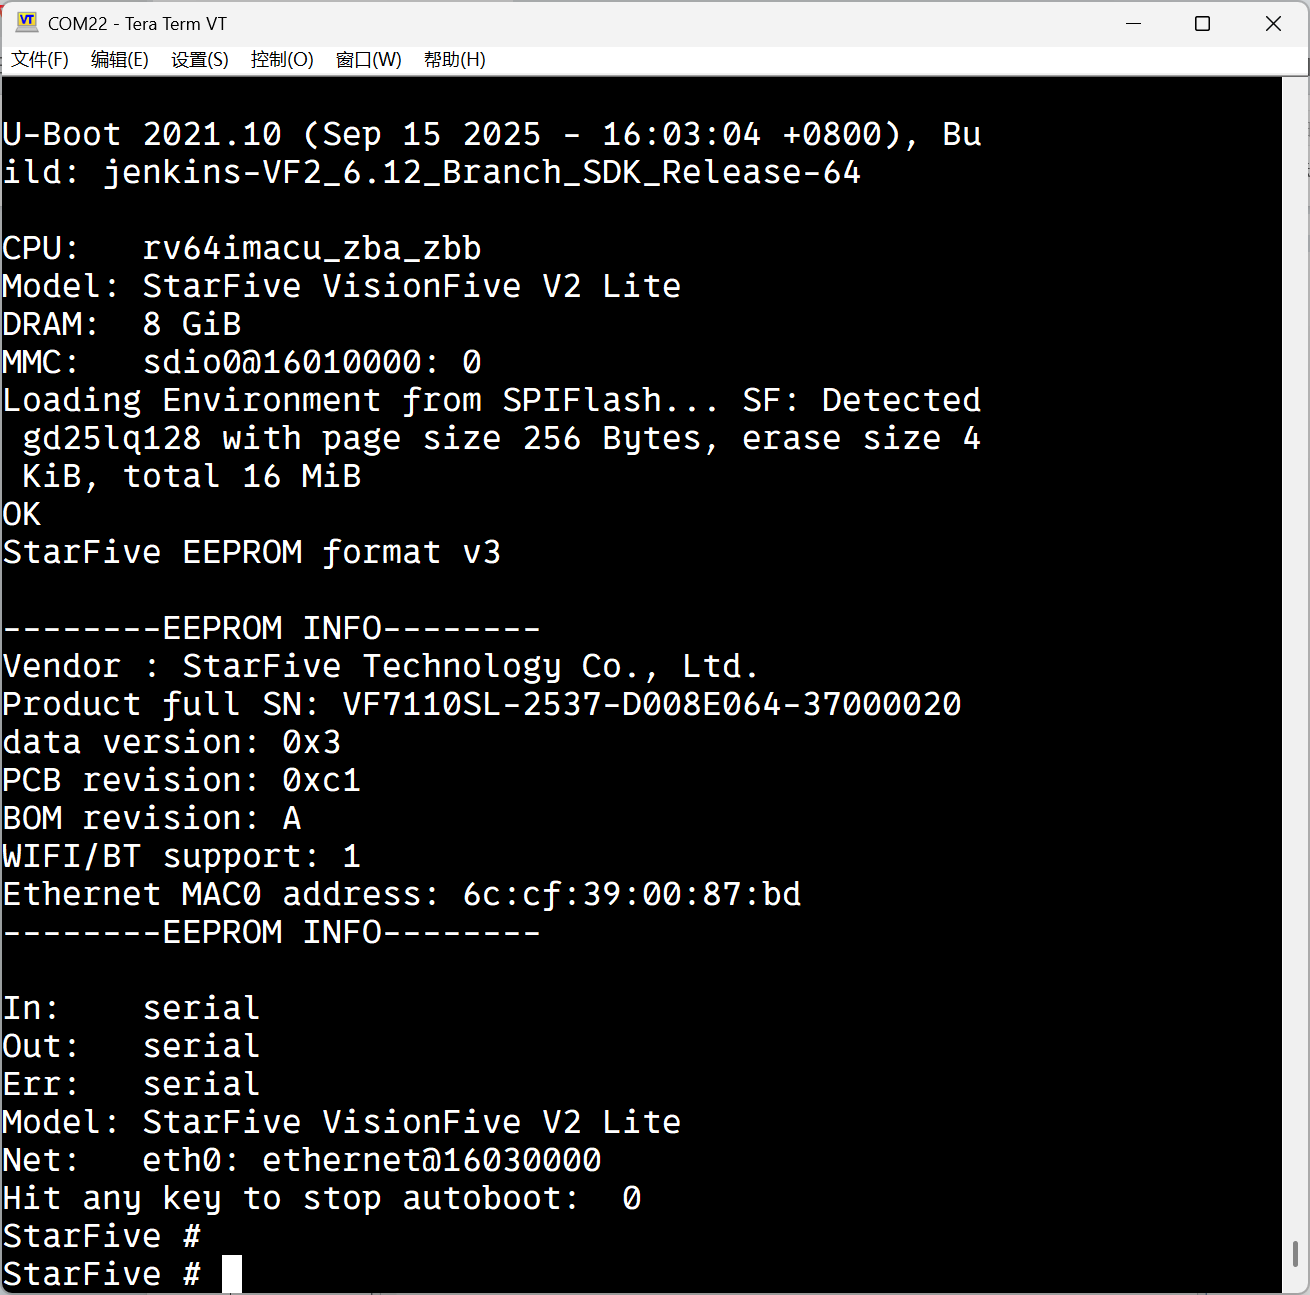
- Select burning mode and file:
- Choose the appropriate burning mode based on your requirements:
- Image: For burning system image files (*.img).
- Kernel: For burning the Linux kernel file (starfive-visionfive2-vfat.part).
- FileSystem: For burning filesystem images (*.ext4).
- Select the corresponding image file (e.g.,
ubuntu-24.03-preinstalled-desktop-riscv64+vf2-lite.img).
Figure 2. Select Image File 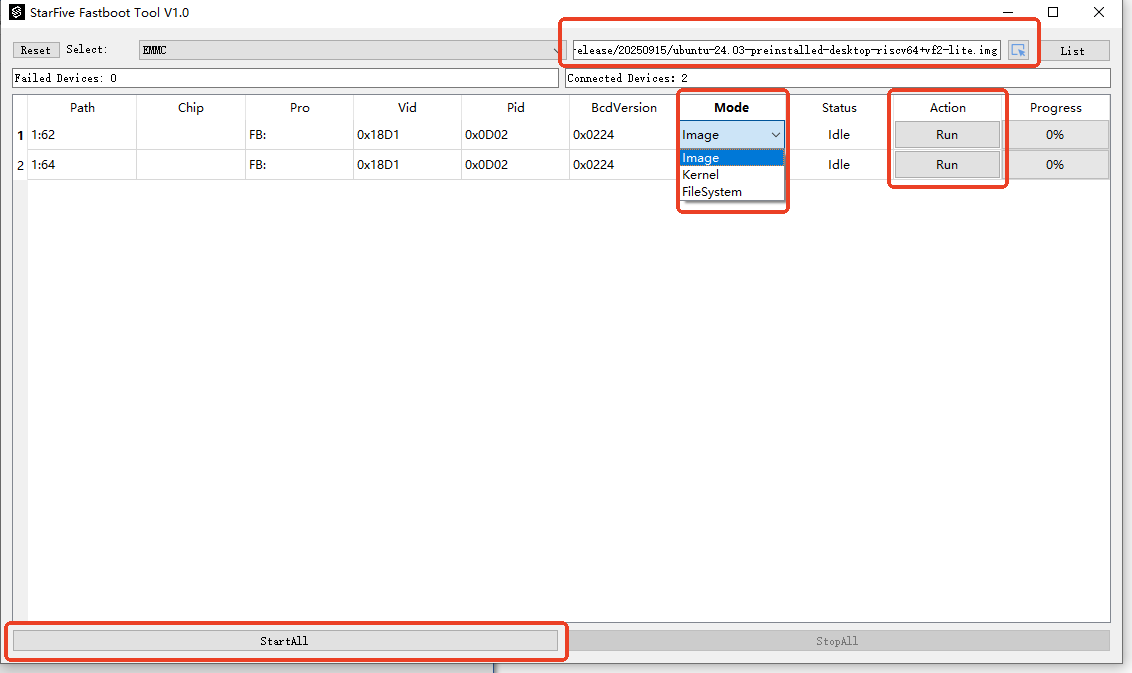
- Choose the appropriate burning mode based on your requirements:
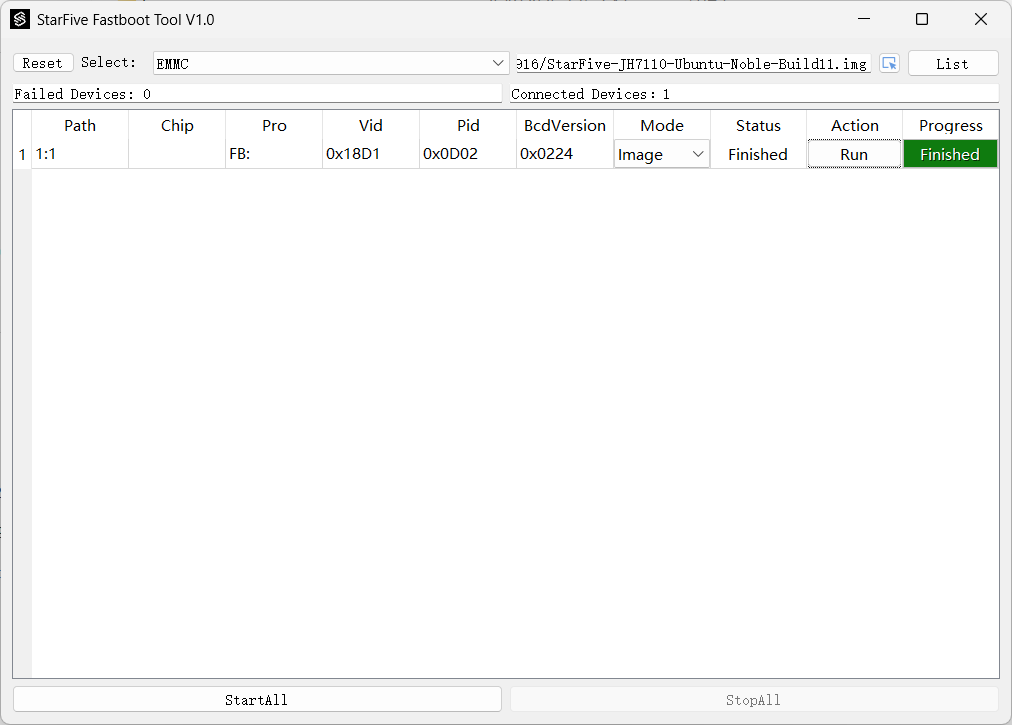
- Start burning by clicking the Run or Start All button to
begin the download. Wait for the progress bar to reach 100%, indicating the burning
process is complete.
Figure 3. Start Burning 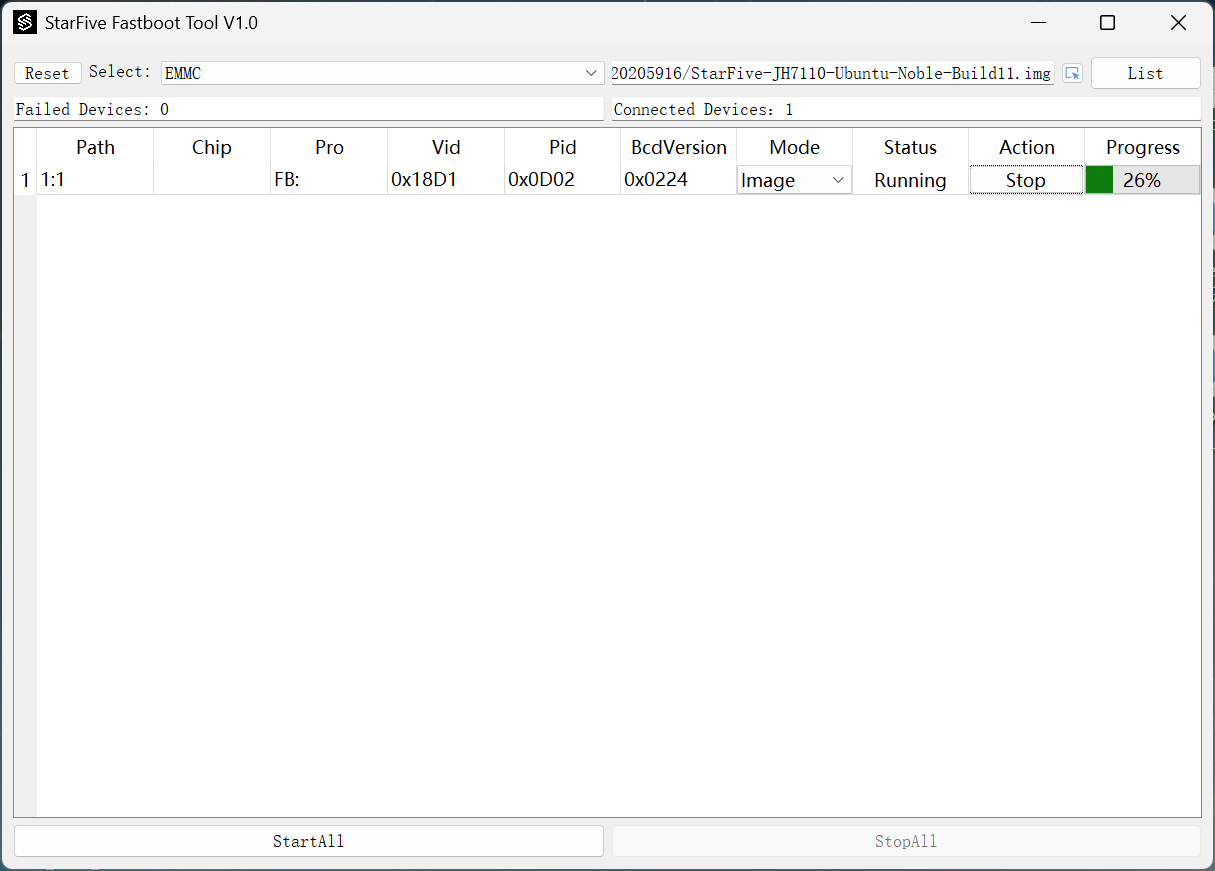
Figure 4. Example Output 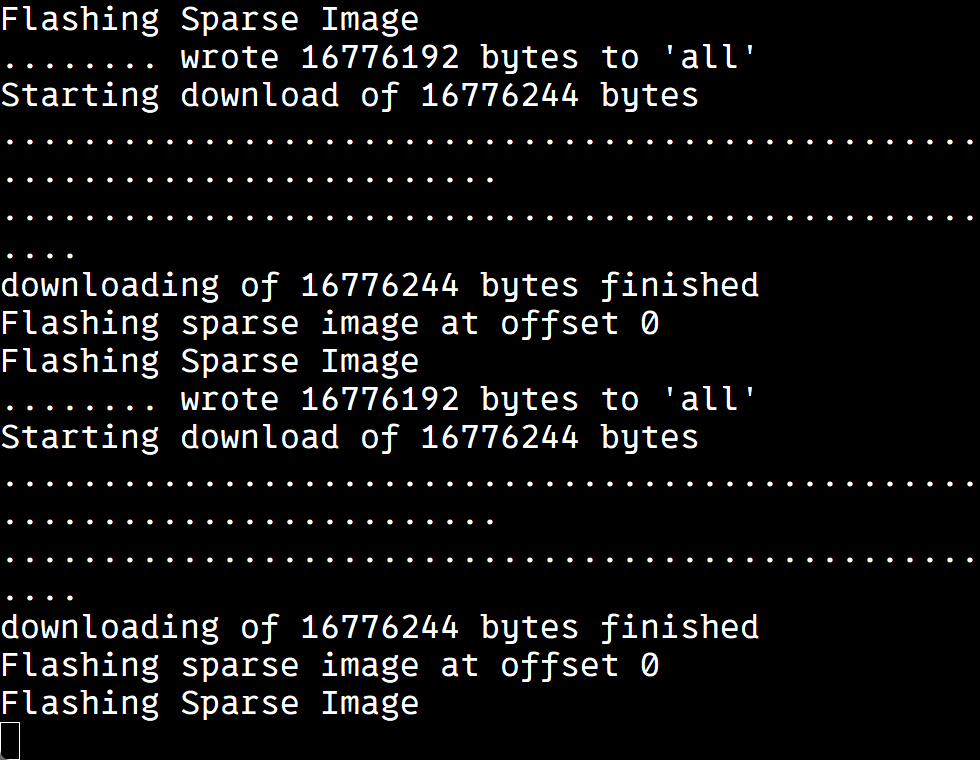
- Once the image is successfully burned, restart the board.