Peripheral Examples
This topic provides examples of using the 40-pin GPIO header to connect to external peripherals.
Run Sense HAT (B) SHTC3 Sensor
This example connects Sense HAT (B) to VisionFive 2 and runs the SHTC3 sensor test
program.
Note: The official libraries of BCM2835, Python, and wiringPi
are not supported. Use the system call is instead.
-
Connect Sense HAT to the 40-pin header of VisionFive 2 as follows.
Figure 1. Connect Sense Hat (B) to the 40-Pin Header 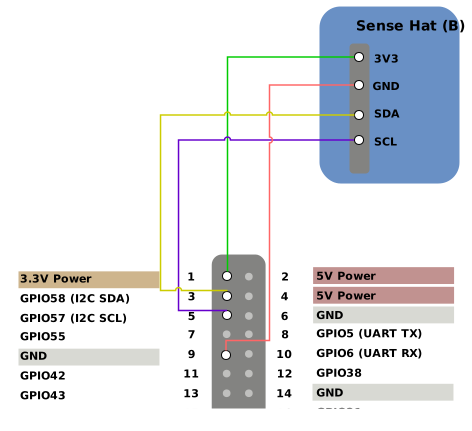
Sense HAT (B) VisionFive 2 Pin Number 3V3 1 GND 9 SDA 3 SCL 5 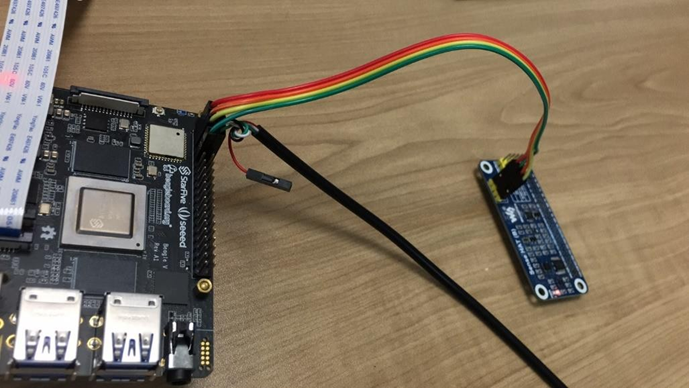
-
Download the source code from
-
(Skip if you already install the compile tool) Install the compile tool. For example:
sudo apt-get install gcc-riscv64-linux-gnu -
Execute the following to compile:
It generates the shtc3 file in the same directory.riscv64-linux-gnu-gcc SHTC3_dev.c -o shtc3 -
Copy the executable code from the shtc3 file to the board, and change the execution permission by executing the following command:
chmod +x shtc3 -
Run the SHTC3 sensor.
The output like the following indicates the execution is successful../shtc3root@starfive:~# ./shtc3 SHTC3 Sensor Test Program ... Fopen : /dev/i2c-0 Temperature = 52.20°C , Humidity = 55.32% Temperature = 23.81°C , Humidity = 55.29% Temperature = 23.79°C , Humidity = 55.30% Temperature = 23.82°C , Humidity = 55.29% Temperature = 23.81°C , Humidity = 55.29% Temperature = 23.82°C , Humidity = 55.30%
Run 2.4inch LCD Module
This example connect the 2.4inch LCD Module to VisionFive 2 and demos how pictures are displayed.
-
Connect the 2.4inch LCD module with the 40-pin header of VisionFive 2.
Figure 2. Connect 2.4inch LCD with 40-Pin Header 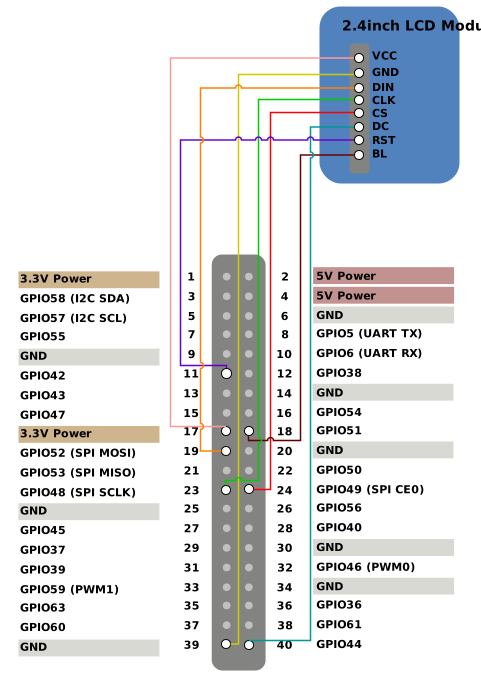
2.4inch LCD Module VisionFive 2 Pin Number VCC 17 GND 39 DIN 19 CLK 23 CS 24 DC 40 RST 11 BL 18 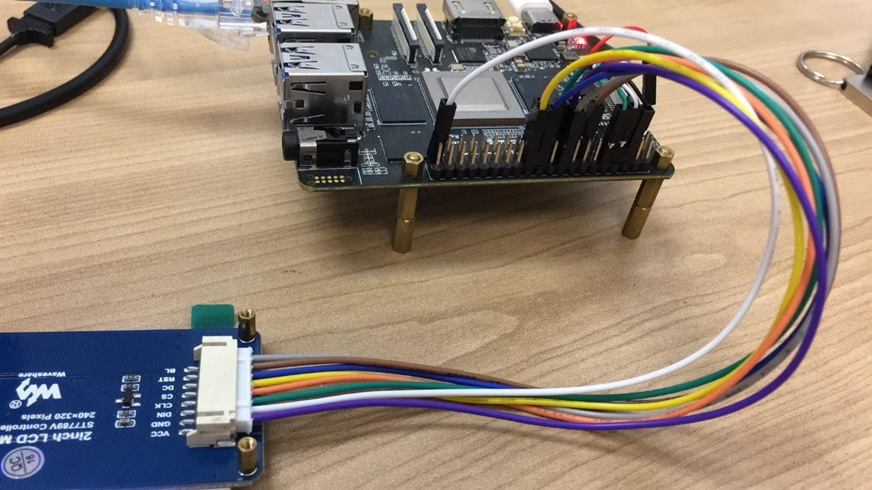
-
Download the source code from
-
Execute the following command to copy the code to the board.
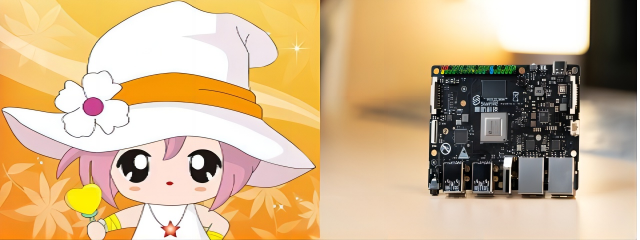
The following two figures will be displayed in turn. One is the photo of VisionFive 2 and the other is the official example figure.tar -xvf LCD_Demo.tar.gz cd visionfive2/ ./main 2.4Figure 3. Example Output