HDMIT Configuration
Configure Kernel Menu for HDMI
-
Under the root directory of freelight-u-sdk, run the following command to enter the kernel menu configuration GUI.
make linux-menuconfig -
Enter the Device Drivers menu.
-
Enter the Graphics support menu.
-
In the Graphics support menu, select the DRM Support option.
Figure 1. DRM Support for VeriSilicon 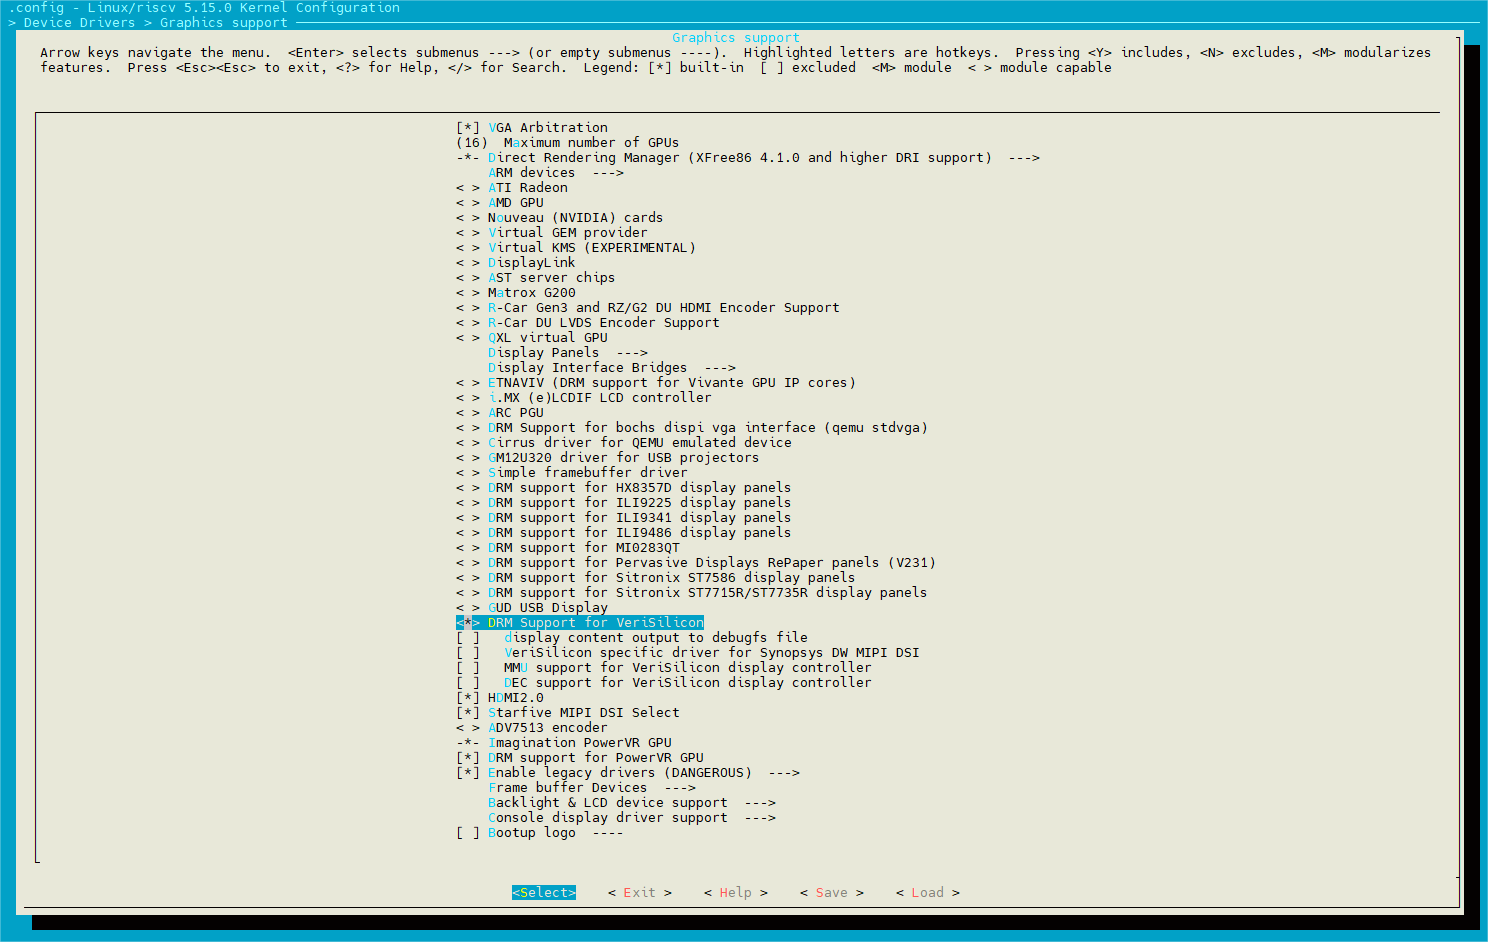
-
In the Graphics support menu, select the HDMI2.0 option.
-
Save your change and exit the kernel configuration dialog.
Configure Kenel Menu for Test Program
-
Under the root directory of freelight-u-sdk, run the following command to enter the kernel menu configuration GUI.
make linux-menuconfig -
Enter the Target packages menu.
-
Enter the Libraries > Graphics > libdrm menu.
-
In the libdrm menu, select the Install test programs option.
You can see the modetest tool in the kernel for testing.
-
Save your change and exit the kernel configuration dialog.
Board-level Configuration
The following code example configures the HDMI driver at the board level, including
enabling the HDMI controller, configuring pinmux, and connecting it to the display
controller.
&hdmi {
	status = "okay";
	pinctrl-names = "default";
	pinctrl-0 = <&inno_hdmi_pins>;

	hdmi_in: port {
		#address-cells = <1>;
		#size-cells = <0>;

		hdmi_in_lcdc: endpoint@0 {
			reg = <0>;
			remote-endpoint = <&dc_out_dpi1>;
		};
	};
};- &hdmi: References the HDMI controller node defined in the SoC’s device tree HDMI Device Tree Source Code.
- status: Enables the HDMI on the board.
- pinctrl-names: Names the pin assigned to HDMI.
- pinctrol-0: Assigns a hardware pin to HDMI.
- hdmi_in: port: Defines a video input port for the HDMI controller.
- hfmi_in_lcdc: endpoint@0: Represents a data connection
point in the video pipeline.
- remote-endpoint: Connects the HDMI controller to the display controller
Debug Display
To debug the display function:
-
Prerequisite: Configure Kenel Menu for Test Program.
-
Run the following command to verify the display function and connection status.
For example,modetest -M starfivemodetest -M starfive -D 0 -a -s <Connector ID>@<CRTC ID>: <Resolution> -P <Plane ID>@<CRTC ID>: <Resolution>@<Format> -Ftiles
Output example 1:
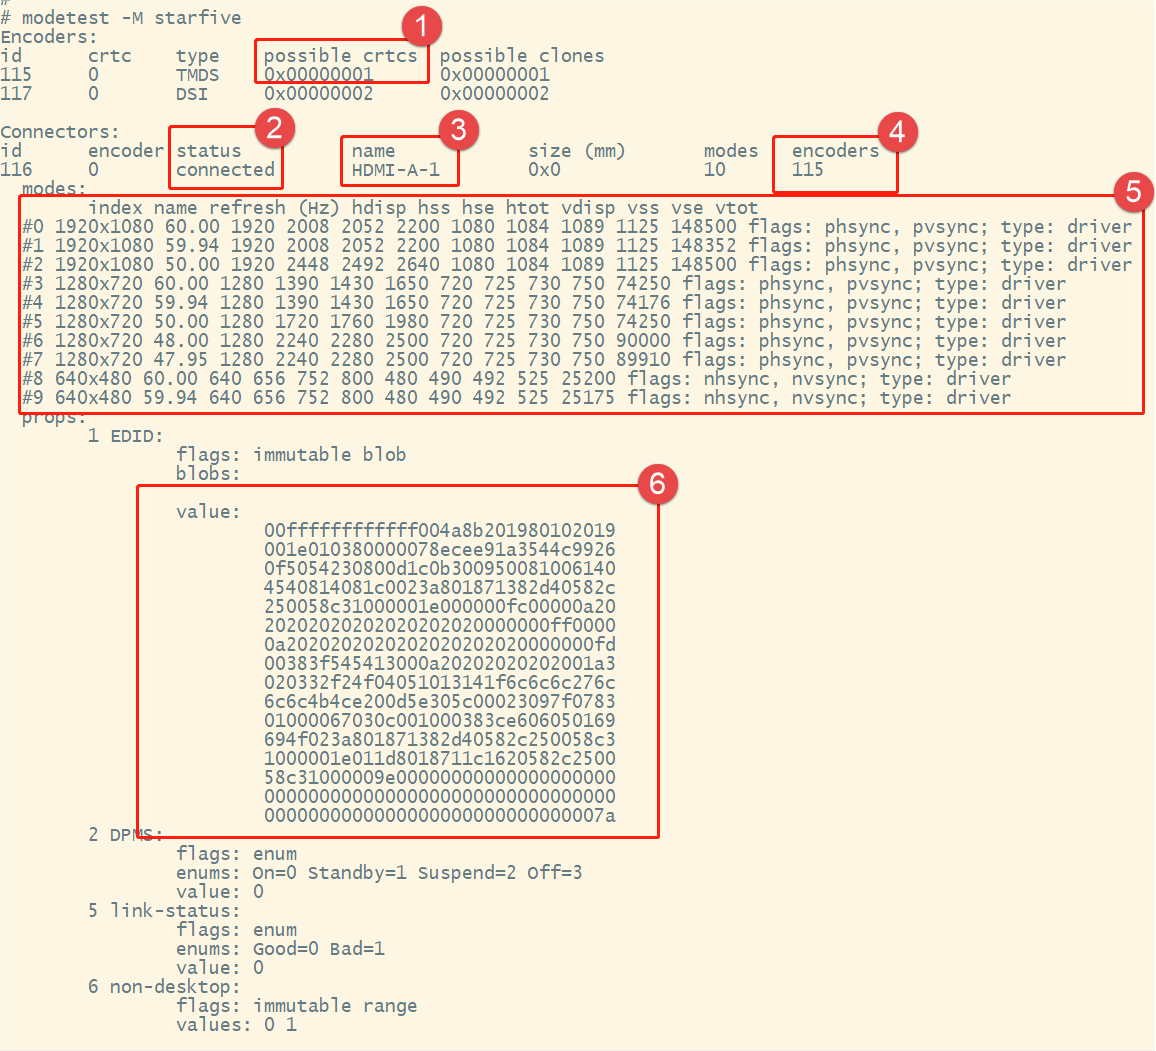
| Legend | Label | Description |
|---|---|---|
| ① | possible crtcs | Available Cathode Ray Tube Controller (CRTC) devices |
| ② | status | Whether the display connector is connected or not |
| ③ | name | The name (type) of the display connector |
| ④ | encoders | The connected encoders |
| ⑤ | modes | The supported display modes |
| ⑥ | value | The Extended Display Identification Data (EDID) of the screen |
Output Example 2
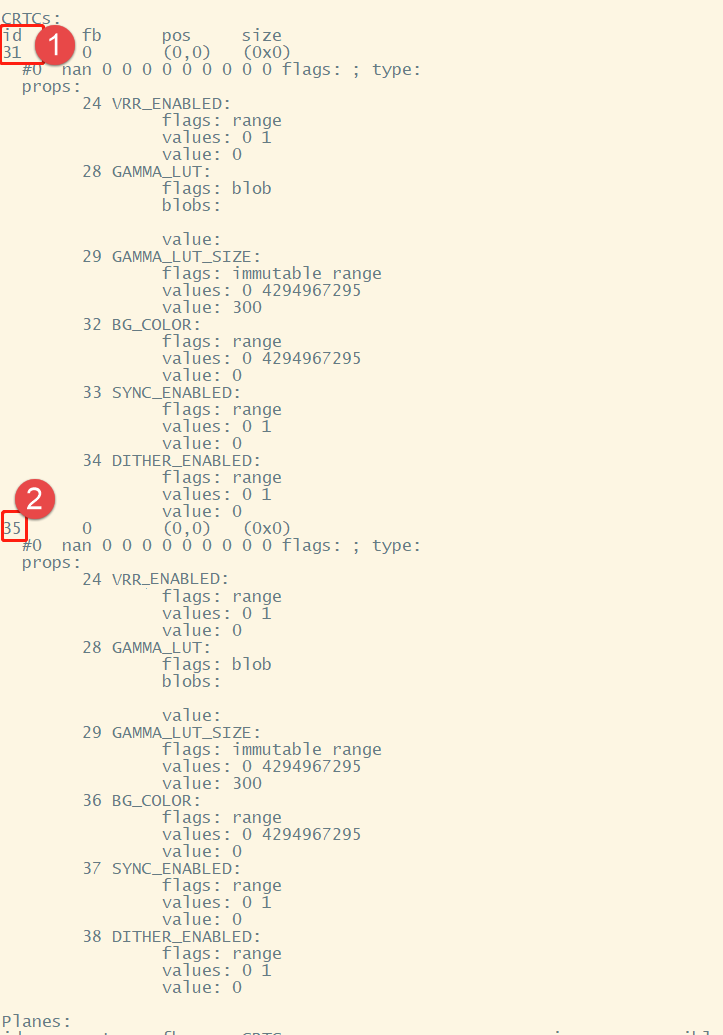
| Legend | Label | Description |
|---|---|---|
| ① | id | The CRTC 0x00000001 mentioned in possible crtcs, which means the CRTC is available for use. |
| ② | id | The CRTC 0x00000002 mentioned in possible crtcs, which means the CRTC is available for use. |
|
Note: If the displayed CRTC is 0x00000003,
both CRTCs are available for use.
|
||
Output Example 3
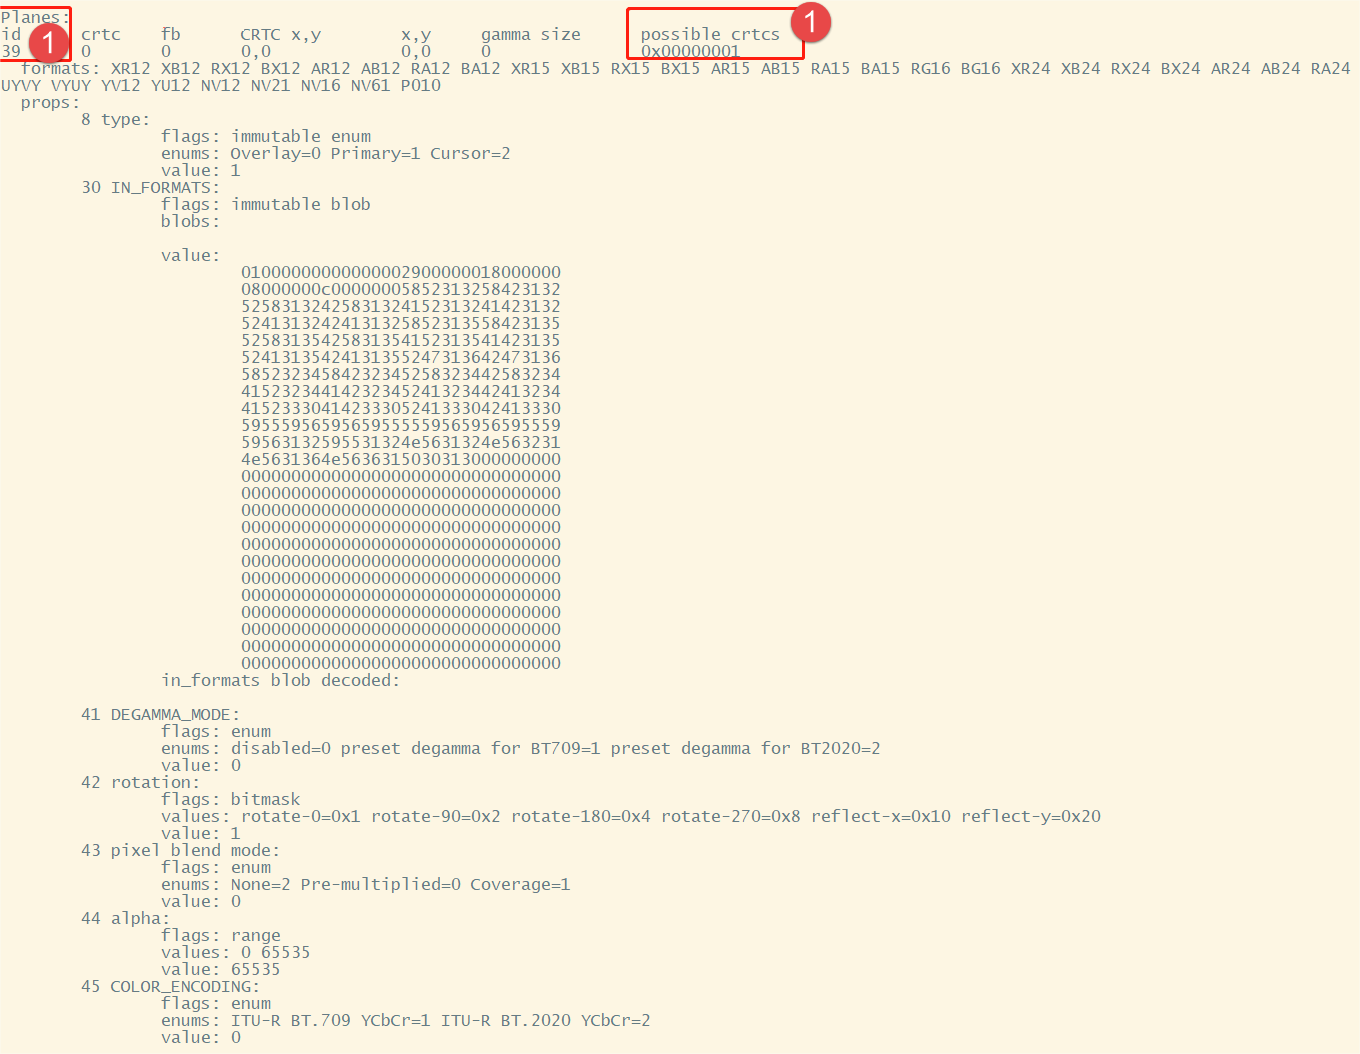
| Legend | Description |
|---|---|
| ① | The CRTC and its connected plane |