U-Boot Configuration
Configure Kernel Menu for U-Boot
Follow the steps below to enable the kernel menu configuration for U-Boot.
- Enter the root directory of the SDK: freelight-u-sdk.
- Run the following command to build the kernel menu configuration dialog.
make uboot-menuconfig
- If you need to enable a function, navigate the menu and select your target option in correspondence with the function.
- Save your change before you exit the kernel configuration dialog.
- Run the
makecommand to generate the bin file.
Note:
You can use
menuconfig to view and edit any a macro
definition in the deconfiguration file as described in Deconfigure Kernel Menu for U-Boot. - Enter the kernel menu configuration dialog.
- Type “/” to enter the search screen.
- Input the keyword of the macro definition which you want to search.
- Edit the macro definition following your need.
Deconfigure Kernel Menu for U-Boot
Follow the steps below to enable the kernel menu deconfiguration for U-Boot.
- Use the following command to open the configuration file (with the
".configuration" extension).
- For JH-7110 EVB:
vim freelight-u-sdk/u-boot/configs/starfive_evb_defconfig
- For VisionFive
2:
vim freelight-u-sdk/u-boot/configs/starfive_visionfive_defconfig
- For JH-7110 EVB:
- Locate your target macro definition item, and use the following approach to
disable the function if needed.
- To disable a function, simply add a "#" ahead of the corresponding macro definition, or change the "y" inline with a macro definition to "n".
Note: You are not allowed to enable a function in the deconfiguation file. If you need to re-enable a disabled function, perform the operation usingmenuconfigas described in Configure Kernel Menu for U-Boot. The deconfiguration file will be updated once you have successfully enabled your target function.The following image shows an example of the configuration file.Note: The example is based on VisionFive 2. If you are working on the JH-7110 EVB, make sure you understand the macro definition you encounter can be different.Figure 1. Deconfiguration File 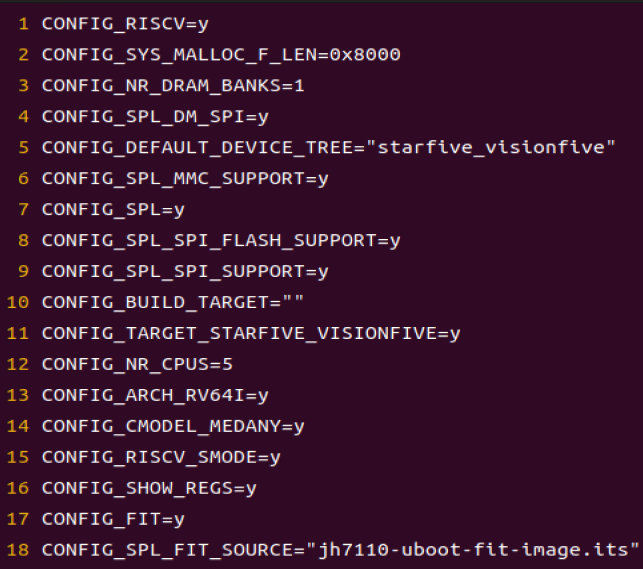
Update Startup Logo
You can change the VisionFive 2 startup logo that is stored in the following path: visionfive/u-boot/tools/logos/starfive.bmp.
- Replace the starfive.bmp with another logo image you
want to display.Note: The logo file must be in bmp format.
- Rename the logo file to starfive.bmp.Note: The file size should not exceed 1500 KB.
- Perform the following steps to recompile the new image:
- Use
cdcommand to back to your u-sdk directory.
where <X> is the path where you store the u-sdk repository on your local drive.cd <X>/visionfive/ - Execute the following command to clean the old
image.
make clean - Execute the following command to recompile the new
image.
make -j8The new images, visionfive2_fw_payload.img and u-boot-sp1.bin.normal.out are generated under work directory.Note: The logo is center display by default, if you want to change the logo display position, you need to change the code.
- Use
- To update the SPL and U-Boot, perform the following steps:
- Prepare the TFTP server. The following is an example command for
Ubuntu
distribution.
sudo apt install tftpd-hpa - Power on VisionFive 2 and wait until it enters the U-Boot command line interface.
- Configure the environment variables by running the following
command:
setenv ipaddr 192.168.120.222;setenv serverip 192.168.120.99 - Check the connectivity by pinging the host PC from VisionFive 2.
- Initialize SPI
flash:
sf probe - Update SPL
binary:
tftpboot ${loadaddr} u-boot-spl.bin.normal.out sf update ${loadaddr} 0x0 $filesize - Update U-Boot
binary:
tftpboot ${loadaddr} visionfive2_fw_payload.img
sf update ${loadaddr}s 0x100000 $filesize
- Prepare the TFTP server. The following is an example command for
Ubuntu
distribution.