GPIO Configuration
Configure Kernel Menus for Pinctrl and GPIO Drivers
-
Under the root directory of freelight-u-sdk, run the following command to enter the kernel menu configuration GUI.
make linux-menuconfig -
Enter the Device Drivers menu.
-
Enter the Pin controllers menu.
Figure 1. Pin Controllers 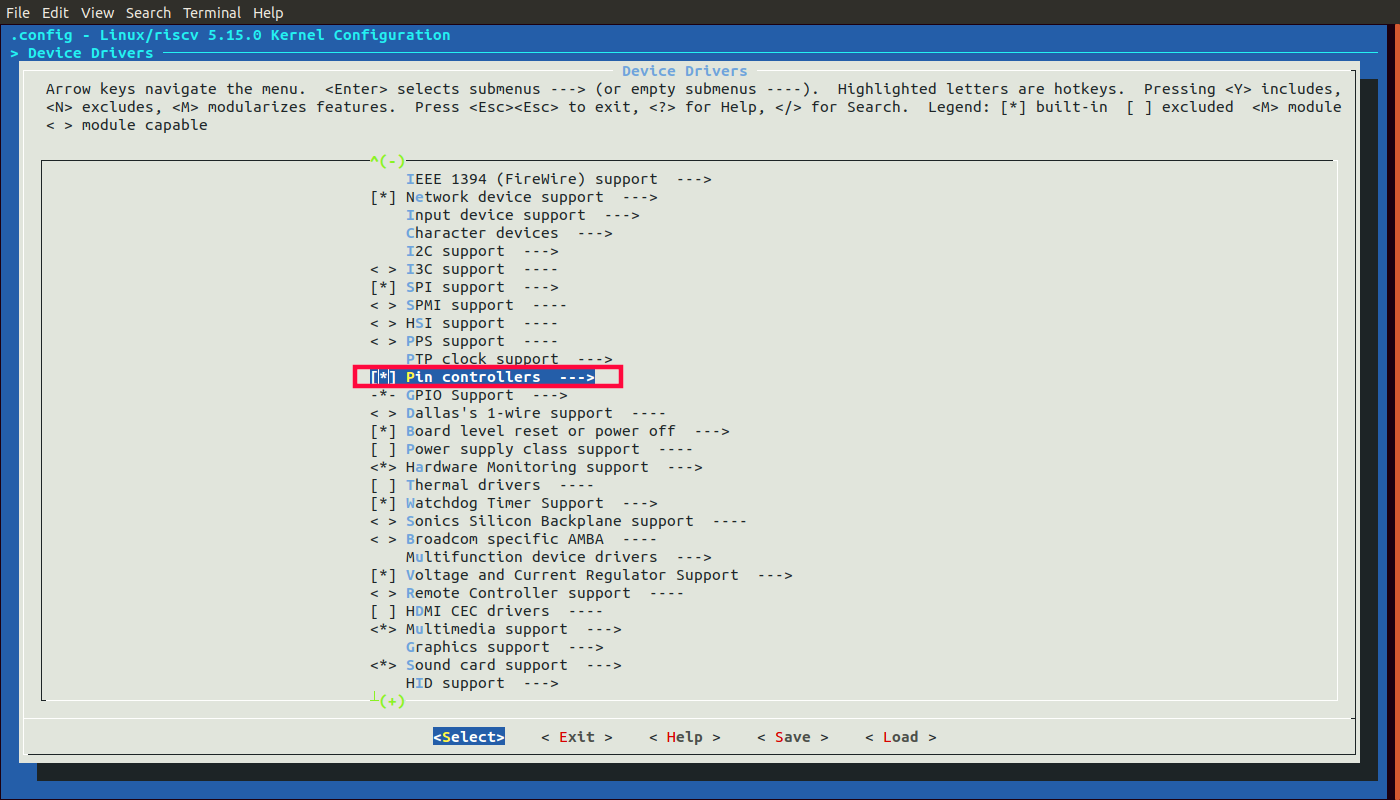
-
To enable the pinctrl driver, select the Pinctrl driver for StarFive SoC option. To enable the GPIO driver, select the Pinctrl and GPIO driver for StarFive JH7110 SoC option.
Figure 2. Driver Menu 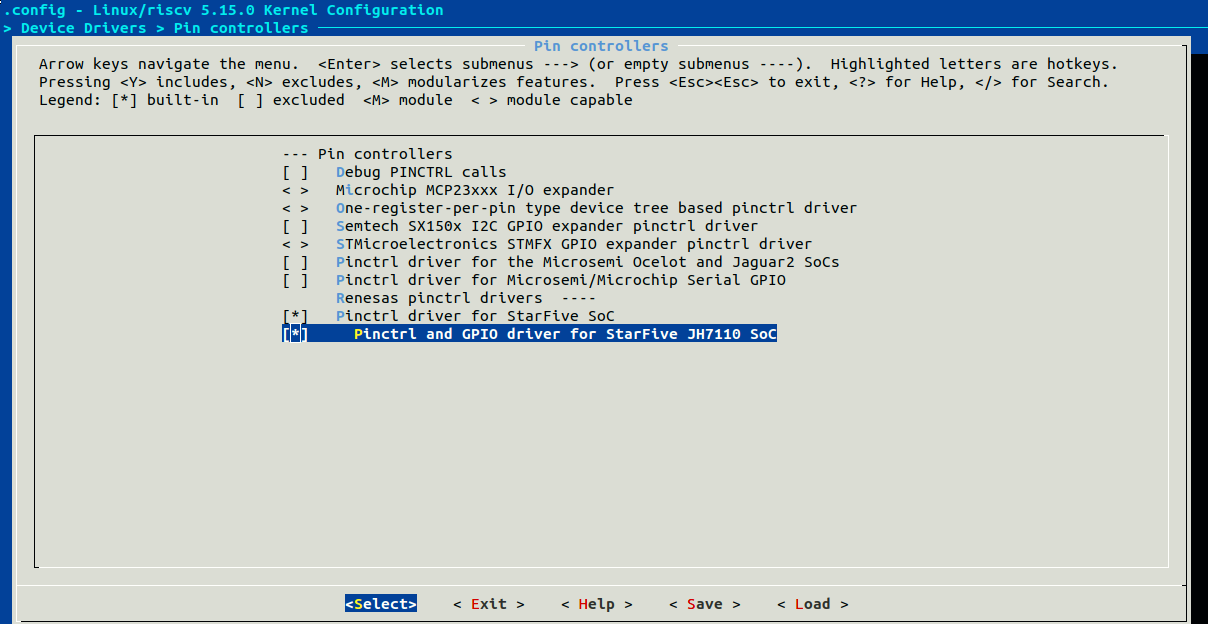
-
Save your change and exit the kernel configuration dialog.
Verify GPIO Driver
After system boot-up, you can run the following commands to verify if the GPIO driver
is working properly.
# cd /sys/class/gpio/
# ls
export	gpiochipO	gpiochip64	unexport
# echo 44 > export
# ls
export	gpio44	gpiochipO	gpiochip64	unexport
# cd gpio44/
# ls
active_low	direction	subsystem	value
device	edge	uevent
# cat direction
in
# cat value
1
Board-level Configuration
The following code example configures two SoC pins (GPIO5 and GPIO6) to act as the
UART0 serial port (TX/RX) with correct pin functions, direction, bias, and
electrical settings. It is a child of the board’s top-level &gpio pin
controller.
&gpio {
        uart0_pins: uart0-pins {
                uart0-pins-tx {
                        sf,pins = <PAD_GPIO5>;
                        sf,pin-ioconfig = <IO(GPIO_IE(1) | GPIO_DS(3))>;
                        sf,pin-gpio-dout = <GPO_UART0_SOUT>;
                        sf,pin-gpio-doen = <OEN_LOW>;
                };

                uart0-pins-rx {
                        sf,pins = <PAD_GPIO6>;
                        sf,pinmux = <PAD_GPIO6_FUNC_SEL 0>;
                        sf,pin-ioconfig = <IO(GPIO_IE(1) | GPIO_PU(1))>;
                        sf,pin-gpio-doen = <OEN_HIGH>;
                        sf,pin-gpio-din =  <GPI_UART0_SIN>;
                };
        };
};
Parameters:
- pins: Which physical pin is used for UART0 TX
- pinmux: Pin mux function select
- pin-ioconfig: Input enable and drive strength setting
- pin-gpio-dout: Output connection
- pin-gpio-doen: output enable