LED Dot Matrix Display
This section describes how to use VisionFive 2 or VisionFive 2 Lite's GPIO pins for LED dot matrix display. The MAX7219 module is used in this demo program to show how it displays the StarFive logo through an example program with Python.
Hardware Setup
Connect the MAX7219 module to the 40-pin header of VisionFive 2 or VisionFive 2 Lite as follows.
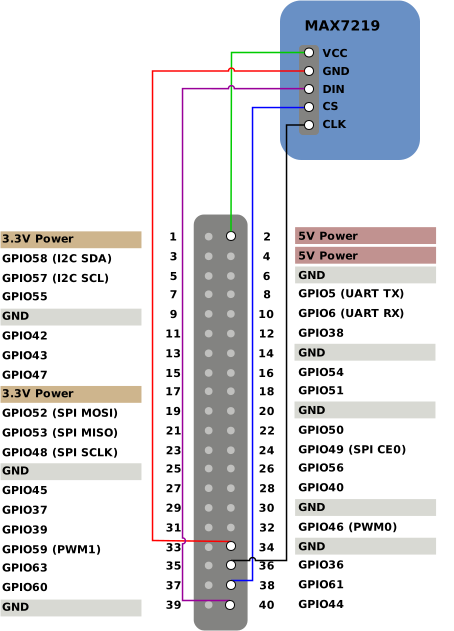
| MAX7219 | 40-Pin GPIO Header | |
|---|---|---|
| Pin Number | Pin Name | |
| VCC | 2 | 5V Power |
| GND | 34 | GND |
| DIN | 40 | GPIO44 |
| CS | 38 | GPIO61 |
| CLK | 36 | GPIO36 |
Run Demo Code
Perform the following steps on Debian of VisionFive 2 or VisionFive 2 Lite.
-
Locate the directory where the test code,
LED_Matrix.py, exists.-
Source into the PYthon3 Virtual Environment.
source ./myvenv/bin/activate -
Install the dependency.
python3 -m pip install pillow -
Get the directory where
VisionFive.gpioexists.python3 -m pip show VisionFive.gpioNote: The output depends on how the application is installed. -
Enter the
VisionFive.gpiodirectory.cd <VisionFive.gpiodirectory> -
Enter the
sample-codedirectory.cd ./VisionFive/sample-code/
-
Under the
sample-codedirectory, execute the following command to run the demo code.
Alternatively, you can also run the following command.sudo python LED_Matrix.pysudo python3 LED_Matrix.pyThe LED Matrix module displays the "S" logo.Figure 2. S Logo 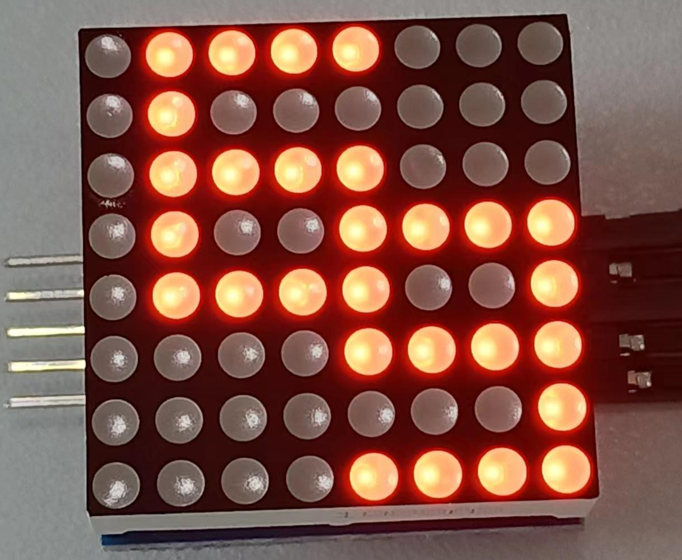 Note: For details about the source code, see LED_Matrix.py Source Code.
-
(Optional) Exit the Python3 Virtual Environment.
deactivate