Detect Objects
Hardware Setup
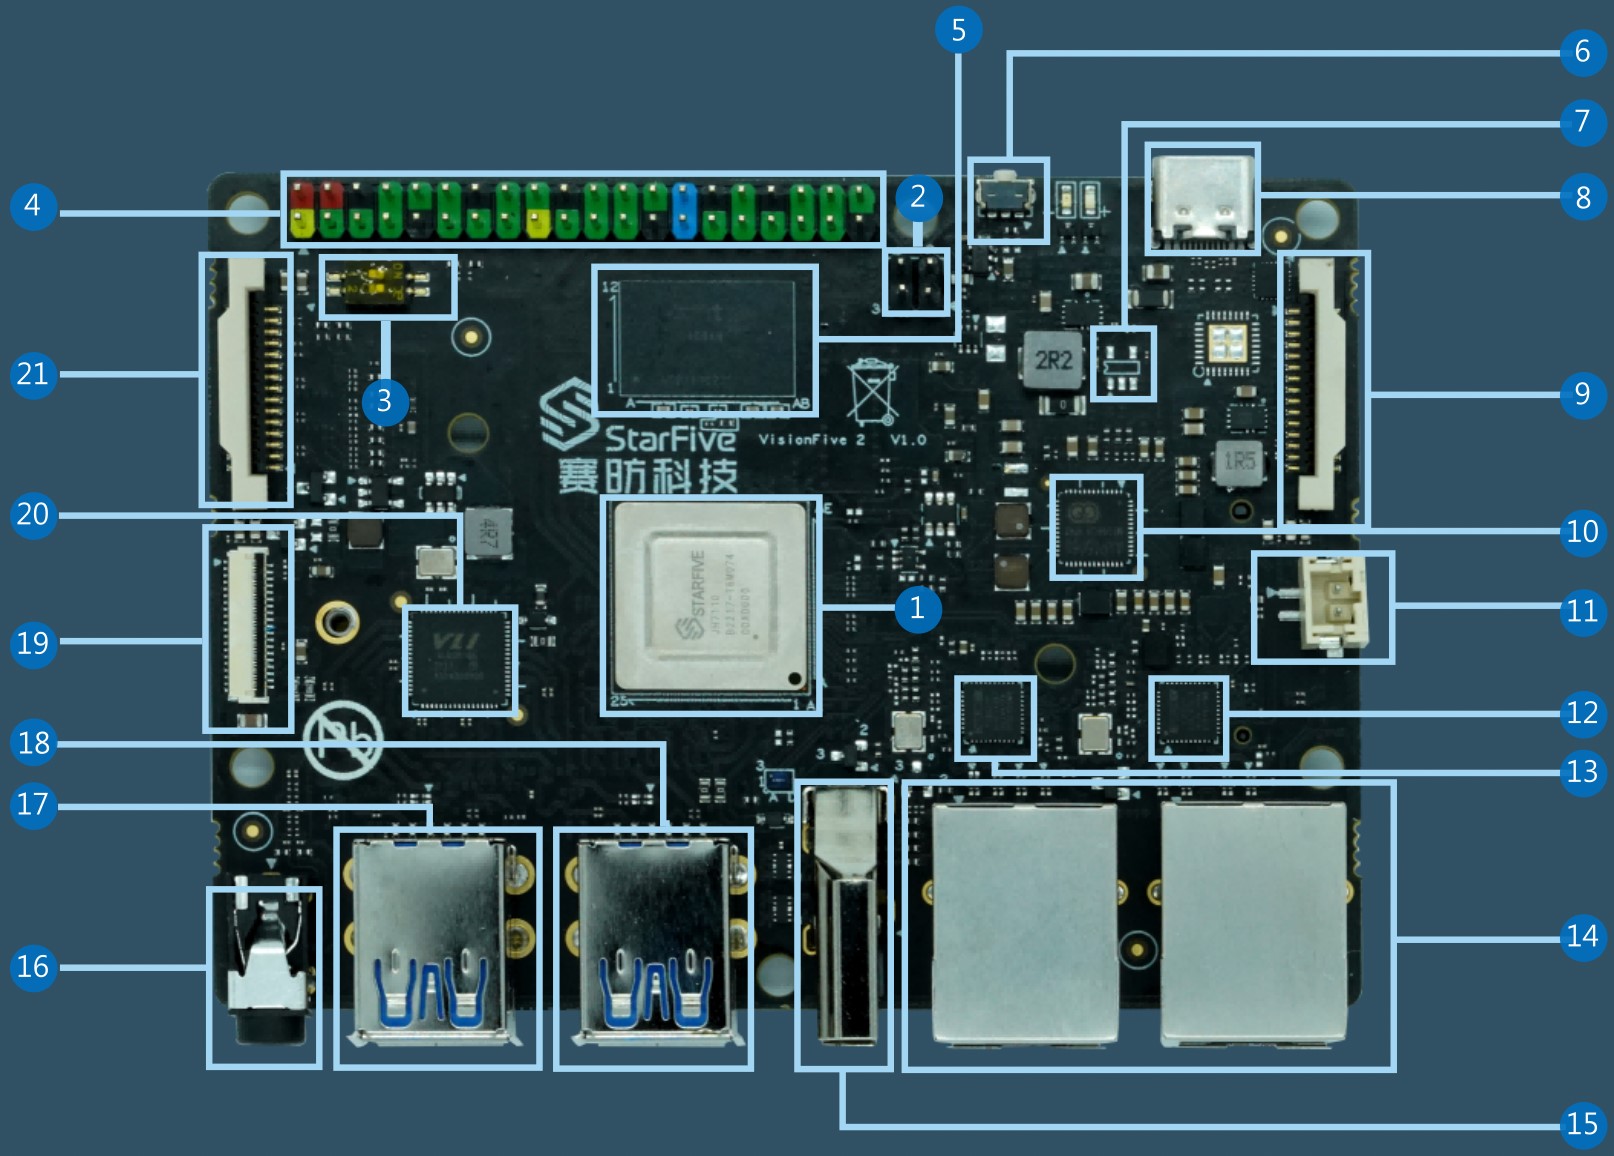
Connect the external devices, accessories, and power adapter to VisionFive 2 or VisionFive 2 Lite according to the following top-view diagram.
-
Plug the Micro-SD card with the latest Debian image into the card slot on the back of VisionFive 2/VisionFive 2 Lite.Note: Flash Debian OS into a Micro-SD card as described in Flash OS to a Micro-SD Card. Make sure that the Debian image you download is the latest version.
-
Connect the Ethernet cable to one of the RJ45 Ethernet ports (No. 14).
-
Connect the HDMI monitor with the HDMI cable to the HDMI 2.0 port (No. 15).
-
Connect the IMX219 MIPI camera to HDMI 2.0 port (No. 9). If the camera has a pin header for fixing purposes (without connecting to any actual circuit), it can be connected to the available pins of the 40-pin GPIO header (No. 4).
-
Connect the USB camera, keyboard, and mouse to the USB ports (No. 17 and 18).
-
Connect the power adapter with a USB cable to the USB-C port (No. 8).
| LED | 40-Pin GPIO Header | |
|---|---|---|
| Pin Number | Pin Name | |
| Positive | 36 | GPIO36 |
| Negative | 34 | GND |
Software Preparation
-
Log into Debian and make sure VisionFive 2/VisionFive 2 Lite is connected to the Internet. For details, see Log into Debian.
-
Execute the following command on VisionFive 2 or VisionFive 2 Lite Debian to install StarFive Packages and its dependencies. The installation requires 1-3 hours.
For VisionFive 2:https://github.com/starfive-tech/Debian/releases/download/v0.8.0-engineering-release-wayland/install_package_and_dependencies.sh chmod +x install_package_and_dependencies.sh sudo ./install_package_and_dependencies.sh
For VisionFive 2 Lite:https://github.com/starfive-tech/Debian/releases/download/v0.15.0-engineering-release-wayland/install_full.sh chmod +x opt/install_full.sh sudo ./opt/install_full.sh
-
(Optional) If you need to use the IMX219 CSI camera, open a separate terminal window on VisionFive 2 Debian and build media pipeline and run the ISP control process:
export PATH=$PATH:/opt/
/opt/media-ctl-pipeline.sh -d /dev/media0 -i csiphy0 -s ISP0 -a start
Recognize General Objects
Recognize general objects based on YOLO-V3, YOLO-V5, or MobileNet-SSD model.
| Model | Details |
|---|---|
| YOLO-V3 |
Under the user path on VisionFive 2 or
VisionFive 2 Lite Debian, run the following
command:
where,
|
| YOLO-V5 | Enter the third-party application directory,
where, device, with the value of 1 or
4, specifies the number of the video device that captures a
video stream.demo, of YOLO-V5 and execute the
following
command: |
| MobileNet-SSD |
Under any path under the user path on
VisionFive 2 or VisionFive 2 Lite Debian, run the following
command:
where,
|
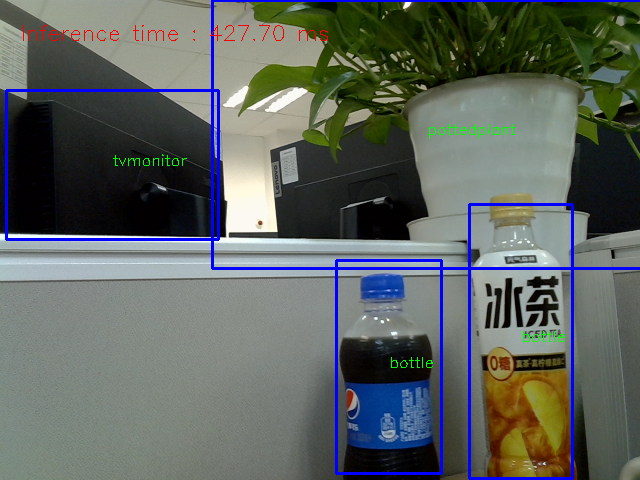
- HDMI monitor displays the real-time video stream from a webcam.
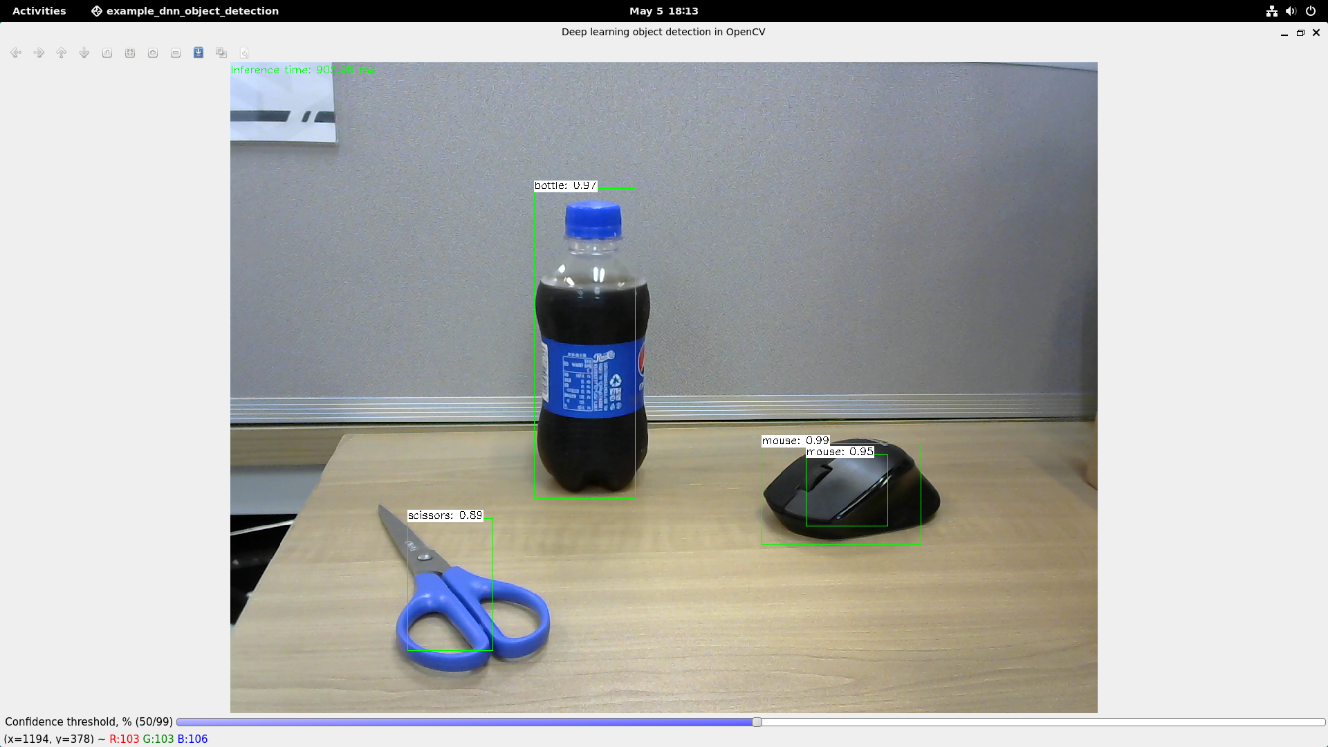
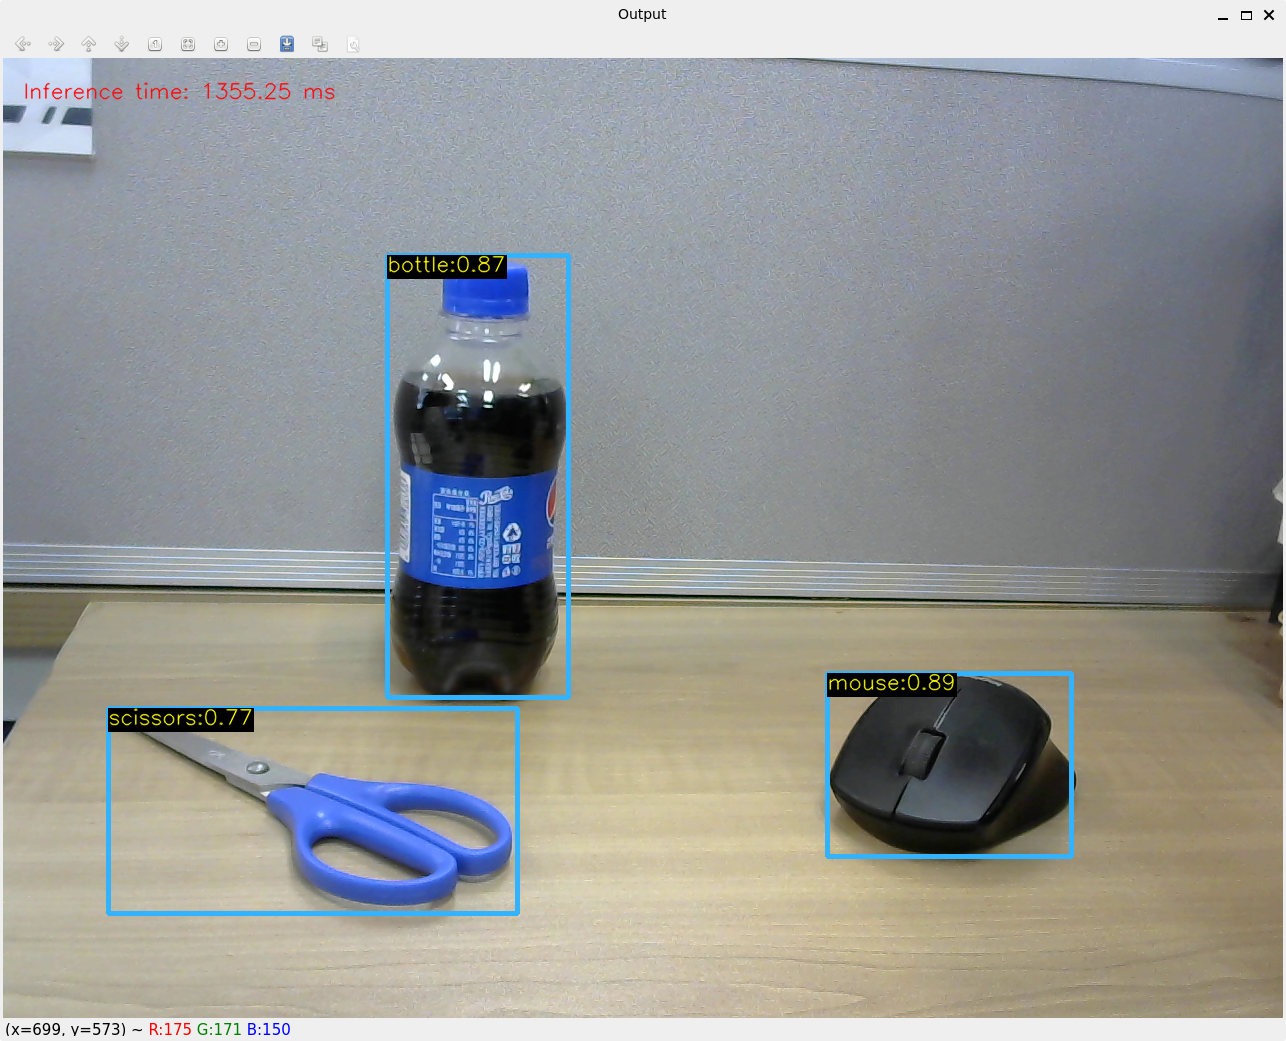
- HDMI monitor displays real-time drawings of bounding boxes, labeling the objects recognized by the model, and displaying their names and confidence level.
- The inference time per frame is displayed on the upper left corner, which translates to different inference frame rates for different models (1-1.5 fps for YOLO-V3 model; 0.6-1.1 fps for YOLO-V5 model; 2.5-3 fps for MobileNet-SSD model).
Detect and Decode QR Codes
The QR code detection and decoding demo program supports both C++ and Python applications.
-
To run Python application, enter the application directory and run the following command on VisionFive 2 or VisionFive 2 Lite Debian:
cd /usr/share/doc/opencv-doc/examples/python/ python3 qrcode.py --device=4 -
To run C++ application, under the user directory of VisionFive 2 or VisionFive 2 Lite Debian, run the following command:
example_cpp_qrcode --device=1
The parameter device specifies the number of the video device
for capturing a video stream. Normally, dev/video1 represents the
camera connected to MIPI CSI, and /dev/video4 represents the USB
camera.
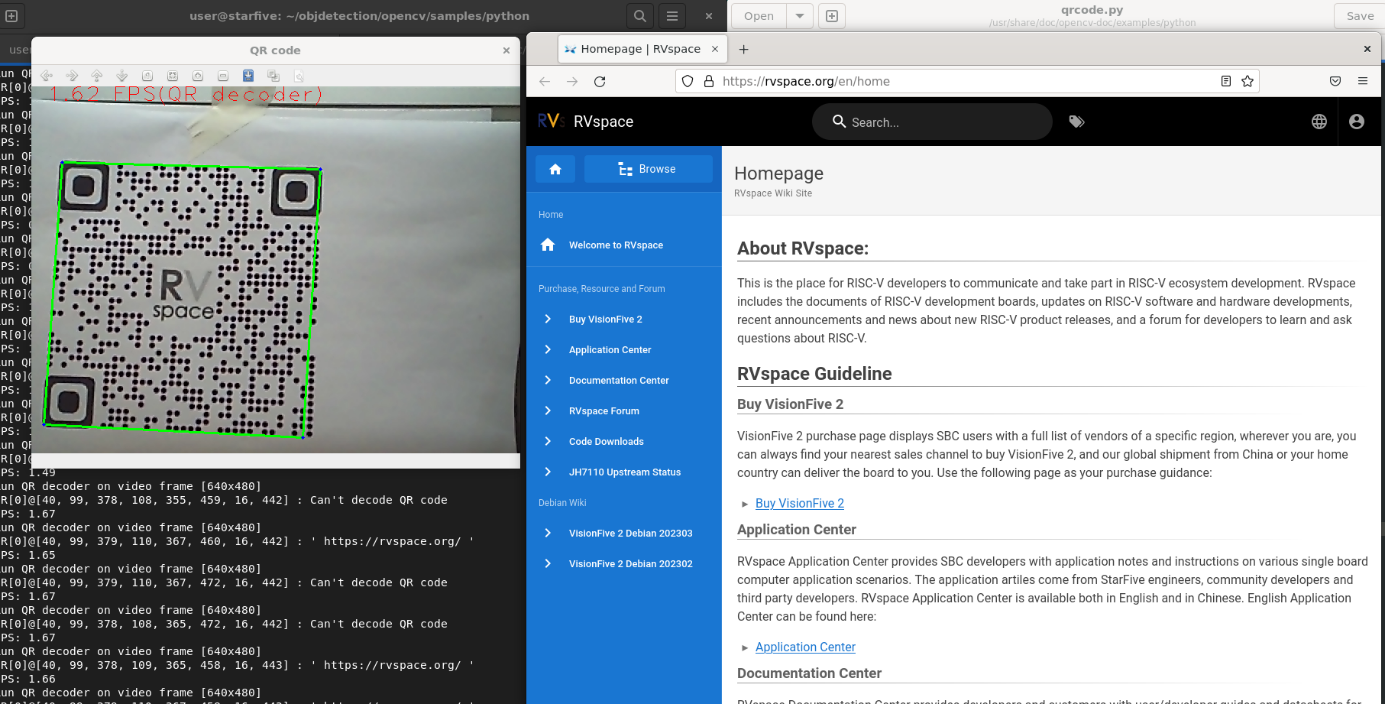
- HDMI monitor displays the real-time video stream from a webcam.
- A real-time bounding box marks the position of the QR code, and QR code decoding is initiated.
- The decoding result like URL will be printed on the terminal where the demo code is run.
- The real-time frame rate is displayed in the top left corner. The frame rate is approximately 5.5 fps when performing standalone recognition, and approximately 1.8 fps for recognition and decoding combined.
- Python sample can utilize Firefox to open the website that is successfully decoded.
- The detection speed is 4-6 fps (for locating), and the decoding speed is approximately 1.5 fps (for extracting the content of the QR code).
Detect Image Edge
The image edge detection demo program supports both C++ and Python applications.
-
To run Python application, enter the application directory and run the following command on VisionFive 2 or VisionFive 2 Lite Debian:
cd /usr/share/doc/opencv-doc/examples/python/ python3 edge.py 4 -
To run C++ application, under the user directory of VisionFive 2 or VisionFive 2 Lite Debian, run the following command:
example_cpp_videocapture_camera --device=4
The parameter device specifies the number of the video device
for capturing a video stream. Normally, dev/video1 represents the
camera connected to MIPI CSI, and /dev/video4 represents the USB
camera.
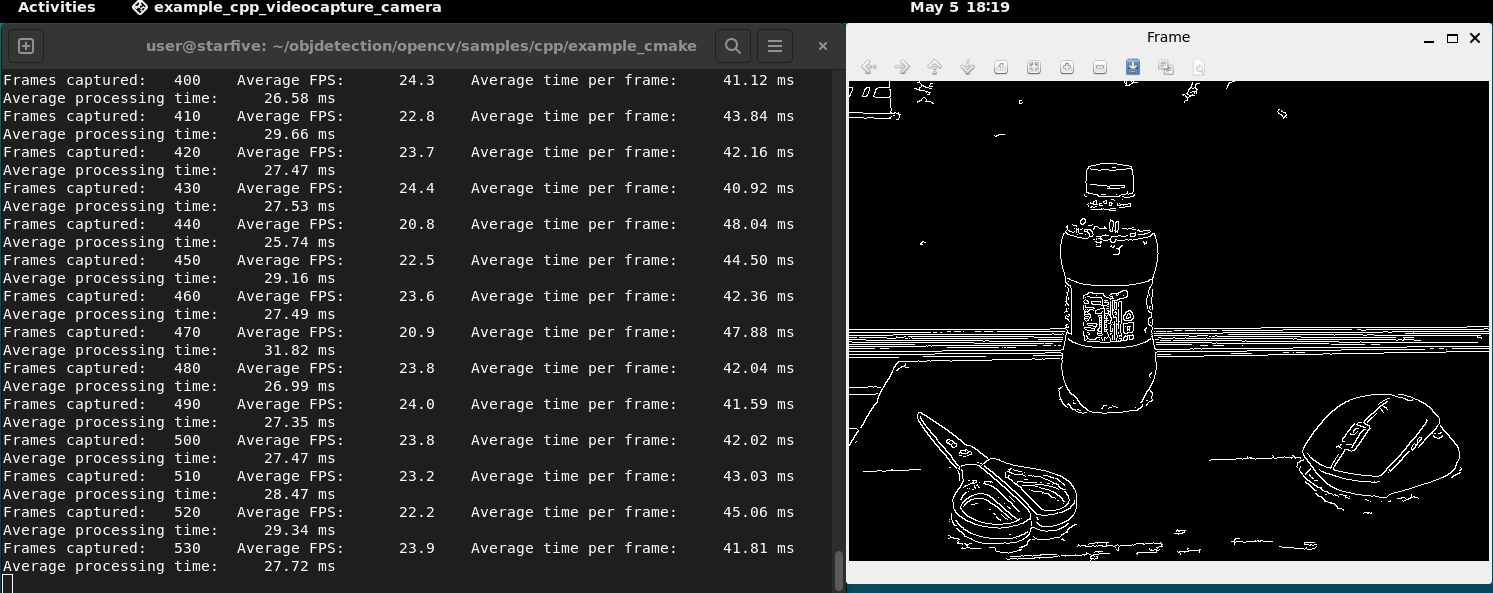
- HDMI monitor displays the real-time video stream from a webcam.
- The terminal where the image edge detection demo code is run prints the running frame rate and other information in real-time.
Detect Image Defects
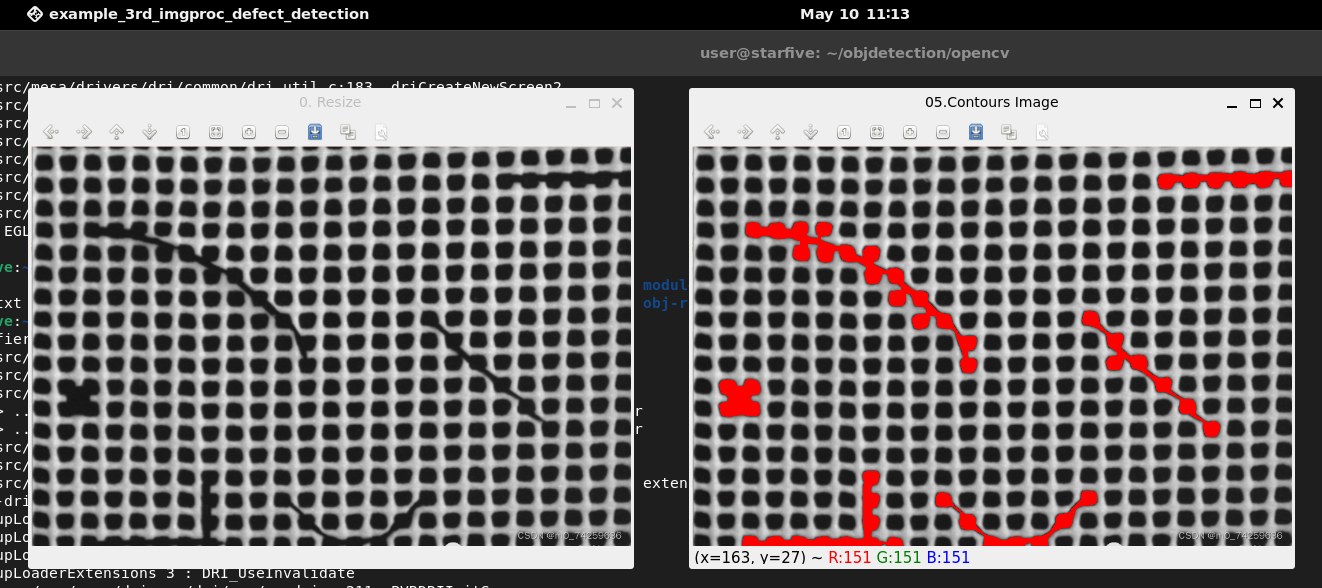
The defect detection demo program locates and highlights the positions of the defects on the surface of an object by identifying connected regions that are too large.
example_3rd_imgproc_defect_detection- The HDMI monitor displays the original image of the object, as well as the processed result image that is marked with the detected defect areas;
- The terminal displays the serial number and area of the connected region to which the defect area belongs.