Use a Button to Control LED Dot Matrix
This section describes how to use VisionFive 2 or VisionFive 2 Lite's GPIO pins to develop an LED dot matrix display after pressing a button.
Hardware Setup
Connect pin ① and pin ② of the button to the breadboard first, and then connect pin ③ and pin ④ to VisionFive 2 or VisionFive 2 Lite. The following table and figure describe how to connect the button and MAX7219 to the 40-pin GPIO Header:
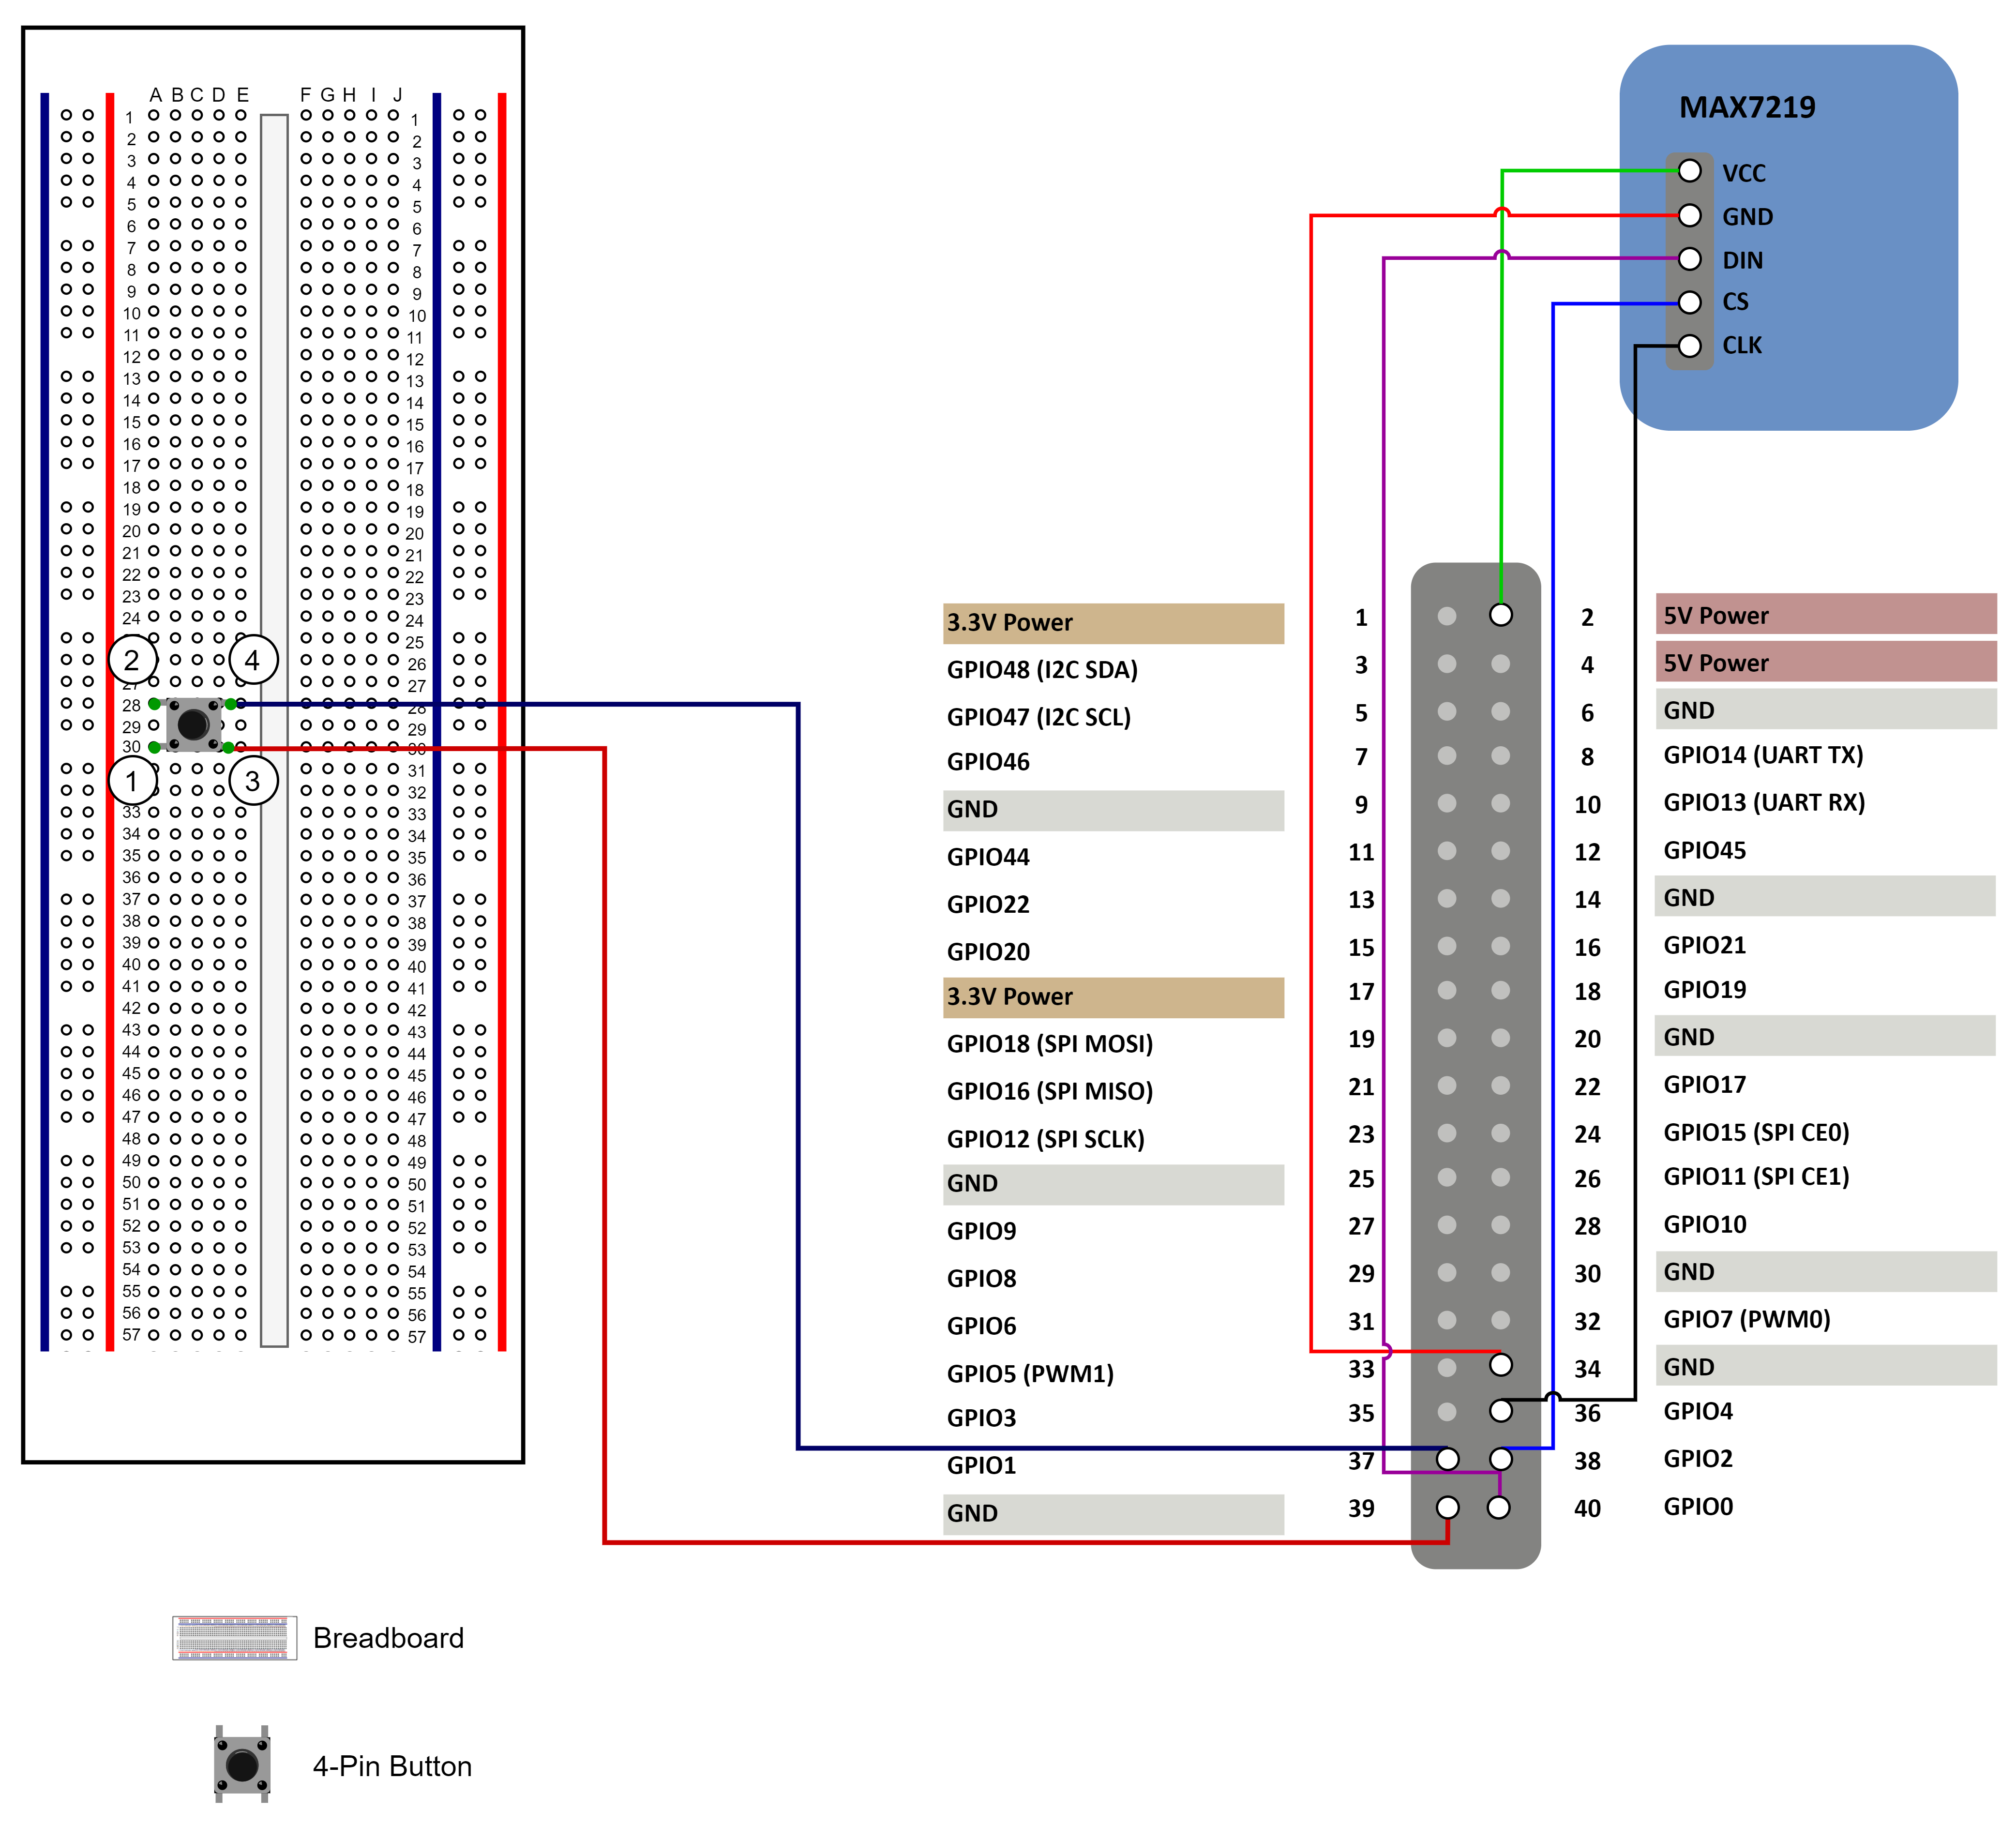
| Button | 40-Pin GPIO Header | |
|---|---|---|
| Pin Number | Pin Name | |
| Pin ④ | 37 | GPIO60 |
| Pin ③ | 39 | GND |
| MAX7219 | 40-Pin GPIO Header | |
|---|---|---|
| Pin Number | Pin Name | |
| VCC | 2 | 5V Power |
| GND | 34 | GND |
| DIN | 40 | GPIO44 |
| CS | 38 | GPIO61 |
| CLK | 36 | GPIO36 |
Run Demo Code
Perform the following steps on Debian of VisionFive 2 or VisionFive 2 Lite.
-
Locate the directory where the test code,
edge_detection_with_LED_Matrix.py, exists.-
Source into the Python3 Virtual Environment.
source ./myvenv/bin/activate -
Install the dependency.
python3 -m pip install pillow -
Get the directory where
VisionFive.gpioexists.python3 -m pip show VisionFive.gpioNote: The output depends on how the application is installed. -
Enter the
VisionFive.gpiodirectory.cd <VisionFive.gpiodirectory> -
Enter the
sample-codedirectory.cd ./VisionFive/sample-code/
-
Under the
sample-codedirectory, execute the following command to run the demo code.
Alternatively, you can also run the following command.sudo python edge_detection_with_LED_Matrix.pysudo python3 edge_detection_with_LED_Matrix.pyThe terminal displays the following:# python3 edge_detection_with_LED_Matrix.py *------------------------------------------------------* Please press the key on pin 37 to launch !!!Press the button according to the prompt, and the LED matrix module counts down from 5 to 1 and then displays the S logo.Figure 2. Countdown and StarFive Logo 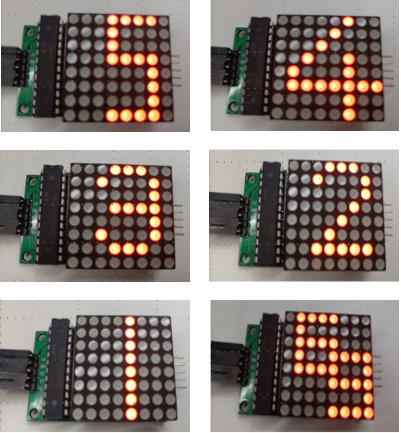 Note: For details about the source code, see edge_detection_with_LED_Matrix.py Source Code.
-
(Optional) Exit the Python3 Virtual Environment.
deactivate